With technology ever-changing, and businesses continuously facing security challenges, services such as Azure and AWS need to keep on adapting and improving their security posture to ensure that they continue to protect their customers and services. While this is certainly the correct thing to do, it does sometime create issues for the end users or other applications that are making use of those services.
If you are a Veeam Backup for M365 customer or user, you may come across the below warning messages when running a backup job. This is because Microsoft have made some additional security changes with different graph API access permissions. This isn’t really all that bad, minus the bits that have been skipped during that backup window, but it is extremely easy to resolve.
12/02/2025 9:07:25 PM :: Missing application permissions: Exchange.ManageAsApp. Missing application roles: Global Reader. Public folder and discovery search mailboxes will be skipped from processing, and a shared mailbox type will not be identified.
12/02/2025 9:07:25 PM :: Missing application permissions: ChannelMember.Read.All. Private and shared team channels will be skipped from processing
To resolve this, all you need to do is run through editing your organization once again, and allowing to. update the application registration.
You do need to make sure you still have the certificate in the cert store for which you used to create the application or recently updated with
Right click on the organization and select Edit Organization
Click Next until you get to the “Microsoft 365 Connection Settings” – Here you can select Use an existing Azure AD Application
Your Username and Application ID will appear in the boxes. Here you will need to then select Install and select your certificate that you used to connect to the application when you either created or last updated.
Ensure to check the Grant this application required permissions and register its certificate in Azure AD box. Click Next
You will then be request to copy the code and go to https://microsoft.com/devicelogin and log in with a GA account to authorize the change
Once Authorized you will then see the progress of the update.
Once all updated click Finish. You can then go ahead and start the job and wait for it to complete.
Once the job has completed, confirm that all was successful and no further warnings.
This should be resolve any issues Veeam Backup for Microsoft had for backing up using the Graph API.
It was July 13, the day was only just starting as I was coming up the elevator to my work’s office floor, and just as I usually do, I flicked open my phone for any notification badges. Although I had checked earlier, there weren’t really any notifications, but one caught my eye, it was a LinkedIn email informing me I had a new direct message from Chris Grundemann, whom I was very lucky to have met In Austin, TX at Tech Field Day 18 back in February 2019.
Chris is a fantastic dude and together with Zoe Rose, they run the Imposter Syndrome Network Podcast, a podcast I was a huge supporter of before the first episode with Ethan Banks dropped. They really started promoting the idea early on, and it got my excited for what was to come.
My mind is always running at 130% all the time, there is so much going on that there usually isn’t ever time to finish thinking through the last thought. The one place where I find that my thoughts can slow down and process more thoroughly is in the car, this is where I am usually listening to podcasts or thinking through a problem (but it is also the place where the solution will get lost because I can’t write it down). That being said, I’ve listened to every episode of the Imposter Syndrome Network Podcast, each and every week. Just like any other podcast, I start thinking of what I could contribute to that episode, what my opinion of the topic might be, or the answer to a quiz. I had also thought on many car trips that I would like to be asked on the Imposter Syndrome Podcast – of course, I had all the topics and answer right there in head, however I would forget it all once the car engine was turned off – although I didn’t actually think I would end up on an episode, especially as time went on and the guest just became ever so much more amazing with their long lists of achievements.
However, on this particular day, that message arrived. Here was a message from Chris asking me to come onto the show and tell my story. Immediately my imposter syndrome kicked in and my mind started racing in all of the thoughts of how could I just say, “I really appreciate the offer, but I’m not the person you’re looking for..” I didn’t think I had any of the chops to be on the show. But the strange thing is, I actually wrote back “..My imposter syndrome is yelling at me to say “No” but the one thing I’ve taught myself is to just answer “Yes” and be terrible to be successful.”– that last bit was key. “Be terrible to be successful.”
So, from that point, I was signed up and I booked in for my recording session with both Chris and Zoe for 2 weeks time, Friday at 3:30am in the morning. That’s right, 3:30am. The 3 of us together were able to split the earth in 3 even sections with our locations. The recording went well, and it was quite clear at the start that the cogs hadn’t really started turning and my answer to Chris’ first question was restarted 3 times. We spoke a lot about my 10 year history as a vExpert and what it takes to join and be a part of those community programs and the motiviation to produce content. As all three of us have been delegates with Tech Field Day, we also talked about that small close-knit family that community groups create, and the different levels of experience and opinions of technology.
I’ve done some podcasts in the past, when I did Nerd Journey Pod, I was nervous, the only thing going through my head was “What if I say the wrong thing publicly – what is everyone going to think?” and it really got to me, you can hear it throughout. My next podcast was with The On-Premise IT Roundtable with Gestalt IT, but was joined by Pure Storage – whilst I was there for Storage Field Day, talk about being thrown into the deep end of having to discuss a product I barely knew anything about – but I managed to get through it by focusing on the business side rather than the specific technology (phew!). I then made several appearances over the last few years on the Tech Breakfast Podcast just joining in on the conversation which had no real agenda except to discuss current technology events.
So you can see my podcasting history is fairly short, and one thing I’ve learnt about myself over the recent years is that I am just 1 person in among 7 billion others, if I sink like a lead balloon doing a podcast or a video, then it won’t be long and I’ll be forgotten. It has taken me a VERY long time to learn that. Sure, there are people who are close to me, but they seem to move on pretty quick, too many other things that are happening, it’s just myself who dwells on my own past.
Immediately after I said my first opening line on the show, I squirmed in my seat, I started focusing on that thinking it was terrible and very cringe worthy, although I had originally thought it would be a nice little joke, because really, I was an imposter being there – this continued to play on my mind all the way up to me hearing it when the recording was released. But, it was one of my friends who heard the episode and his first reply was “That first line reminded me of Fight Club” and yeah, that was exactly what I needed to hear, it tied it together nicely.
I am always hesitant to listen to myself after any recordings I’ve done, but I do it anyway, I use it to help learn and make adjustments on what to do different next time. I was extremely nervous to listen back to the episode, the only things I could remember saying were the bits where I started to focus on where I felt I said the wrong thing. In the end, I actually enjoyed the episode and started to promote it in some of my channels with friends across the world – this is something I usually would be very strategic with and would wait until the episode was released out of my control, but on this occasion, I couldn’t wait.
What happened over the next 24 hours was certainly a first from any of the other podcasts I had done, several people I had no direct connection with started reaching out on LinkedIn telling me how much they enjoyed the episode and they wanted to connect. This truly created some highlights, like anything I produce, as long as someone gets something out of it, then I’ve done something worthwhile, I just didn’t expect the response I got.
Earlier this year, I accepted an offer to do a co-presentation with a friend at an event next year, it was a whole year away, and it still took some time to accept the offer, but the thing is, if I don’t take the opportunity, I’ve only got myself to blame for not taking the leap.
While it might seem obvious that I process every word in real-time, it isn’t the voice that the audience is there listening to, they are there for the content and to learn something. You can be anxious, but don’t let that stop you because there is always a brighter outcome – it just takes 1 person.
It doesn’t matter if someone has a longer list of credentials than you, it doesn’t matter if someone has written a post on a topic you were planning to. It doesn’t matter how you present. Step up, take the challenge and say “Yes”. There is at least someone out there who will appreciate it very much that you did.
Veeam has been embracing Linux servers to host the Veeam backup infrastructure with certain componets being expanded to support running on Linux alongside the Windows infrastructure. Whilst the Windows side is fairly well understood for those who have been using Veeam for a long time, the Linux infrastructure piece is starting to take hold with many starting to make the move, however there are still some admins who shy away thinking that deploying Linux is ‘too hard.’ – this couldn’t be further from the truth.
While configuring my first Linux server for hosting my Veeam repository, I ran into only 1 issue that was easily solved with ticking a couple of extra boxes.
For this particular server, I was utlising Ubuntu 22.04.02 – the installation was very seamless as the installer walks you through one step at a time.
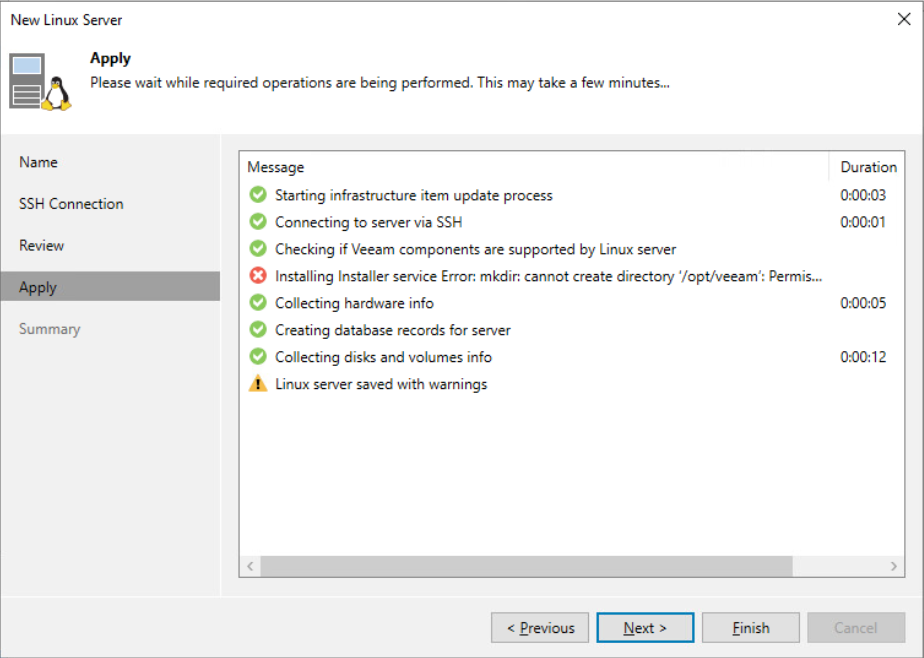
The issue that I ran into was during the ‘Apply’ stage of adding the Linux server to Veeam in order to be able to use it for a Proxy or Repository. I received the error Installing Installer service Error: mkdir: cannot create directory ‘/opt/veeam’: Permission Denied.Those last 2 words there are the hint.
In order to resolve, you will need to update and ensure that the user account has either the right escalated permissions configured on the Linux server or you need to enable and set the credential in the Managed Credentials for the user to have escalated rights.
There are 2 options that you will need to enable under the Managed Credentials, and you can just click backwards in the wizard to update them.
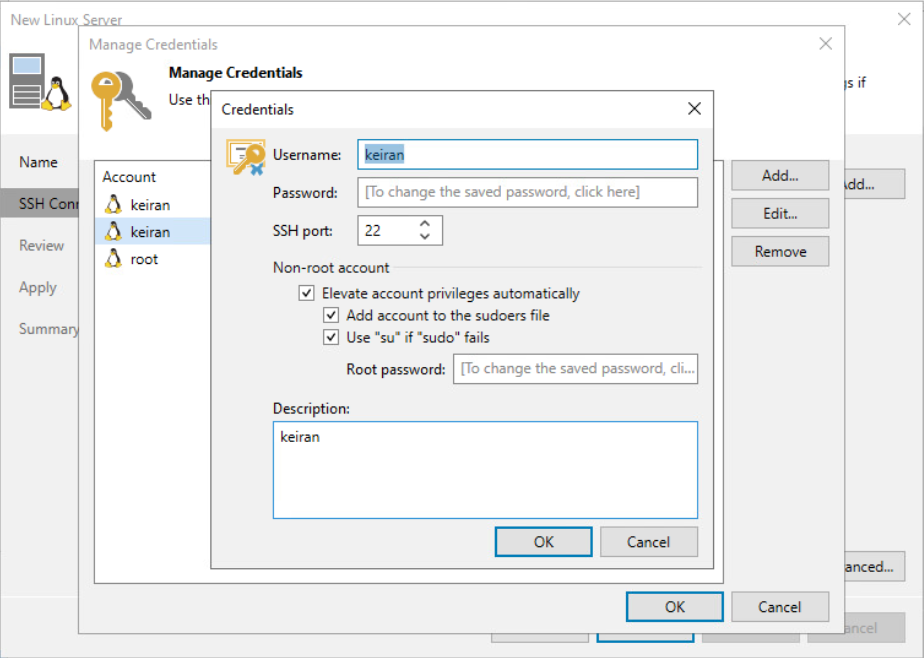
Once you have entered the Managed Credentials, you just need to edit the user in which you want to create the Veeam BR and Linux server connection with. here you will find the section ‘Non-root Account’ – this is where you will need to select “Elevate account privileges automatically.” By selecting this, you are allowing Veeam to do the heavy lifting by configuring the account as needed.
The next 2 tick boxes allow you to have the account placed in the sudoers file so that it has the full access that it needs to the server. The ‘Use “su” if “sudo” fails’ is a fallback option allowing Veeam to be compatible with more Linux distros as some require the use of su rather than sudo to elevate access.
You will then be required to supply the root password so that Veeam can make the required change for the account access.
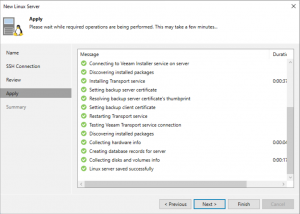
Once the changes have been made, you can then proceed to applying the configuration – you should see the remaining tasks be completed successfully.
From this point, you can add this server to be your repository or proxy, depending on what it is intended for.
It’s another week and Veeam has yet again realeased a new version. This time it is Veeam Backup for Office 365 and it is backing up the truck and dumping a sizeable amount of new features. Release notes here
Interface Changes
In v6, Veeam introduced the Self-Service Restore portal allowing customers to be able to log in with their M365 account and restore from their backup. In v7, this has since had an update and a facelift allowing user a greater experience.
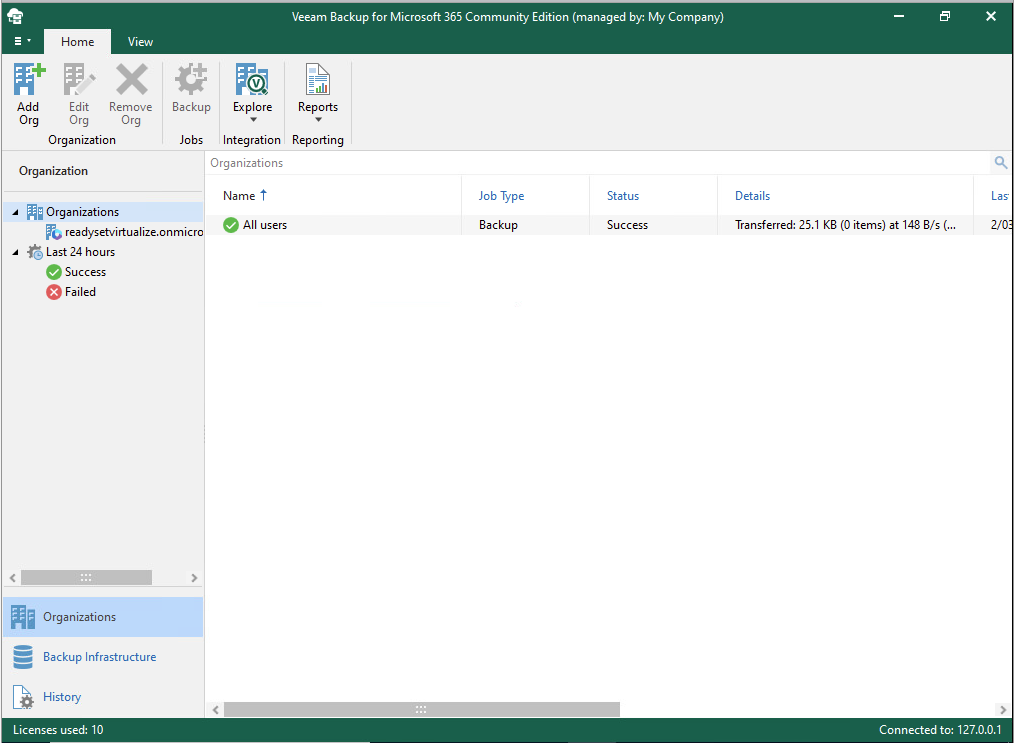
While there have been some portal changes, the console has also had some minor changes made to it with colours and styling. Whilst only appear to be minor, if you spend enough time in the earlier versions, you will notice the difference.
Immutability
One of the newest features that has been around in the VBR world for the last few versions is Immutability. Having a backup is one thing, but is it truely a backup if it is able to be removed or minipulated? Veeam takes care of this by providing the addition of immutability, locking down your backups to ensure that they go untouched and continue provide a safe and secure copy.
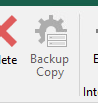
Backup Copies
In keeping a safe and secure copy, Veeam have now impleted Backup Copies to help get closer to the 3-2-1 rule. (3 Copies – 2 Media types – 1 Offsite). Backup copies have been around for a very long time in the Backup and Replication product set allowing for multiple copies of the backup to be placed in another repository, whether that ben connected locally or via Cloud Connect. Veeam Backup for M365 allows the backup to be created on the attached local/on-prem repository and then the backup copy to push to a secondary location such as Azure Archive tier.
In order to create your backup copies, you need to create a location that will be able to accept the copy. If you are an Azure shop, for example, a new option in creating an Azure Blob Storage type has been added. Here you can select to use Azure Archive Storage for cost-efficient storage, which is a great place to send your backup copies to. If you do not have a repository configured similar to this, then backup copies will not be an available option.
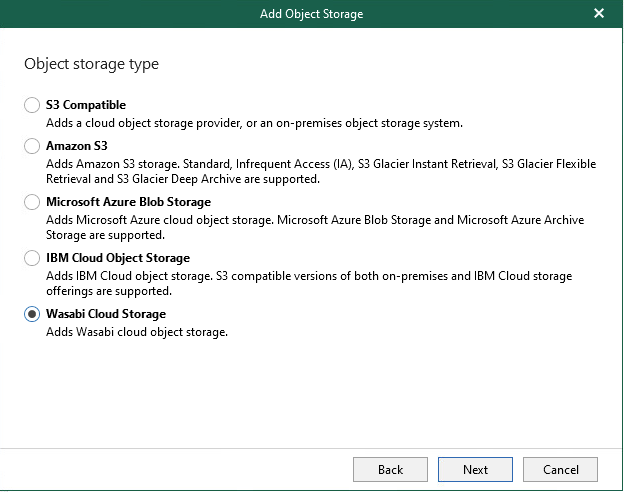
New Object Storage Locations
It’s been no secret that Veeam have really been knuckling down to implement Object Storage across their product set, and slowly they have been adding it to each of their products. This year we saw Veeam Backup and Replication v12 introduce direct to Object Storage backups, whereas this has been in the M365 product set for some time as an offload target for the repository. Along with the interface changes, there is a new selection page when starting to create your repository. You will need to have created an Object Storage location under the Object Storage menu, but once that is available, you can select which repository type you would like to create as your primary target storage.
With the full support of direct to Object Storage, Veeam has also added native support direct to Wasabi Cloud Storage allowing for cheap, reliable Object Storage. In the past, you would need to configure a connection to Wasabi via an S3 Compatible storage type.
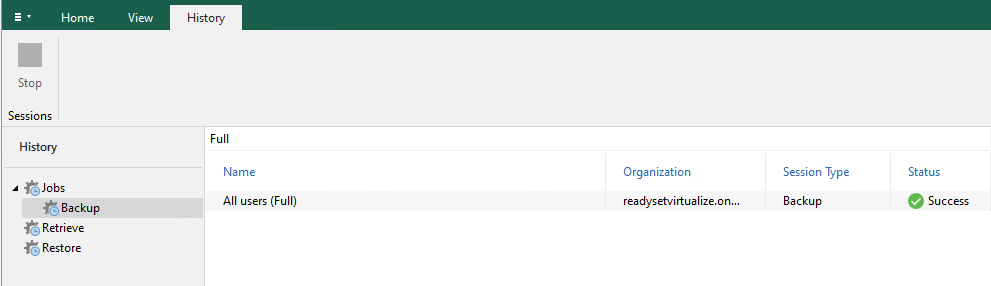
History Search
It might seem a little strange, but for me, this has been one of my biggest gripes with the Veeam Backup for M365 console. The lack of being able to search easily in the console when looking for historical backup reports has now been resovled with the introduction of the search bar. Here you are able to drill down to key words to find a log file for a particular job instead of needing to scroll through the long list of logs. This has been a very welcomed enhancement.
Conclusion
Overall, even though my list above doesn’t appear to be very extensive in the number of items, each one of these has a huge impact on productivity, efficiency and the ability to ensure your backups are both safe and secure and available for when you need them.
If i had to choose, my two favourite additions are Backup Copies and Immutability. These are critical to ensure that your data is safe. Data protection is one of the highest priorities a business should have on their list for running a business, it ensures that when the inevitable happens, you can get your business backup and runnings as quickly and efficiently as possible, no matter what the disaster is.
When new products are released, we generally see other products in the line up being updated with new features and improvements. We saw quite a number of new features added to the Veeam Agent for Mac. During the Veeam v12 launch where the focus was on Veeam’s new Data Platform, Veeam Warranty and Veeam Backup and Replication v12, there was also some other products that received updates and new release numbers and in among those was the Veeam Agent for Linux v6.
Over the years, Linux has grown in popularity in the desktop world and new distros continue to pop up, but in the enterprise space, Linux continues to dominate, whether it be as a virtual machine or a bare metal appliance. Regardless of what the distro is used for and it’s underlying hardware\hypervisor, it still needs to be backed up. Your data is important. So, with that said, let’s dive in.
Installation
So this is something very easy, especially if you have any Linux skills. You will first want to make sure you check the release notes to ensure that you have the a supported distro (or flavour) of Linux. All the main distros are there; Ubuntu, Debian, RHEL, SLES, and many more. You will also want to make sure that all you have all the required dependencies. If you are are planning to backup to a Veeam Backup and Replication or Cloud Connect Repository, you must target VBR 12 or higher. Head on over to the downloads page over at Veeam, here you can grab the latest and appropriate version for your distro. Again, make sure you have all the required dependencies and have read the release notes so you can familiarise yourself pre-install.
In the below, I will be installing on Pop-OS, a distro based on Ubuntu/Debian with a desktop environment, so I will be installing the .deb package and using the Apt package manager.
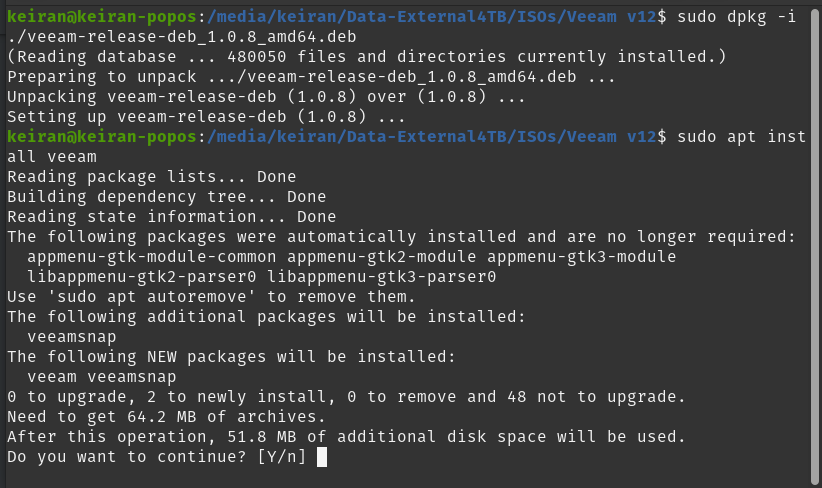
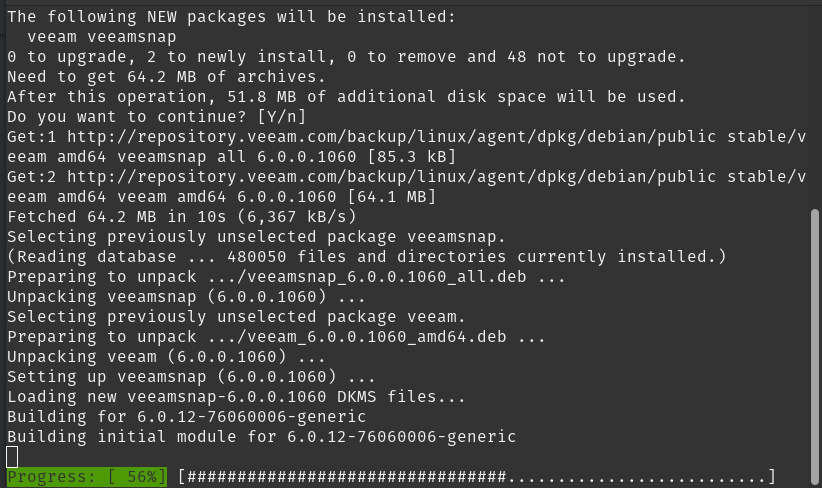
Once the package has been downloaded to your preferred location, open up terminal (If you didn’t use wget or another terminal based download method) and set your new core directory to that folder. Once in the path, you can run the dpkg install line and then update your apt repository. Once the repository has updated you can go ahead and install Veeam.
# cd path/to/folder
# dpkg -i ./veeam-release*
# apt-get update
# apt-get install veeam
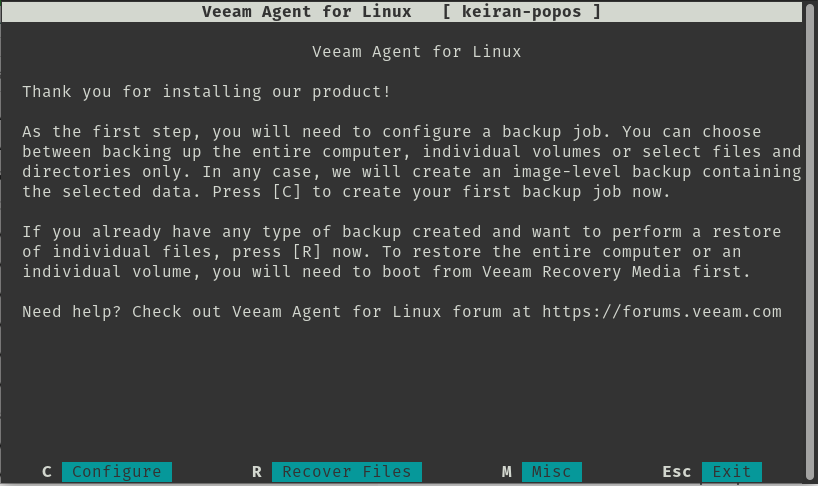
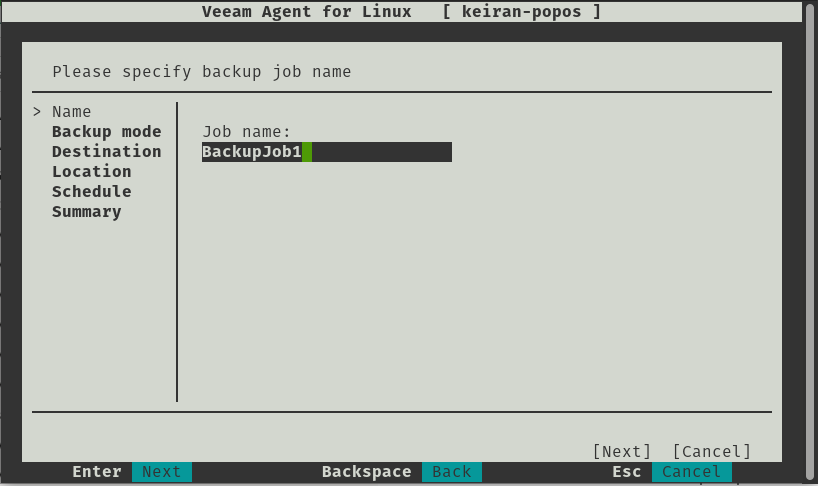
As soon as the install has completed successfully, you can go ahead and launch Veeam. This will bring you to a ELUA splashscreen that you will need to read and accept to continue. You will then be able to move on and configure your first backup job.
$ veeam
Backup
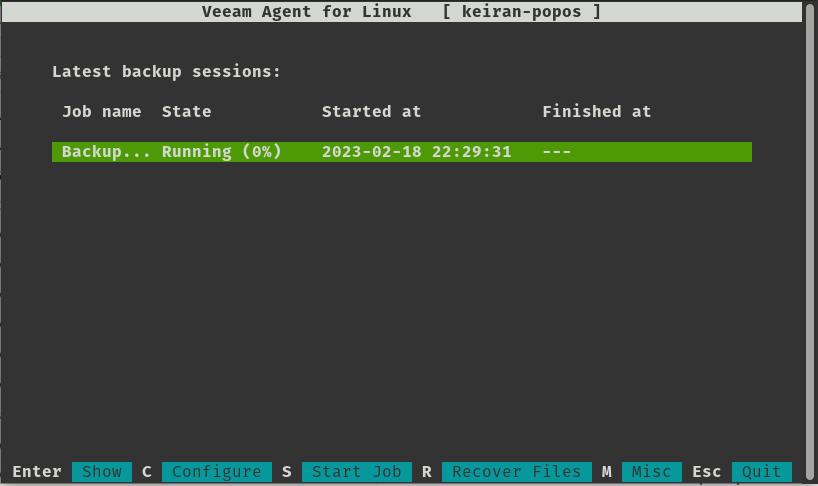
Using the keystrokes, you can navigte around the menu. c will take you to configuring your first backup job.
Configuring a job is very straight forward and easy to navigate, you have a plethora of options for destination, retention and how you want your files backed up.
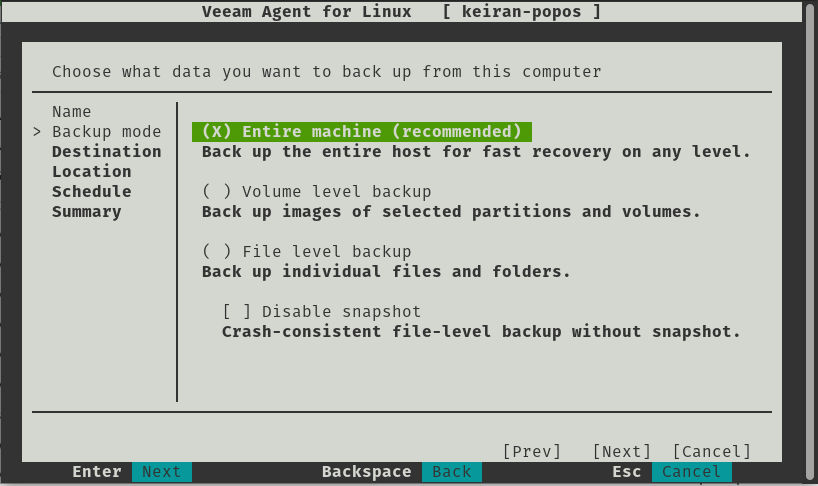
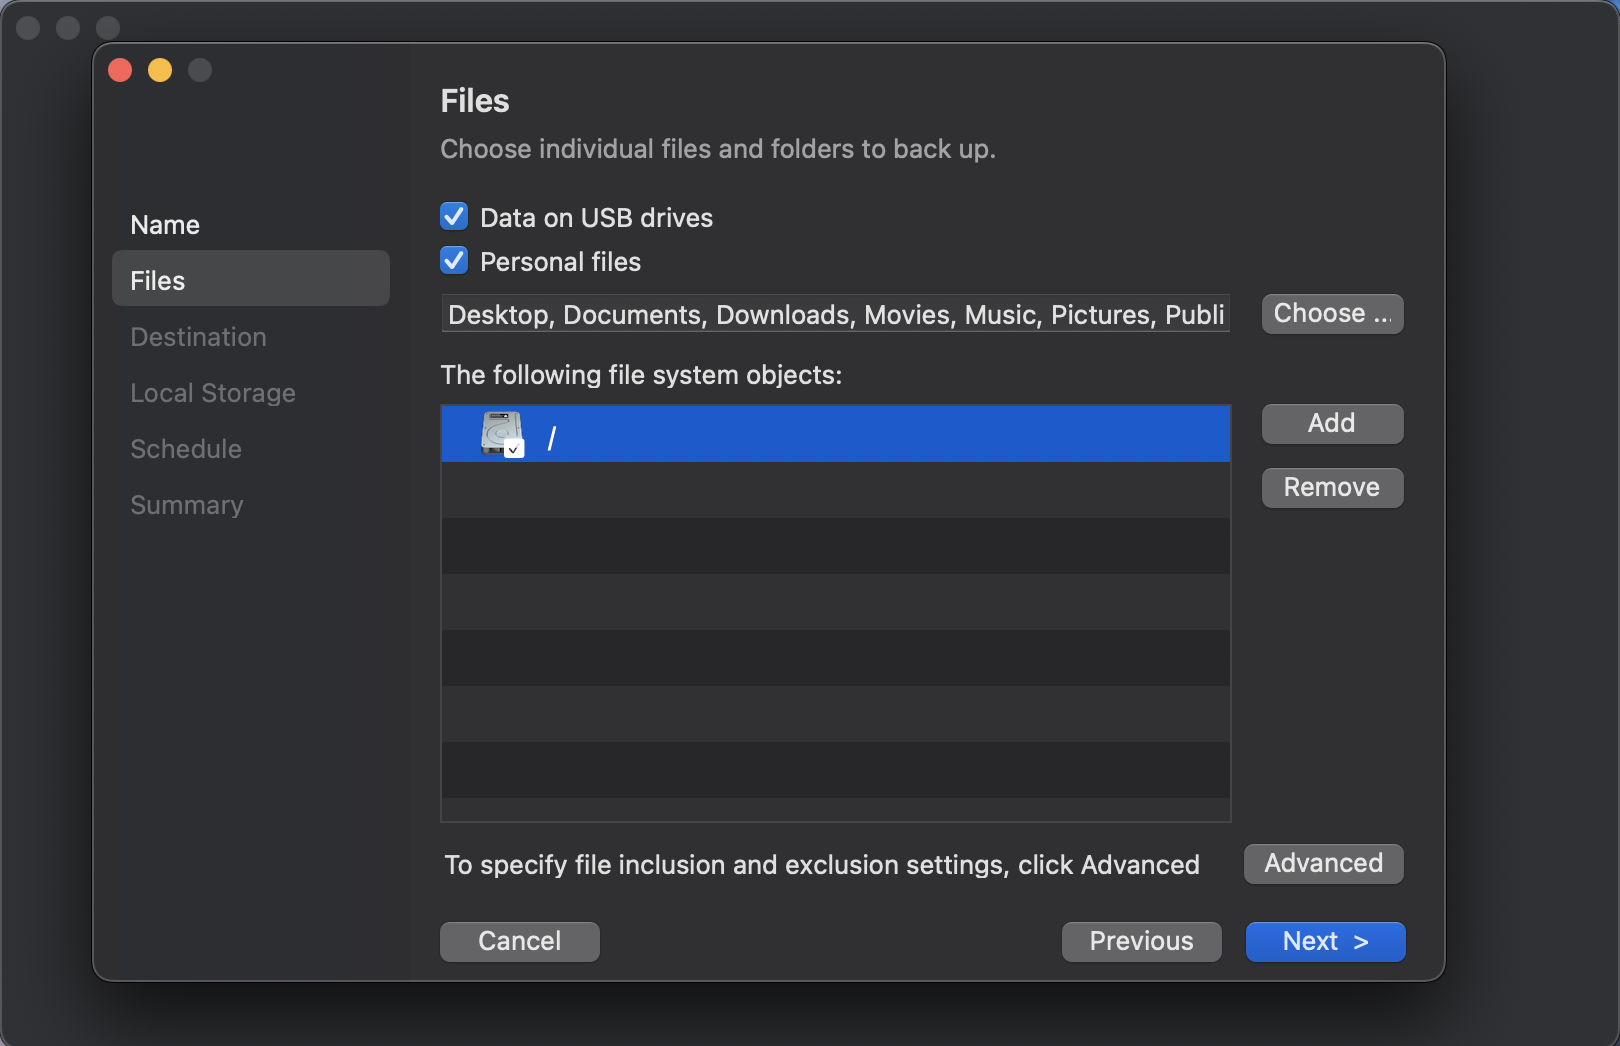
As mentioned, you ahve a number of options in how you would like to back up your files. You can select from either backing up the entire machine, volume level backup, file level backup and the additional option to disable snapshots giving you a crash-consistent file-level backup without the use of snapshots.
Backup Entire Machine
With this option, you will be able to take a complete in-place backup of your system, allowing you to either restore specific files, or restore the entire system back to the last backup. This includes all partitions. If you run something like df – h Here you can see the list of all the partitions that are mounted.
Volume Level Backup
In this option, you can select the volumes that you would like you backup to take a copy of, for example, if you only want a copy of your data drive or partition without the system root or swap partition, you can select just the data drive.
File Level Backup
Here you can select specfic folders and file in which you want backed up. This is a great option if all you want is to back up your desktop and document folders.
Only one option is able to be selected.
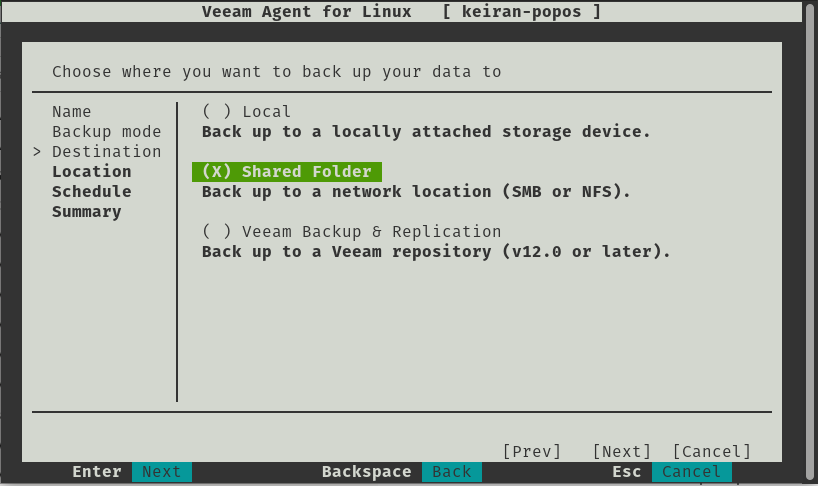
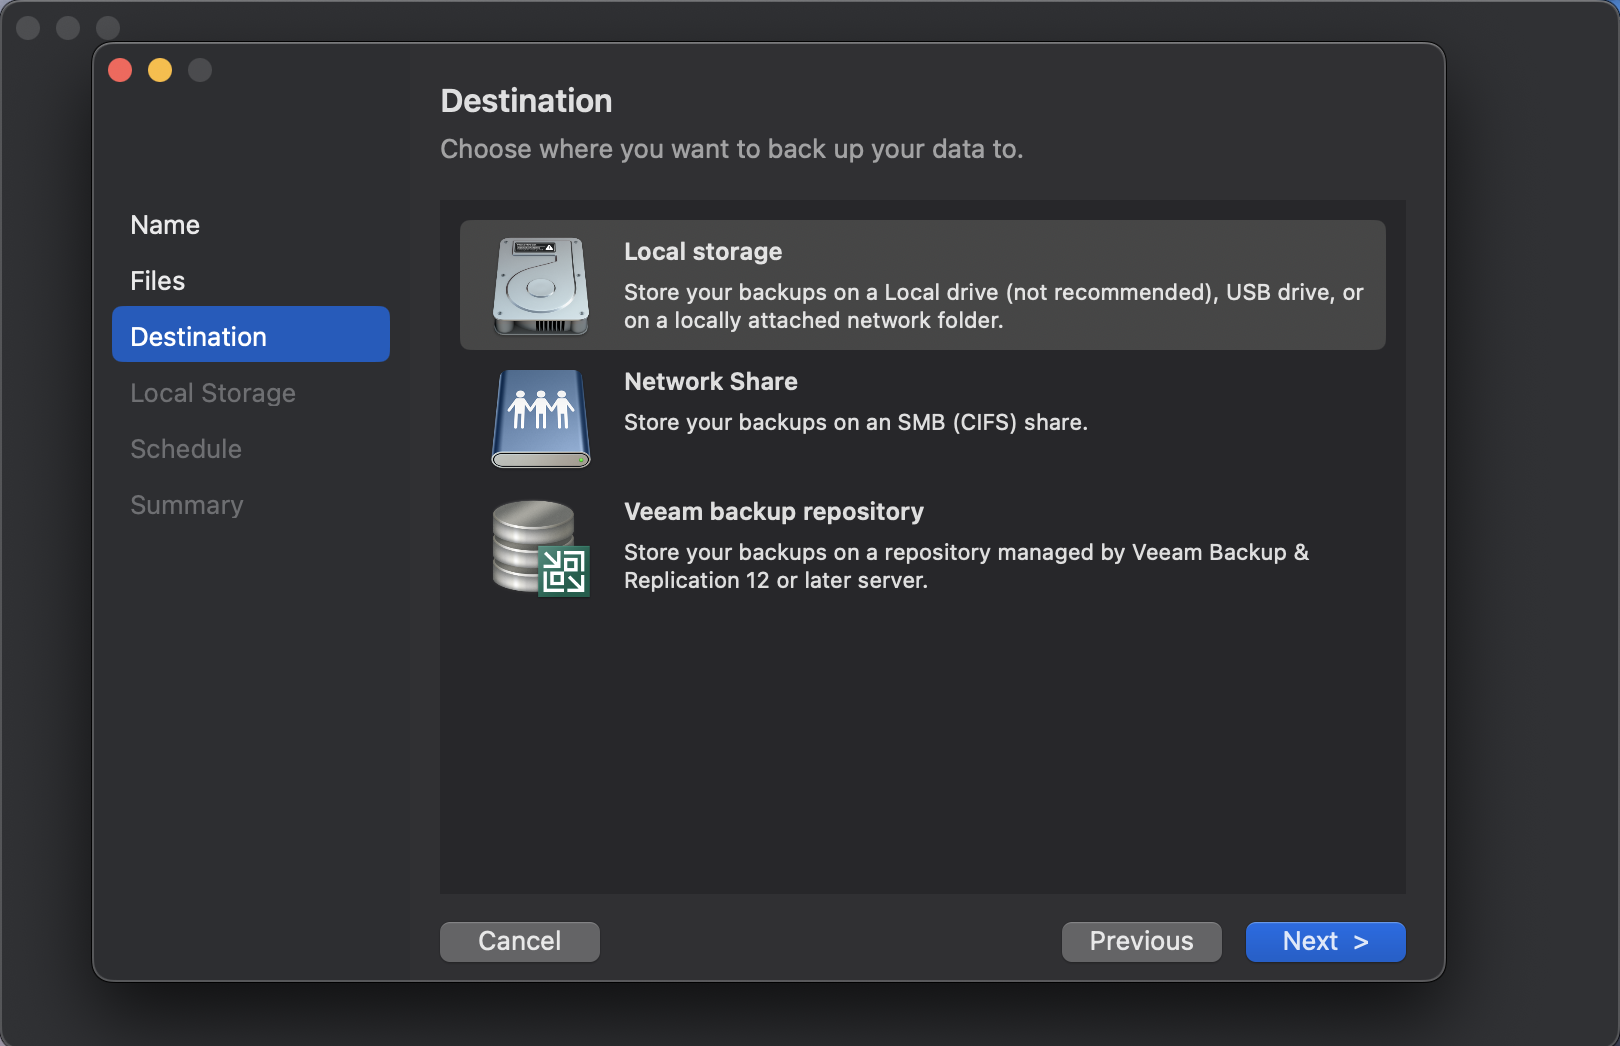
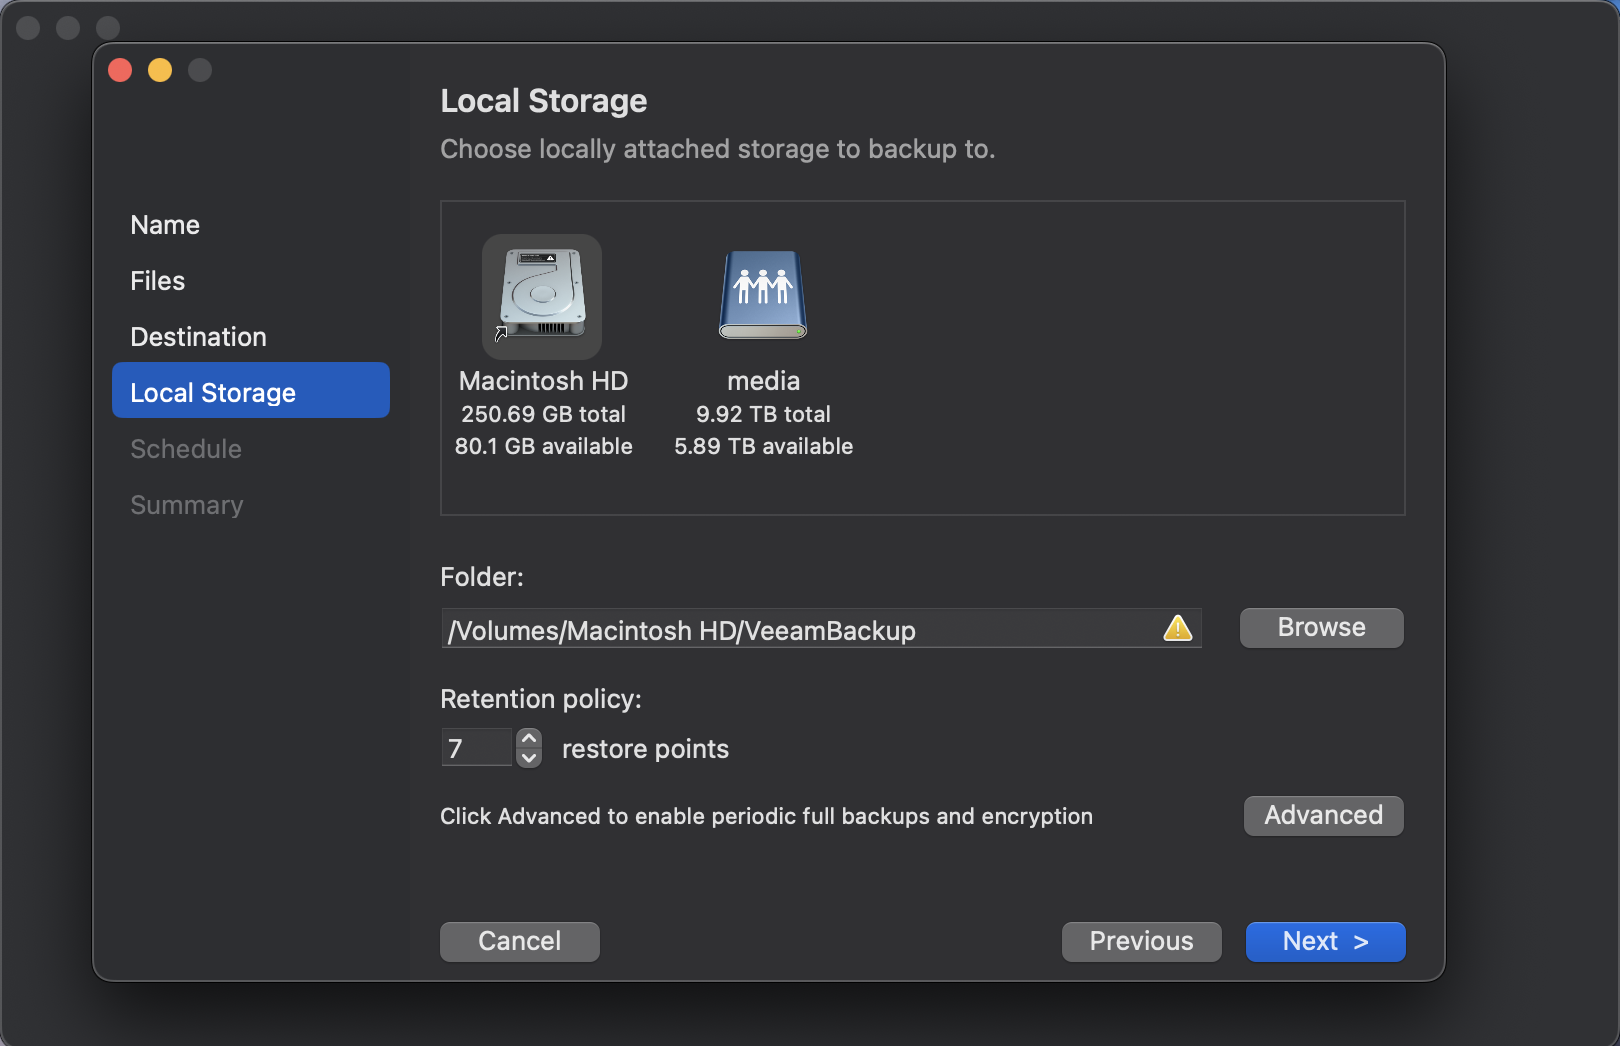
The destination is a very important selection, if you select a local storage device that is built into your computer, than you may have trouble if there is physical damage to the machine. If you were to select a local drive attached, you will need to ensure that the drive needs to be removed safely, and stored in a safe place. Shared folders allow you you to be able to backup to an SMB or NFS share, this allows you to select a destination that might be in another room in the house, or allows your backup to take place over wireless so you can be sitting in any room of the house working away while the backup takes place. Backing up to a Veeam Backup and Replication repository is similar to a shared folder, however you have more control over the backup and it is easier to mount from within the console in the event you need to restore – The Linux agent version 6 is only able to connect to VBR v12 or higher.
It worth noting that the above options are avilable in the free version, however there are also 2 other options available with a valid license. Object-Storage is becoming increasingly popular and there are many vendors that offer both an on-premises installation and a cloud hosted option. With a license you will be able to backup to an object storage repository, or utilise Veeam Cloud Connect and backup to a service provider – both for off-site copies.
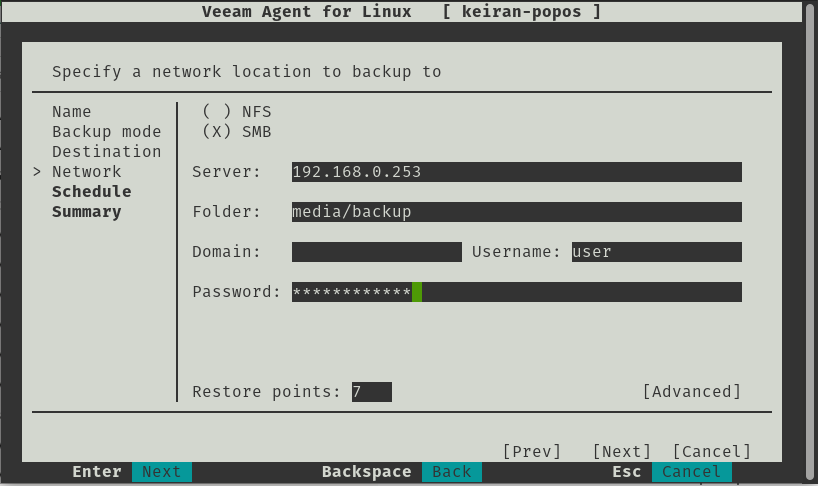
If you attempt to run the SMB share, you may run into an issue where an error message advises that the “Current System does not support SMB” – This is an easy fix and you just need to install the cifs-utils package and once installed, you will be able to continue on with the setup.
# apt-get install cifs-utils
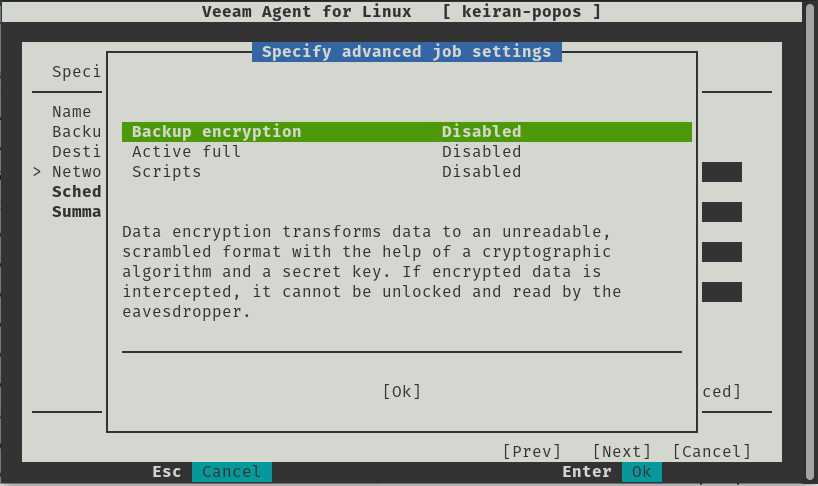
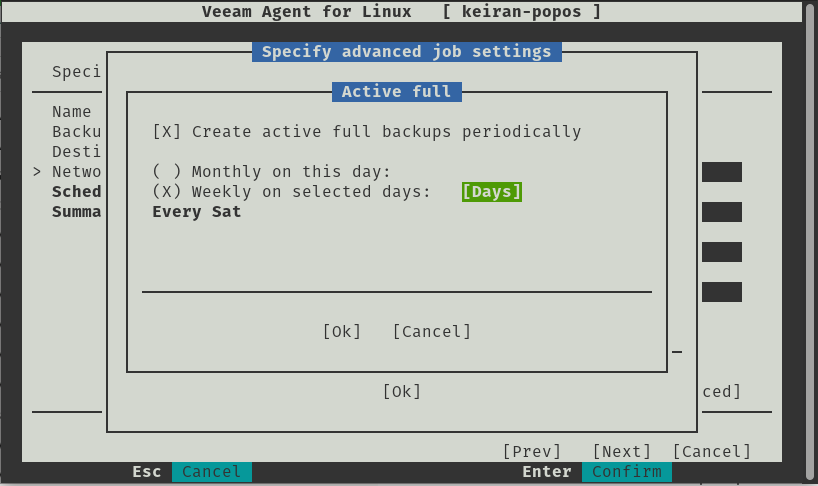
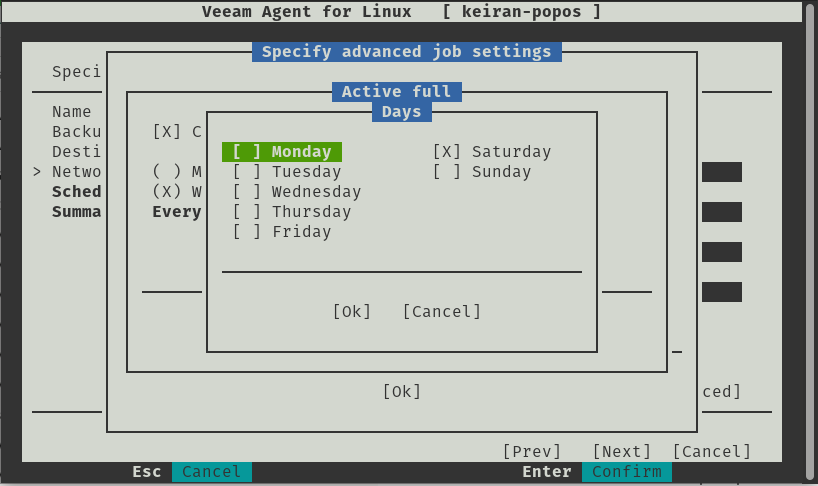
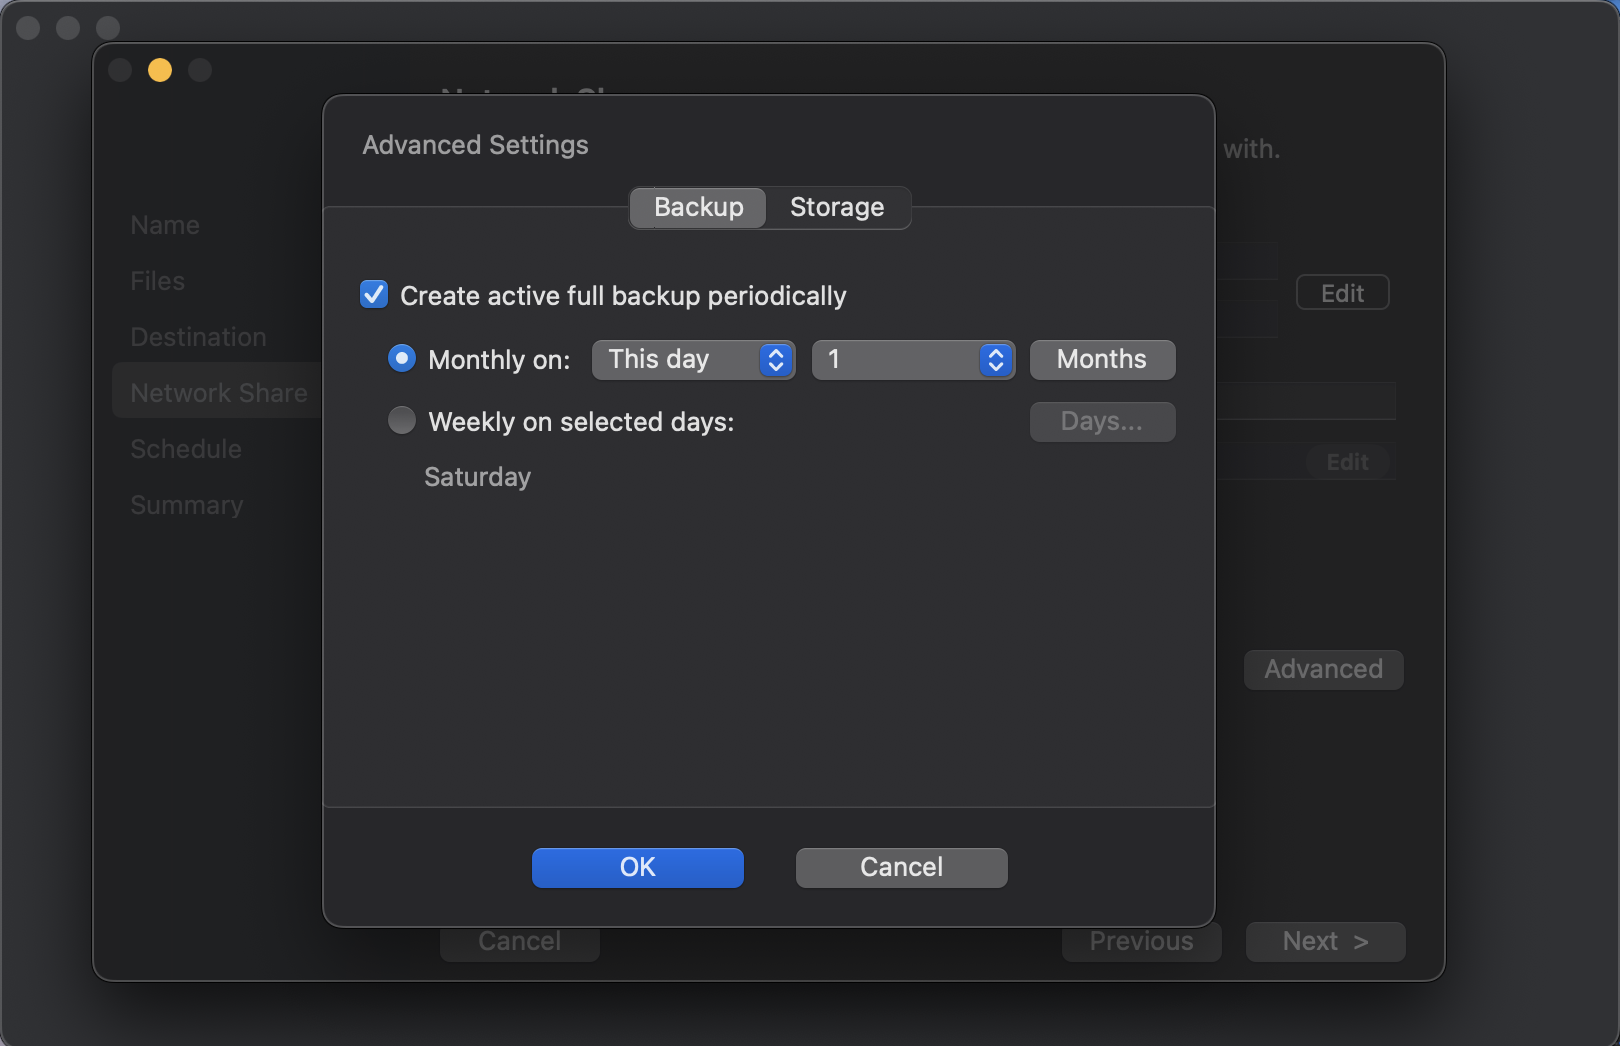
When designing your Backup and DR plan, it is crucial to plan for how long you need to retain your restore points for. The type of restore points is also as important, whether you want all incrementals or a full created once a week, but planning from the beginning can save pain later on. With the Linux Agent, you have the option to enable Active Full and set a schedule for how often you would like the process to run. Veeam also offers some other advanced features when configuring your backup job. Encryption is certainly important, especially for sensitive data, and Veeam’s gives the option in the free version to add an encryption password, but make sure you save that password somewhere secure otherwise your backup will be scrambled and unreadable. You can also run scripts after the restoration.
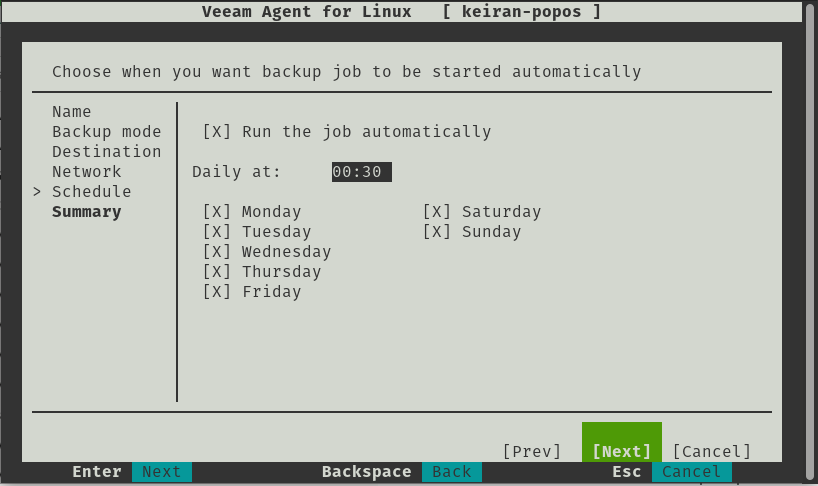
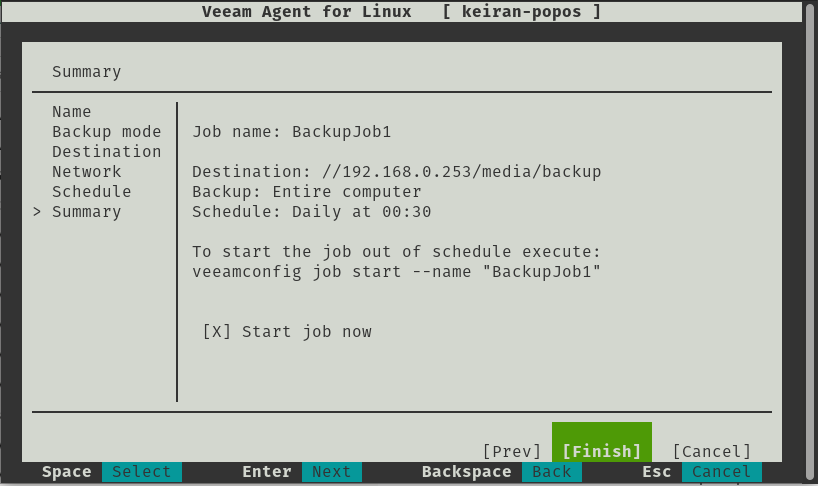
Simply, the last two options allow you to set your schedule, what time and what day would you like your backup to run. Once you’re happy with that you can review your backup configuration and continue – if you desire, you can start the job immediately.
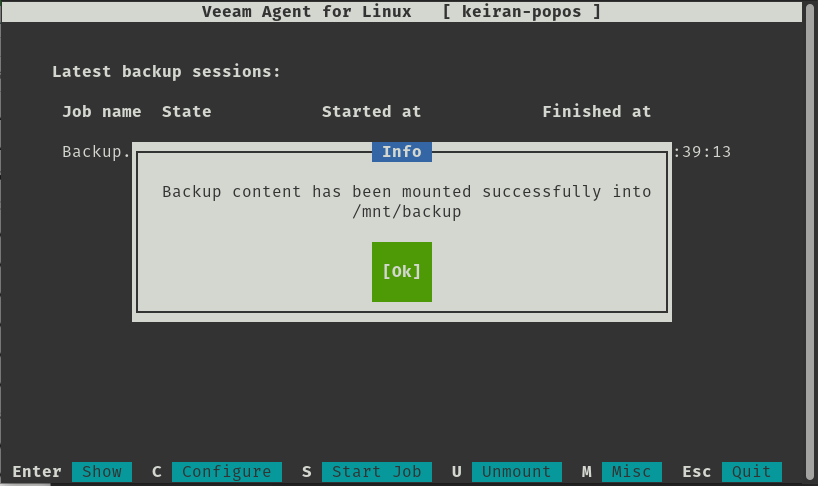
Restore
This is where I felt the product really shined, as much as having an easy backup with a lot of options to make it as efficient as possible, if you can’t access and restore your data then why are you even bothering with a backup?
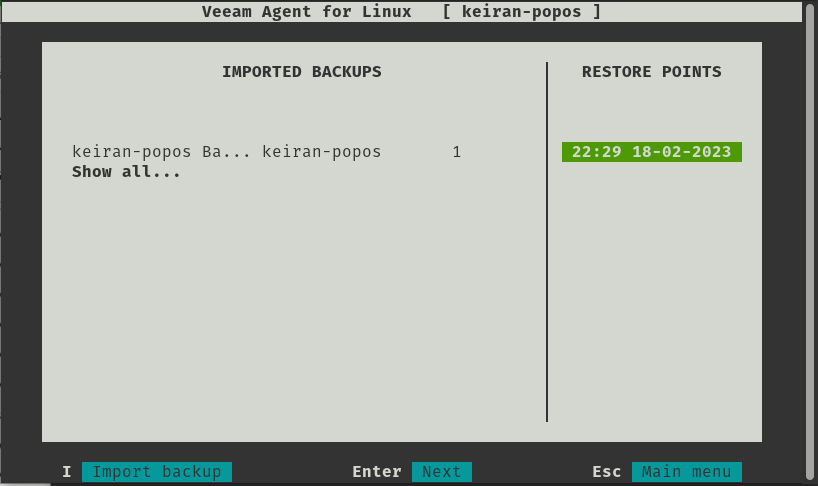
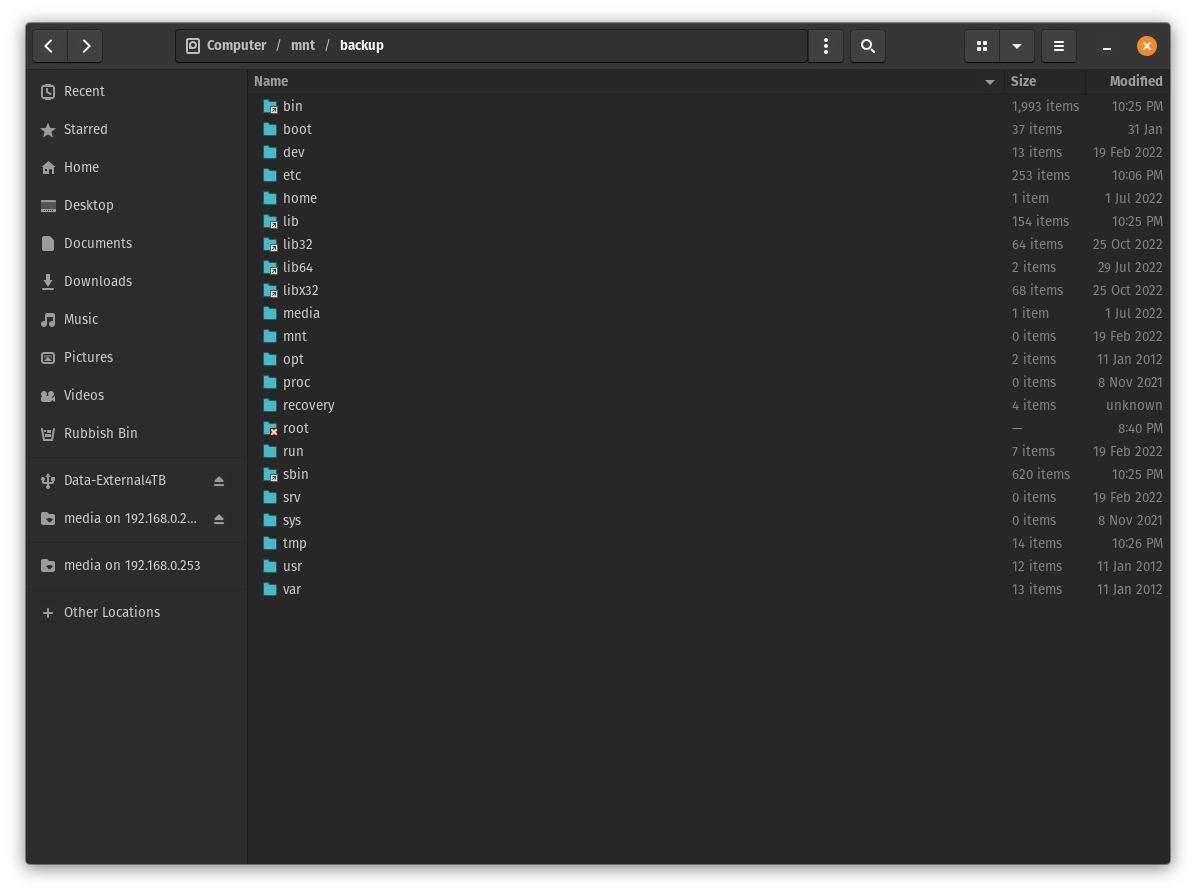
Once the first backup has been successful, select Rfor Recover Files takes you to another screen that displays your backup jobs and their restore points. Once you select a restore point, your system will mount that point to /mnt/backup and from here you can fully browse your backed up files. If you are using a desktop environment, you can open this up in your file manager, and if you are using all cli then you can navigate to the mount point and copy the files as required.
It really is that simple.
Conclusion
Another great product, not only because it does exactly what it is meant to, plus more, but it is also free with a limited set of options. Veeam have really put a huge effort into making a great backup tool so easy to use on Linux. Yes, there are a number of dependencies that are required, but that is just Linux, and majority of them are already installed. Hats off to Veeam for sticking to making another easy to use tool, and also for making it freely available.
Over the years we have seen Veeam release some great products, and with each release they continue to build in more and more features and there is no exception when it comes to the the updated release of the Veeam Agent for Mac v2.
Like the Windows agent, the latest Mac agent is available as a standalone install. The previous version was completely managed from Veeam Backup and Replication where you had to cut a config and package the install. With v2, you can install straight from the pkg file allowing you to have more control and freedom.
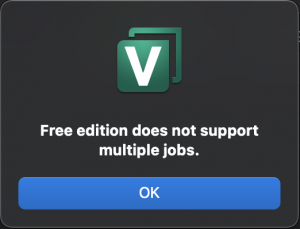
Like the Windows and Linux agents, Veeam is providing the Mac agent with a limited free license which allows up to 1 job created and limited backup locations. However, it still has a ton of functionality and gives you access to backing up either individual files, directories or the entire computer.
So let’s dive in and take a look at what is available under the free license.
Straight off the bat, there is a really nice UI to work with, the layout is easy to work with and everything is very much self explainatory. There are heaps of features that are wrap into this tight little bundle and are easily accessible. The locations in the UI make sense are all in logical locations. I did, however struggle to find how to delete the job as my instict from using other Veeam products was to Right click > Delete . This was simple enough in the end as it was just in the top menu, which I guess just makes it safer.
Backup
As mentioned above, there is a number of new repositories that are available for backing up your workstation to. Previously you were limited to only backing up to a Veeam Backup and Replication repository, but the Mac agent has now been extended to locally connected repositories and SMB shares.
Some people like to only backup certain files and others prefer to backup their entire directories and Veeam knows this well which is why they give you the ability to choose your precious files or your entire root/sub directories. You can even enable backing up locally attached USB drives in case you have an external drive that holds other working files.
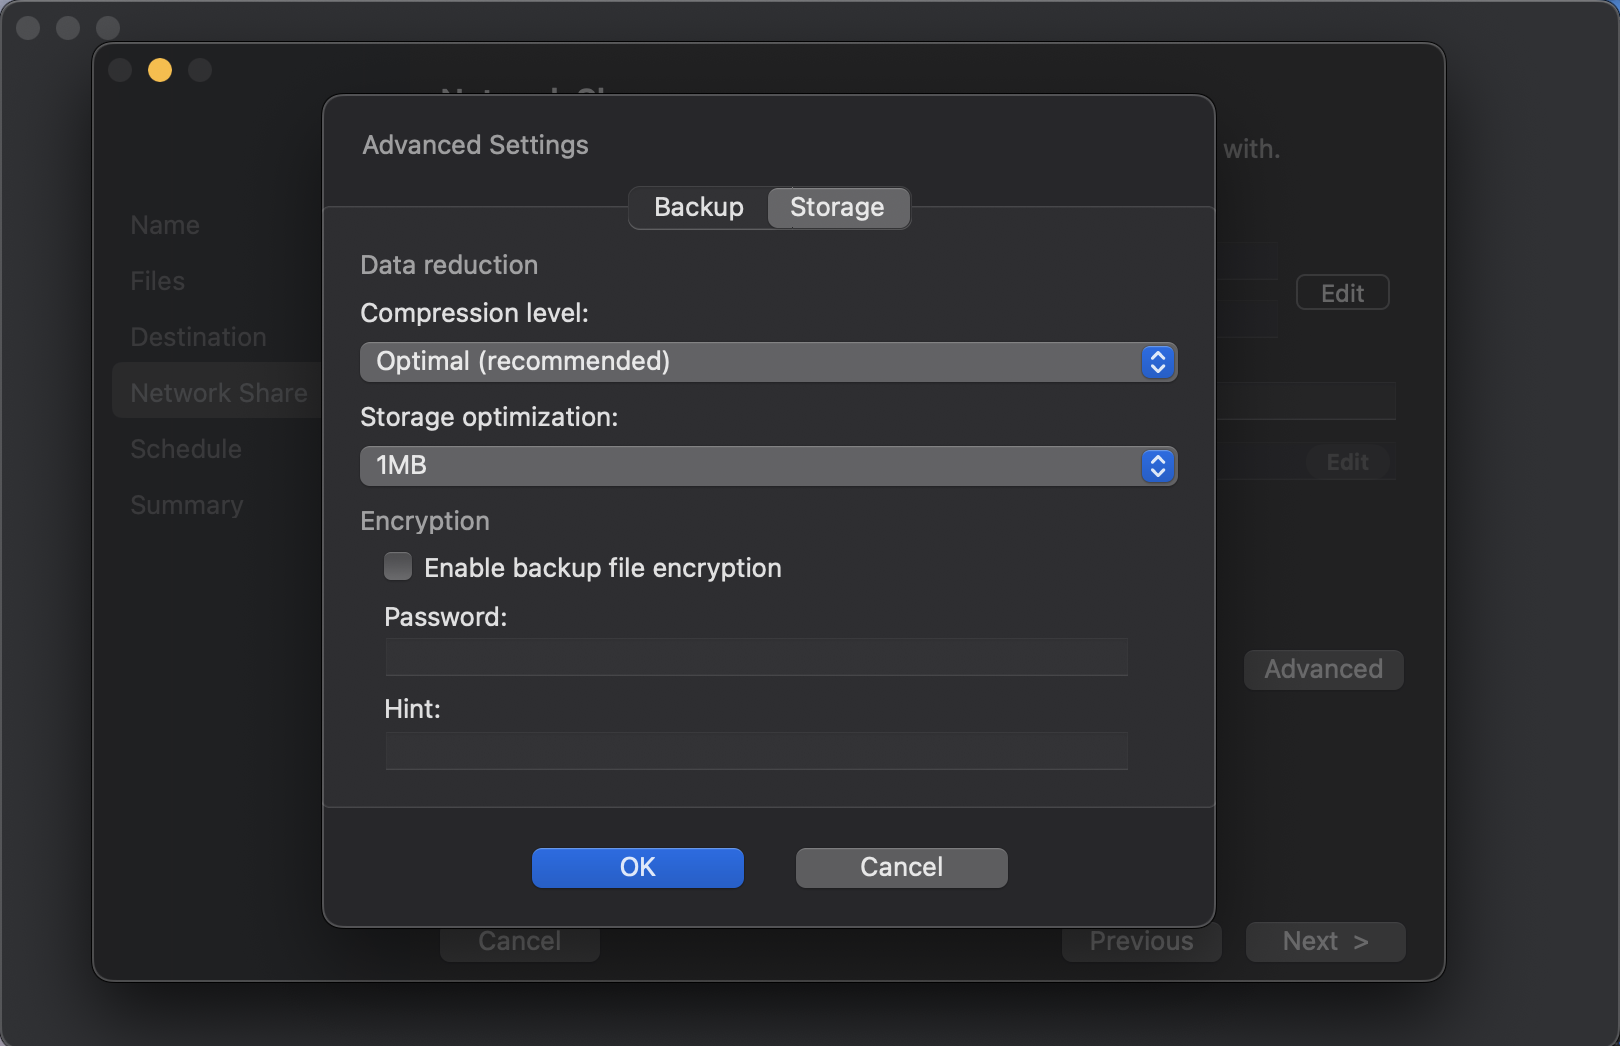
The Mac agent is still quite packed full of features and functions to ensure you get the most out of your backups. You have access to advanced features, such as; Active Full backup schedules, Compression, Storage Optimizations and Encryption.
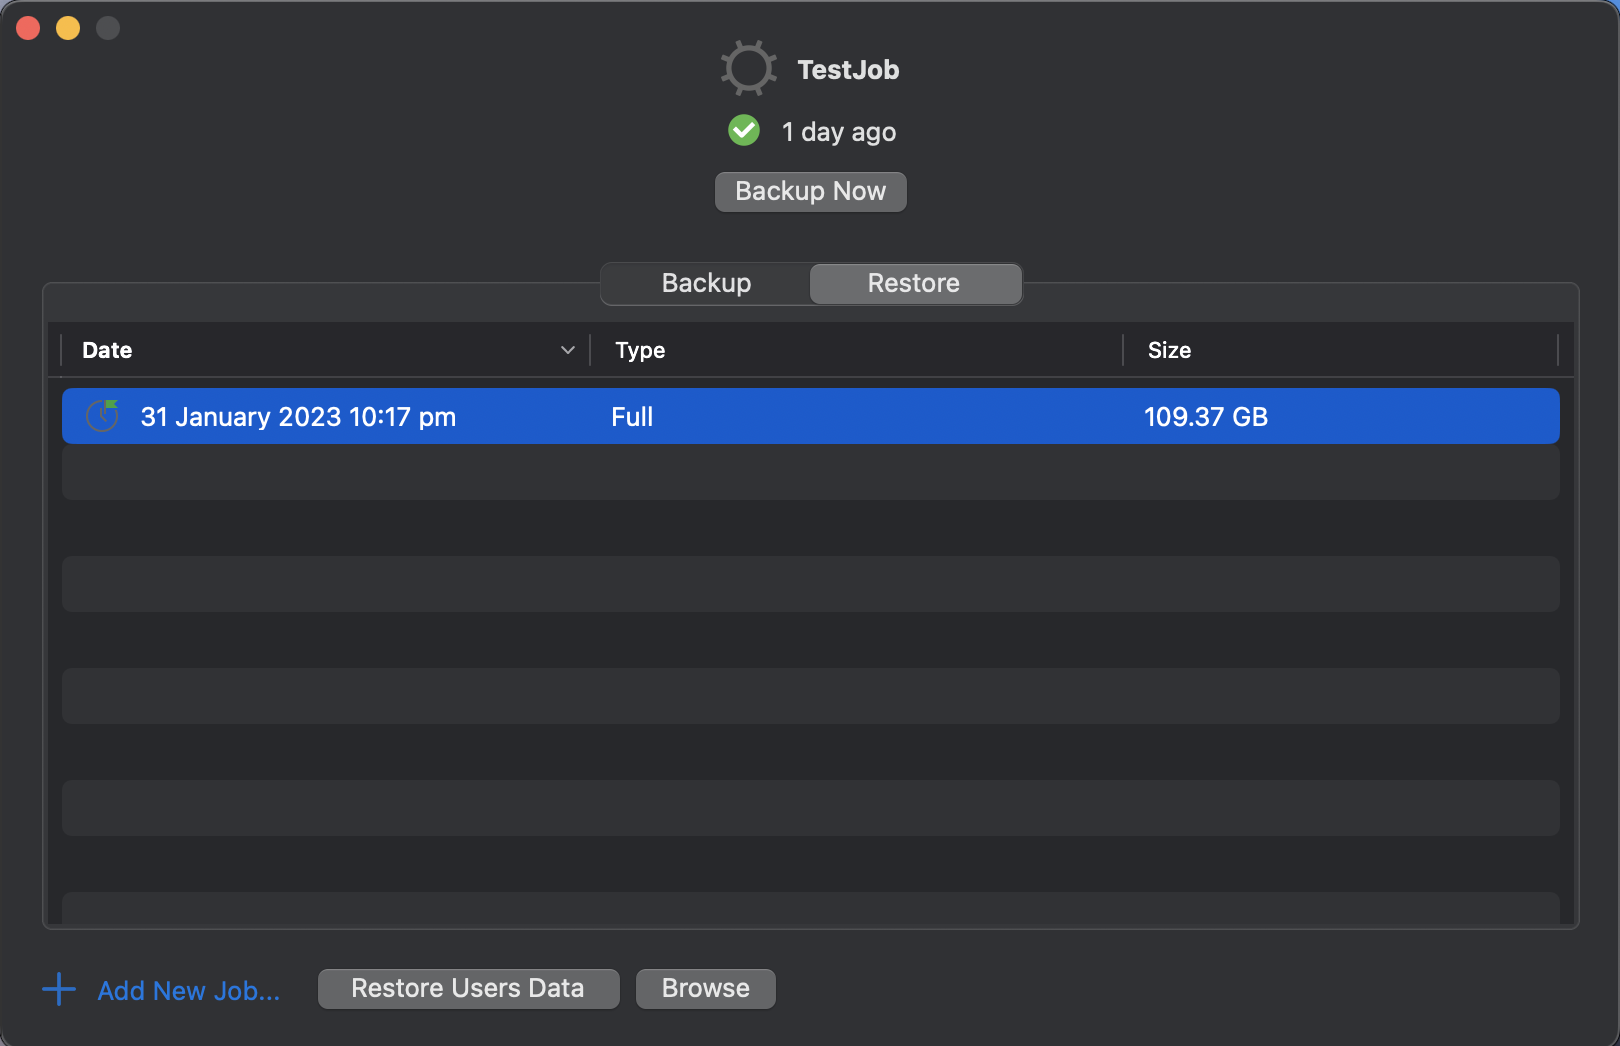
Restore
What’s the point of a backup if you’re never able to restore from it when you need to? While dealing with enterprises, we always say to have a test plan in place, but I feel fairly certain that a lot of folks wouldn’t have one in place for their home network. we should also remember to treat our backups as a copy of our data and not as the only copy.
The Veeam Mac Agent makes restoring a very easy task. Click on the restore tab, select your restore point and then browse your backup. Simples.
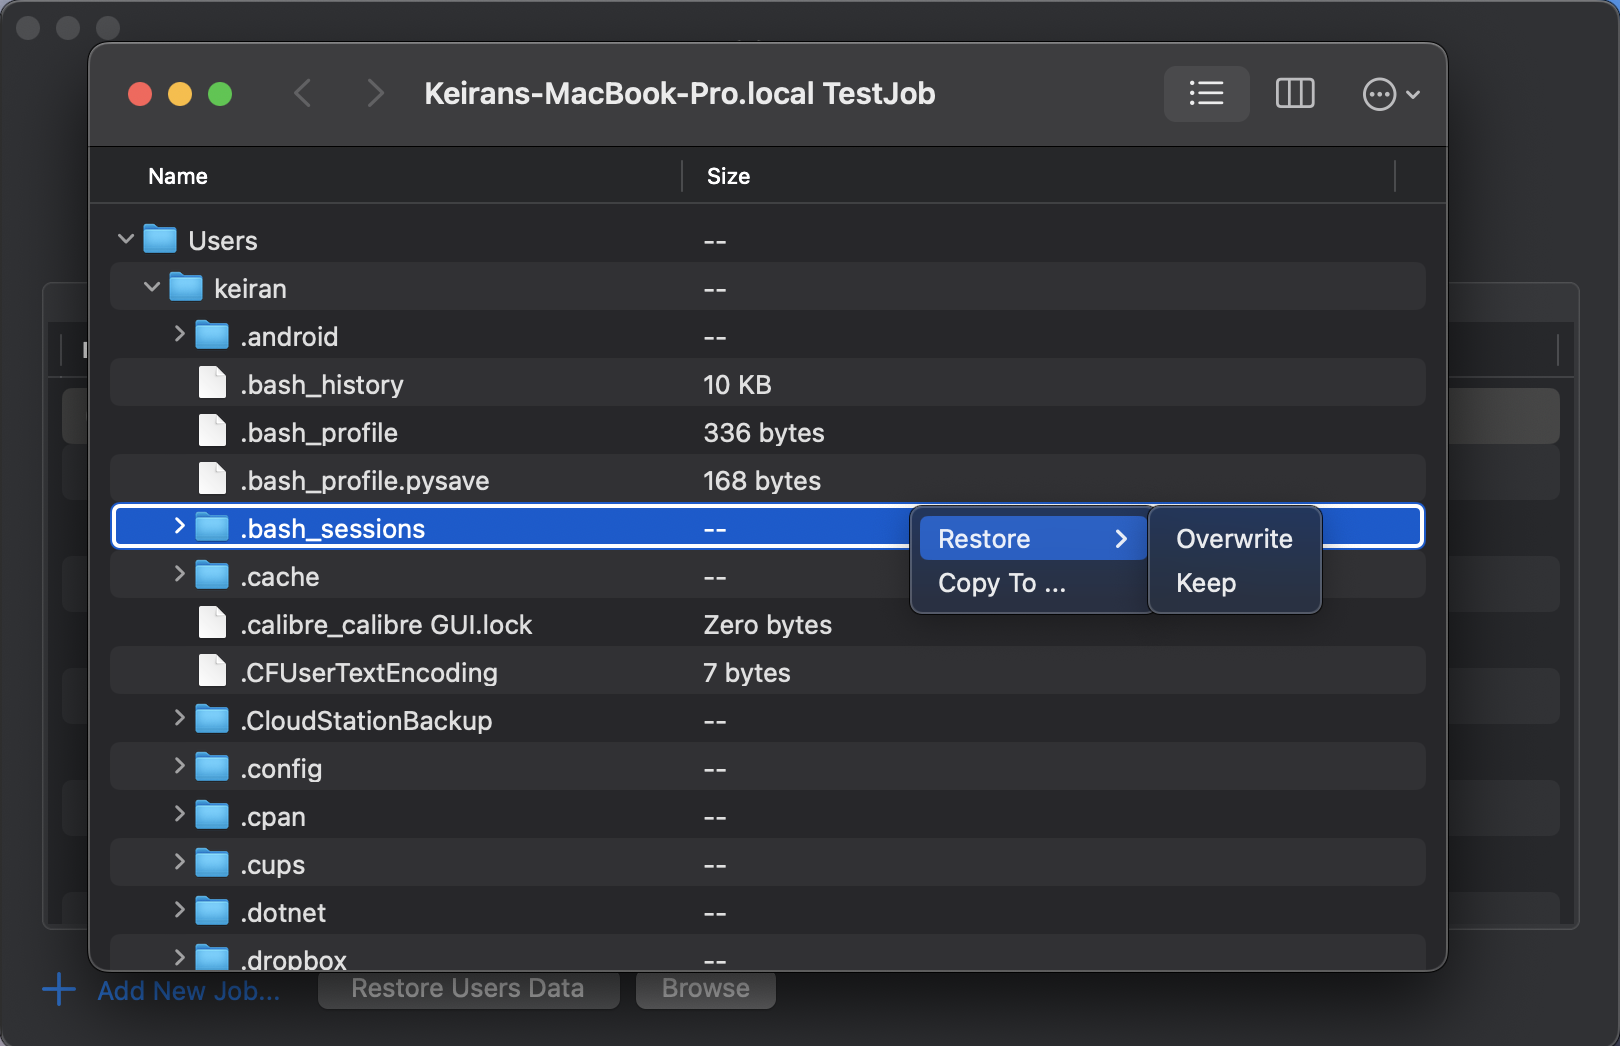
Just like restoring in Backup and Replication, you can choose to either OVERWRITE or KEEP your existing copy of the document (Keep is usually ideal so you can check your restored copy first). KEEP will place a second copy in the same directory and rename to <filename_RESTORED_date&time> so that you will know exactly which copy it is. There is also COPY TO which will allow you to restore to another location – This is great if you want to place the restored file on an external hard drive or in another folder.
If you choose the “Restore Users Data” option, then you will receive a big pop-up to advise you that you will overwrite your User Profile. So, you have been warned!
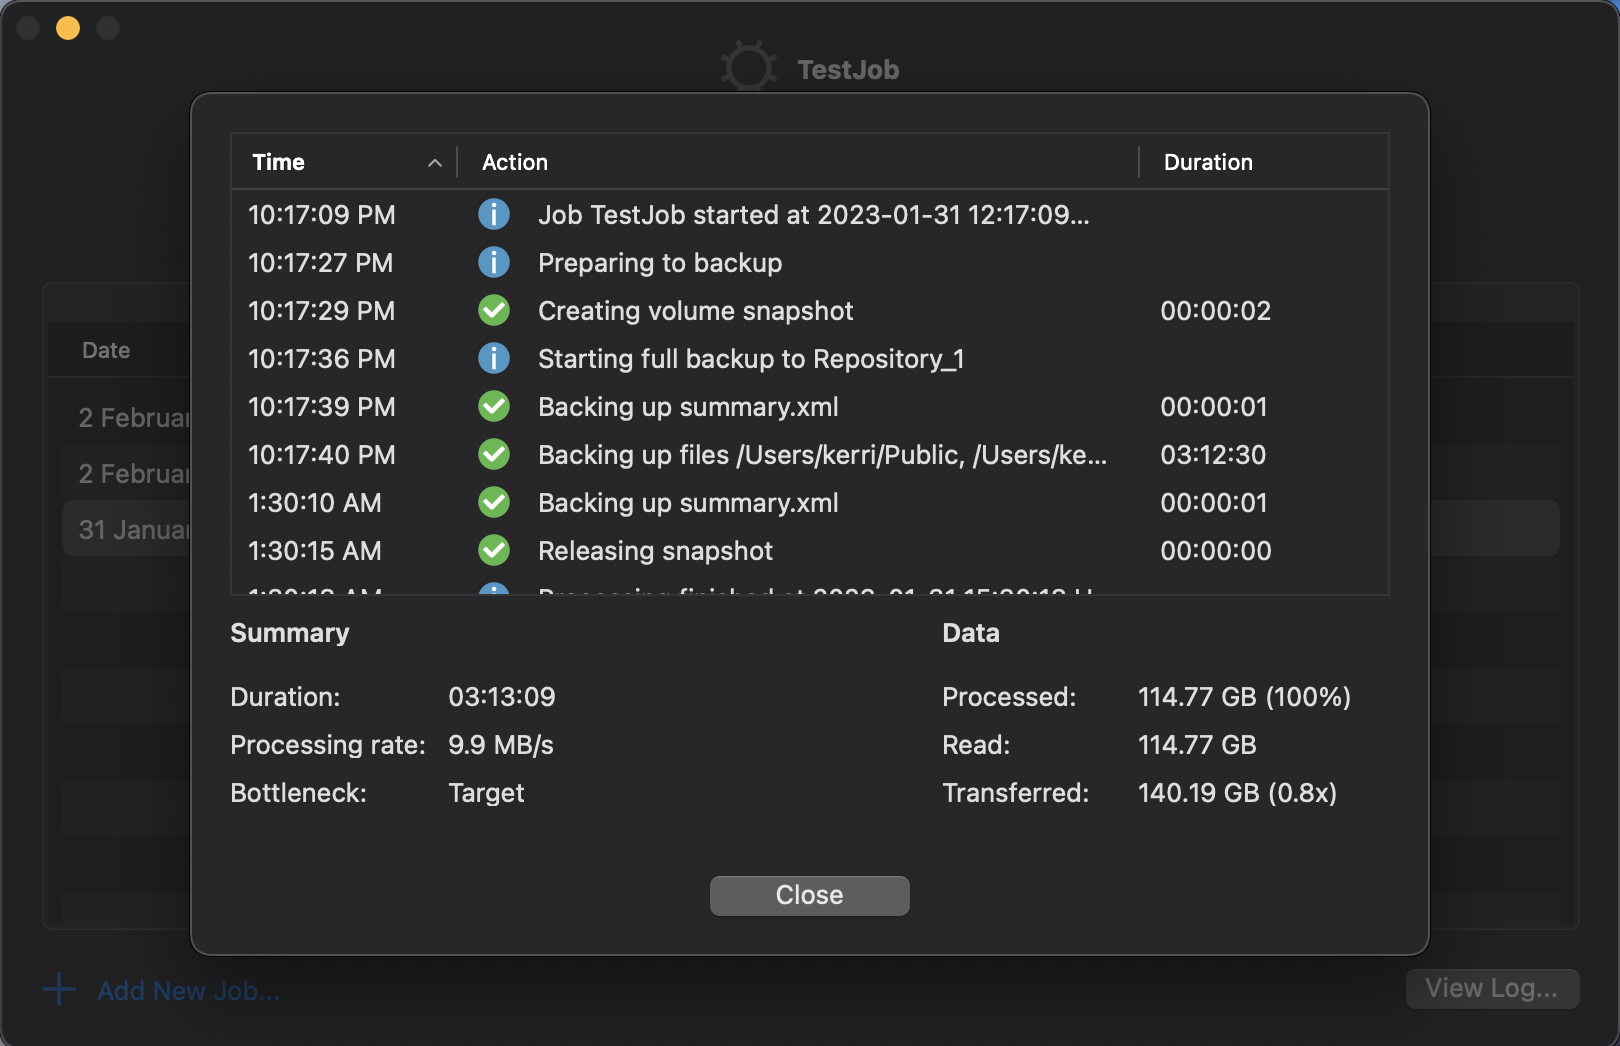
Veeam have also done a fantastic job with their job logs and have a very detailed, but human consumable log output directly in the interface.
Consclusion
Yet again, Veeam have hit it out of the park with their products and to be able to provide a a free product that is packed full of features is very generous of them. I think the Mac Agent has come a long way from v1 and is worth trying out. It certainly is a replacement for TimeMachine and much easier to understand and configure. I would like to see a few more menu items in the right click menu, but these are available in the Apple top bar, so no real issues there.
Make sure you check out the new Veeam Mac Agent once it is GA and be sure to check
This is Part 2 of of my notes from the Pluralsight course “Extending PowerShell” by Matt Allford. As mentioned in part 1, these are just my notes that I took while reviewing the series again. These are in no way of replacing the course, and I highly recommend checking the course out. I hope you find something useful here that may encourage you to explore the PowerShell world.
Introduction
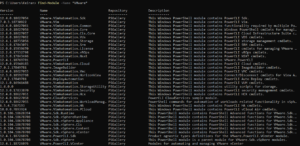
Exploring and working with new PowerShell Modules that are not installed by default.
Covering key components with working with the PS Package mgmt and repos.
Finding and Installing Modules
Updating Modules
Removing/Uninstalling modules
Offline Module installation
Understanding Package Management and Repositories
Linux uses YUM/Apt, etc to install and manage packages but that isn’t as easy on Windows. There is also brew for MacOS and Chocolatey for Windows that can be installed from a 3rd party. The Native windows Package Manager is built within PowerShell.
Should be keeping track of the software installed.
MS released PackageManagement (Formally called OneGet)
The PackageManagement Feature is an aggregator – Installed, update and uninstalled
Comes with a set of PowerShell Cmdlets
There are 4 pillars that make up the PackageManagement architecture.
End User: this is the interface in which we enter our actions to interact with the PackageManagement Core
PackageManagement Core: provides the functions of running the Discovery, Install/Uninstall and Maintaining an inventory of the packages.
PackageManagement Providers: The PackageManagement Framework provides and extensible plugin model tat allows for different installer platforms toplug into the framework. These are PowerShellGet, MSI, MSU, Program and NuGet by default. However, there is also 3rd party such as Python, AppX and PHP, plus more.
Package Sources: This is the source\repository location of where the Package Providers will pull the package from. E.g. PowerShell Gallery.
PowerShellGet.
Package Management Provider: One of the most common Package management providers, it is used to mange PowerShell modules, scripts and DSC resources.
Core functions – Discover, Install, Update and Publish. Packages.
It will target the PowerShell Gallery by default, and online repository, but you can also change the location.
It is available in Windows 10+, Server 2016+, PowerShell 6+ or WMF 5.1 +. It also required PowerShell 3.0+ and .NET Framework 4.5+.
PowerShell Repositories
Are a central location to share, store and Search for PowerShell content, this is a location that you would publish your PowerShell modules to in order to easily access . Also good to place your scripts.
Use PowerShell Get to find new repositories, install, update and Publish modules to the PowerShell repo.
Repos can be public and private.
PowerShell Gallery is the most widely used Repository.
DEMO: Working with Package Management and Repositories
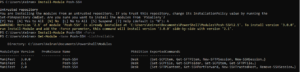
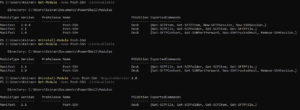
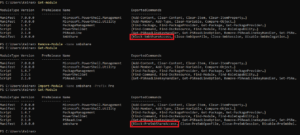
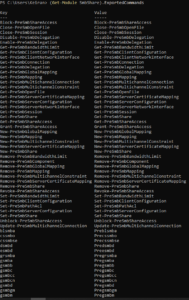
When running Get-Command -Module PackageManagement you will see a list of cmdlets that will search, install and uninstall packages through the Package Management Framework
Running Get-PackageProvider will display the currently configured Package Providers – when running in PowerShell 7, you may only see a couple of providers, but if you run it in an earlier version, you should see several more. This is because PowerShell 7 may not support the other Package Providers by time of this writing.
PowerShellGet is the most common, however NuGet is new in PowerShell 7 and is the default PackageManager for the .NET framework.
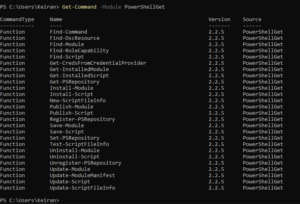
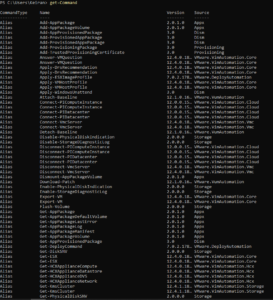
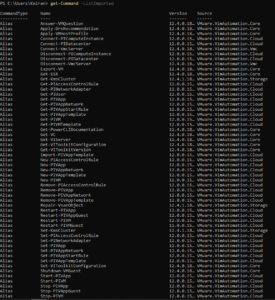
Running Get-Command -Module PowerShellGet will display all the PowerShellGet commands that are available, this will also include Alias’ and Functions.
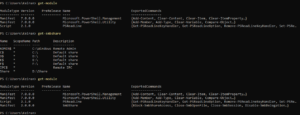
Running Get-PSRepository will return results for the repositories set up to install and save modules and scripts to. By default, PowerShell Gallery is set and is untrusted. When you run a request against the PowerShell Repo, you will be required to accept or decline if you trust the source. You can add other Public and Private repositories.
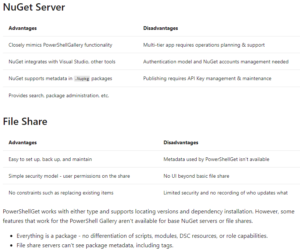
For Private repositories, you can take a look at this article from Microsoft: Working with Private PowerShellGet Repositories, Outlined are two types of repositories you can deploy for Private usage. NuGet and File Share. There are a list of Advantages and Disadvantages.
Microsoft: Working with Private PowerShellGet Repositories
Create a new Local Repo
Example from the course:
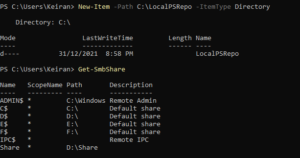
Run New-Item -Path C:\LocalPSRepo -ItemType Directory
From there you can create a new SMB Share on that folder by running
New-SmbShare -Name LocalPSRepo -Path C:\LocalPSRepo\
**Remember back in part 1 we discussed about Auto Loader. Here we have not manually imported SmbShare, however, autol oader has found the module and loaded it for us.
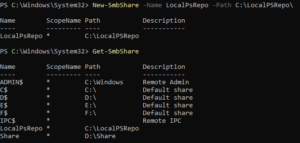
Run a Get-SmbShare again to see the new share added.
To register the repository as a default repository and trusted, you can run the below command, this will set up the source location and the script source location for the private repository.
The -Name does not need to be the same Name as what you have called the share.
The -InstallationPolicy will set whether the repository is trusted or not.
Run a Get-PSRepository again and you will see the Repository added. This will now allow the PowerShellGet provider to search through this new repo to find modules and scripts as well as still searching the PowerShell Gallery.
To set the PSRepository from Untrusted to Trusted or Trusted to Untrusted, you can do this by running the below:
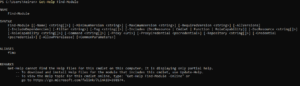
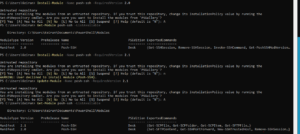
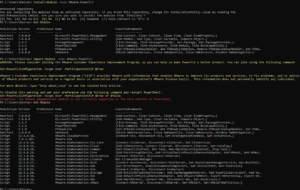
A useful tool is the Find-Module command, which will help find certain modules. There are no required parameters, but you can use such parameters as -MinimumVersion, -MaximumVersion, -RequiredVersion and -AllVersions.
The –IncludeDependencies will display a list of other modules that are required for the module to function correctly. When you go to install the module, the other dependencies should also be installed with the module at the time, you can however go ahead and install those dependencies separately.
Running Find-Module on its own will return results for the latest versions of all modules available in the set PS Respositories.
Running Find-Module -Name *<name>* will search and return results that include the name in wildcard form.
Running Find-Module -Tag <name> will send back results with the tag that is referenced for a module.
**By default, the latest version will be returned. If you run the -AllVersions will display all available versions to find a specific number to install.
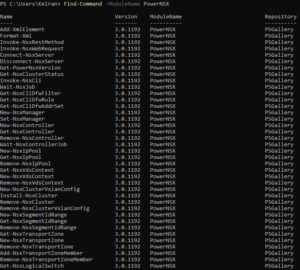
Alternatively, running Find-Command -ModuleName <module name> will display all the commands within that module, this will help when choosing if the module is the required module.
You can also drill down to find which module a specific command is located. Find-Command -Name <Command> will return a list of modules containing that command.
Running Install-Module -Name <Name> will install the module without any other parameters. However, there are a few parameters that are available, such as the minimum and maximum versions.
The -AllowClobber will give you the option to install a module even if the commands conflict with an already installed module.
-Scope defines the location in which the module is to be installed to, setting as CurrentUser will place the module in a path on the CurrentUser will be able to access (as available in the Environment Variable path) whereas setting the -Scope to AllUsers will place it in a default location that is, of course, available to All Users.
Depending on the version of PowerShellGet, the default scope for the module will be determined by the version that is installed.
PowerShellGet V1 = All Users (Preinstalled with Windows 10) PowerShellGet V2 = CurrentUser (Installed as part of PowerShell 7)
The newest version will be used by default.
To install a module, it is as simple as running Install-Module -Name <name>
Alternatively you can install to an alternate scope, however, if you do not have elevated privileges, you will receive the below error, and will not be able to install to the AllUsers default location.
Run the command on it’s own and it will go to the default scope, CurrentUser.
As the repository is untrusted, you will receive a prompt requesting if you would like to trust the repository. It will also advise you can set the InstallationPolicy against the repository.
As a bonus. When installing a module that is the latest version and there is already a previous version available, you will receive a warning that there is already a version installed. The Warning will request if you would like the latest version installed side-by-side.
Update modules
From time to time authors will keep their modules up to date, and it is best to update them to get patches and features related to issues running a cmdlet or new functionality.
To force the installation of an older version, you can run Install-Module -Name <name> -RequiredVersion <version>
To update this to a specific version, and not the latest, run Update-Module -Name -RequiredVersion <version>
** Updating a Module does not remove the previous version. This must be removed by using the Remove-module command.
When not specifying a version parameter, the latest version will be installed.
If the module was not installed by powershell, then Powershell will not be able to update the module as the PowerShellGet core does not have any record of it being installed.
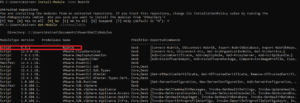
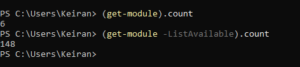
Running (Get-Module).count will show the number of modules installed via the PowerShellGet framework. This will not show any that have been installed using another method.
Running (Get-module -ListAvailable).count will show all Modules installed on the computer and any that are were not installed using PowerShellGet.
Removing and Uninstalling Modules
Removing Module will remove the module from the session but not from being installed on your computer. It is the opposite of Import.
Uninstalling will remove the module from your computer = The opposite of using the Install-Module command.
Run Remove-Module -Name <name> to remove the module
The module is still installed and can be viewed by running Get-module -Name <name> -ListAvailable
When using Uninstall-Module the only required parameter is the -Name However, there is still the option to choose the version of the installed module. This is handy for when you update a previous version and need to clear out the older ones.
When running Uninstall-module -Name <name> (that’s not including a version) the latest version will be uninstalled and the lower version numbers will remaining. To remove all, then you will need to use the -AllVersions parameter
DEMO: Offline Module Installation
This is a method usually used in dark sites or air gapped sites that have strict security configurations, or require security teams to evaluate the modules before providing and marking them as approved modules.
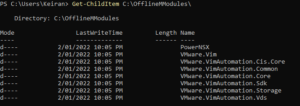
Save-Module
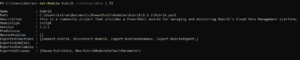
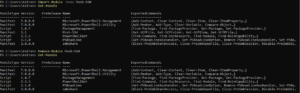
This command can be used to download/save the module (Without installation) to a computer that is connected to the internet.
Save-Module can allow you to inspect the code of the module as you are not simply installing the module. The code is already pre-scanned in the PSGallery, but you can also inspect it yourself
You can still download using parameters for specific versions, but there are two required parameter. -Name and -Path. As you are not installing this and you are saving to copy to another location, you will need to specify a path.
Save-Module -Name <name> -Path <Path>
To install a module from an offline seed. The module should be copied to a default repository in the environment variable path. Once you know the location, you can run a Copy-Item -Path <Source> -Destination <Destination> -Recursefor the module to be located by the PowerShellGet Framework to detect
Diving into my 2022 goals and starting at revisiting PowerShell, this post is part 1 of my notes that I have taken while going through Matt Allford‘s “Extending PowerShell” Pluralsight Course. Please head over and check out the course and let him know what you think. There is a lot of indepth detail and knowledge on how to work with PowerShell Modules and context around each of the topics.
Snapins
Previously Snapins were used back in version 1 of PowerShell – they were adding commands as oppose to modules that hold series of commands.
Required installation from an installer file and registered to the local machine
Lacked capabilities like dependencies.
Modules
Modules – Preferred code package method.
New
Comes as a set of files, but some contain DLL files.
Allows for reuse and abstraction of PowerShell commands
Package of related commands, grouped together and can be vendor specific so that you only need to load the modules that are required. There are some built in modules that are imported by default and other modules can be added into the Environment Variable to load later on.
An example module available.
Bits Transfer Module
This module contains Get-BitsTransfer, etc. -= none of these commands work outside of bits. But all Get, Remove, Set, etc. are in a single PowerShell module
Each module is an upgrade to the previous.
Sit in the PowerShell repo
PSModulePath is default, but any location can be used
Copying and pasting a module is fine to import, but there are better ways to install and import
Module Auto-Loading can auto load in modules when you run your PowerShell, but you don’t always want this in case there are conflicting. e.g. Get-VMis both VMware and Hyper-V commands,
-noClobber is a command to prevent conflicting commands from installing when an existing command has already been installed into the session
Install Module (Install-Module)
The Install module does not import the module for use into the PowerShell session, but it does install the module onto the local machine into a path that is in the Environment Variable location, allowing for the module to be either imported into a session later or added into the Auto-Loading.
Using theInstall-Module -Name <name> will install the module from the PowerShell Gallery if it exists.
In the above example, once the module is installed, it is not automatically imported. The Import-module needs to be run. As this is running in PowerShell 7 Core, the Vmware.ImageBuilder is not supported and is not imported.
DEMO – Working with Module Paths
To find the PsModulePath, Use the $env:PSModulePath commands. However, you can also add -split “;” to separate out the lines where a semi colon is located.
To add additional default locations for modules, you can add them via $env:PSModulePath = $env:PSModulePath + “;C:\<My module path>”
By adding the semi colon to the start of the location above, this will allow the environment path to see this location as a separate path instead of just continuing the line of the previous path. E.g. C:\Windows\system32\WindowsPowerShell\v1.0\ModulesC:\<my module path>
Setting $env:PSModulePath will only be set for the sessions. In order to make it persistent, it will need to be added to the PowerShell Profile, or added to the PowerShell Environment Variable. This can be done via windows GUI or through Powershell
The above commands are first creating a cmdlet with the environment set. This will then allow the second command to run and list out the existing paths already set in the system environment variable path.
The 3rd lone is creating a new cmdlet that is adding both the existing system environment variable paths and the new path together (hence the + sign) – keep the semi colon prefix in mind
The last command is setting the System Environment Variable path to include the $newpath cmdlet. You need to make sure you add the previous Environment Variable location and cmdlet together with the new path each time to ensure the complete PATH is set.
DEMO – Importing and Auto Loading Modules
How modules get imported explicitly and automatically.
First run Get-Help Import-Module to view the mandatory parameter.
– Only required is-name Run Import-Module -name <name of module> to install the module.
Auto-loader
The auto load feature is used when a cmdlet has been run that is part of a module that has not been imported but is sitting in a module that is located in the Environment Variable Location. Powershell will search for the required cmdlet and import the module
Auto load won’t work if the module is not sitting in one of the Paths in the PS Variable Path.
Below in the example, using the command Get-SmbShare searches for the module and then auto loads the module as it is an available option.
Import a module that is not in a Environment Variable location
In the event you have a module that has been downloaded to another location that isn’t in the Environment Variable location, you can easily import it using the full location path in your import command.
Import-Module -Name C:\<Path to file>\
e.g Import-Module -Name C:\PowerShell\Module
Use Import-Module to import with a prefix
As above, we mentioned the -NoClobber parameter that will skip any commands in a module that are conflicting with an already imported module. Another method to avoid a conflict is to add a prefix, allowing the commands to be imported uniquely into the session.
In the below example, SmbShare is already loaded and does not contain a PreFix (Block-SmbShareAccess)
The Module is then removed and then Imported back into the session with use of the -PreFix parameter.
This will now add the prefix of “Pre” to the front noun in the command. (Block-PreSmbShareAccess)
So when running the command after importing with a prefix it will need to be,.
C:\> Block-PreSmbShareAccess
Demo – Indentifing Commands in a Module
Running Get-Command is not a great way to search for a particular command in a PS module. This will load every command that is available. This is far from ideal.
If you run Get-Command -ListImported This will only show you the commands for, you guessed it, the commands only available in the modules that are currently imported into the session.
In order to only find the commands of a particular module that is currently imported and not receive commands for other modules, then using the -Module parameter will cut this list down to only those commands that are required.
Alternate to getting the commands for a particular module is to use the Get-Module SmbShare – however, this will only listed some of the commands off to the side under the “ExportedCommands” column.
To view this better, use the (Get-Module SmbShare).ExportedCommands to display this in a nicer way with also the key and value columns.
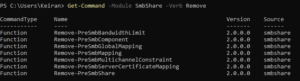
Finding a command by using the Verb
Using the PowerShell Verb-Noun layout, there may be times that you want to do a particular action and know that the verb you need to perform the action. You can search on the verb that is part of the module to get a list of the commands that are available to help narrow down to the right one. This is done using the -Verb parameter followed by the verb to search for.
Get-Command -Module SmbShare -Verb Remove
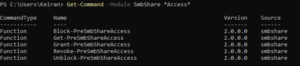
Finding a Command by Wildcard
There may be a case where you only know a part of the command that you are looking for and need to perform a wildcard search. This works by still using asterixis on both sides of the word you are looking for.
In less than a week, I will be joining the Tech Field Day team once again to take part in Storage Field Day 21. Not only is it the first event for ’21, but it is also the 21st Storage Field Day (and I guess that makes it old enough to drink?) – So the team of delegates and I, along with all the presenting companies will be having a blast while discussing the what is going on in storage and technology.
The event is starting on Wednesday January 20th, from 9:30am PST. All of the week’s event will be stream on the website. You can join in on the fun by asking questions through twitter and following the #SFD21 tag.
Lastly. If you want to join an event as a delegate, or even want to present with your company, head over to Tech Field Day and check out the Sponsors or Delegate links.
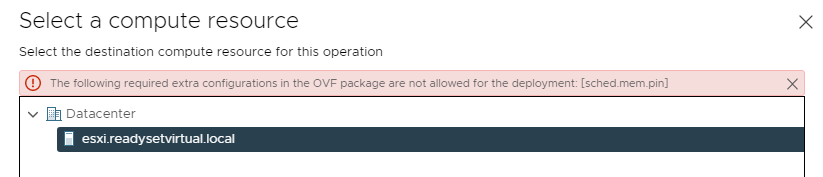
There’s been a couple of times with a certain OVF that I have ran into this issue. Oddly enough, it happened to me in both my vSphere 6.5/6.7 and 7.0 environments and including VMware Workstation 15. I have had someone else test this and not run into the issue, however I’m not too concerned as I have found a simple work around.
The error presents itself when the OVF/VMX file includes the below line with a value of “TRUE” set.
What this is setting is the reservation on the memory. Even though there may not be a value set and may be set to 0MB, this can still affect the deployment.
Now you could easily go into the file and adjust it to “false”, however you would then need to resign the OVF file and it just gets fiddly from there. So the workaround is a simple one.
All you need to do is to deploy the OVF direct on a host. Simple!
As for VMware Workstation. I am yet to work this one out, but if anyone has a solution, that would be great!