One of the most tedious operational tasks you can do in IT is manage domains and certificates – these chores can become quite tiresome when replacing many over a year and then starting again as most certificates only have a 1 year (13 month) life cycle.
But then… you have certificate providers like Let’s Encrypt and ZeroSSL who provide 3 month free certificates (some with additional costs for repeated use) that with the help with additional toolsets can become automated certificate renewals.
in this article I want to cover how to set up and use Let’s Encrypt with Certify the Web to automate the renewal of the certificates for Veeam Backup for M365.
As Let’s encrypt needs to use either DNS or HTML to check the legitimacy of the domain to be ale to provide a valid certificate, it is helpful to use an application like CertifyTheWeb to automate the process to update the DNS record when required. CertifyTheWeb has the ability to update a number of DNS providers using the APIs provided along with the API token. Use the attached link here for Setting up CloudFlare API Token for your required DNS zone – this will then allow CertifyTheWeb to make those changes on the fly.
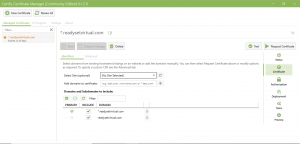
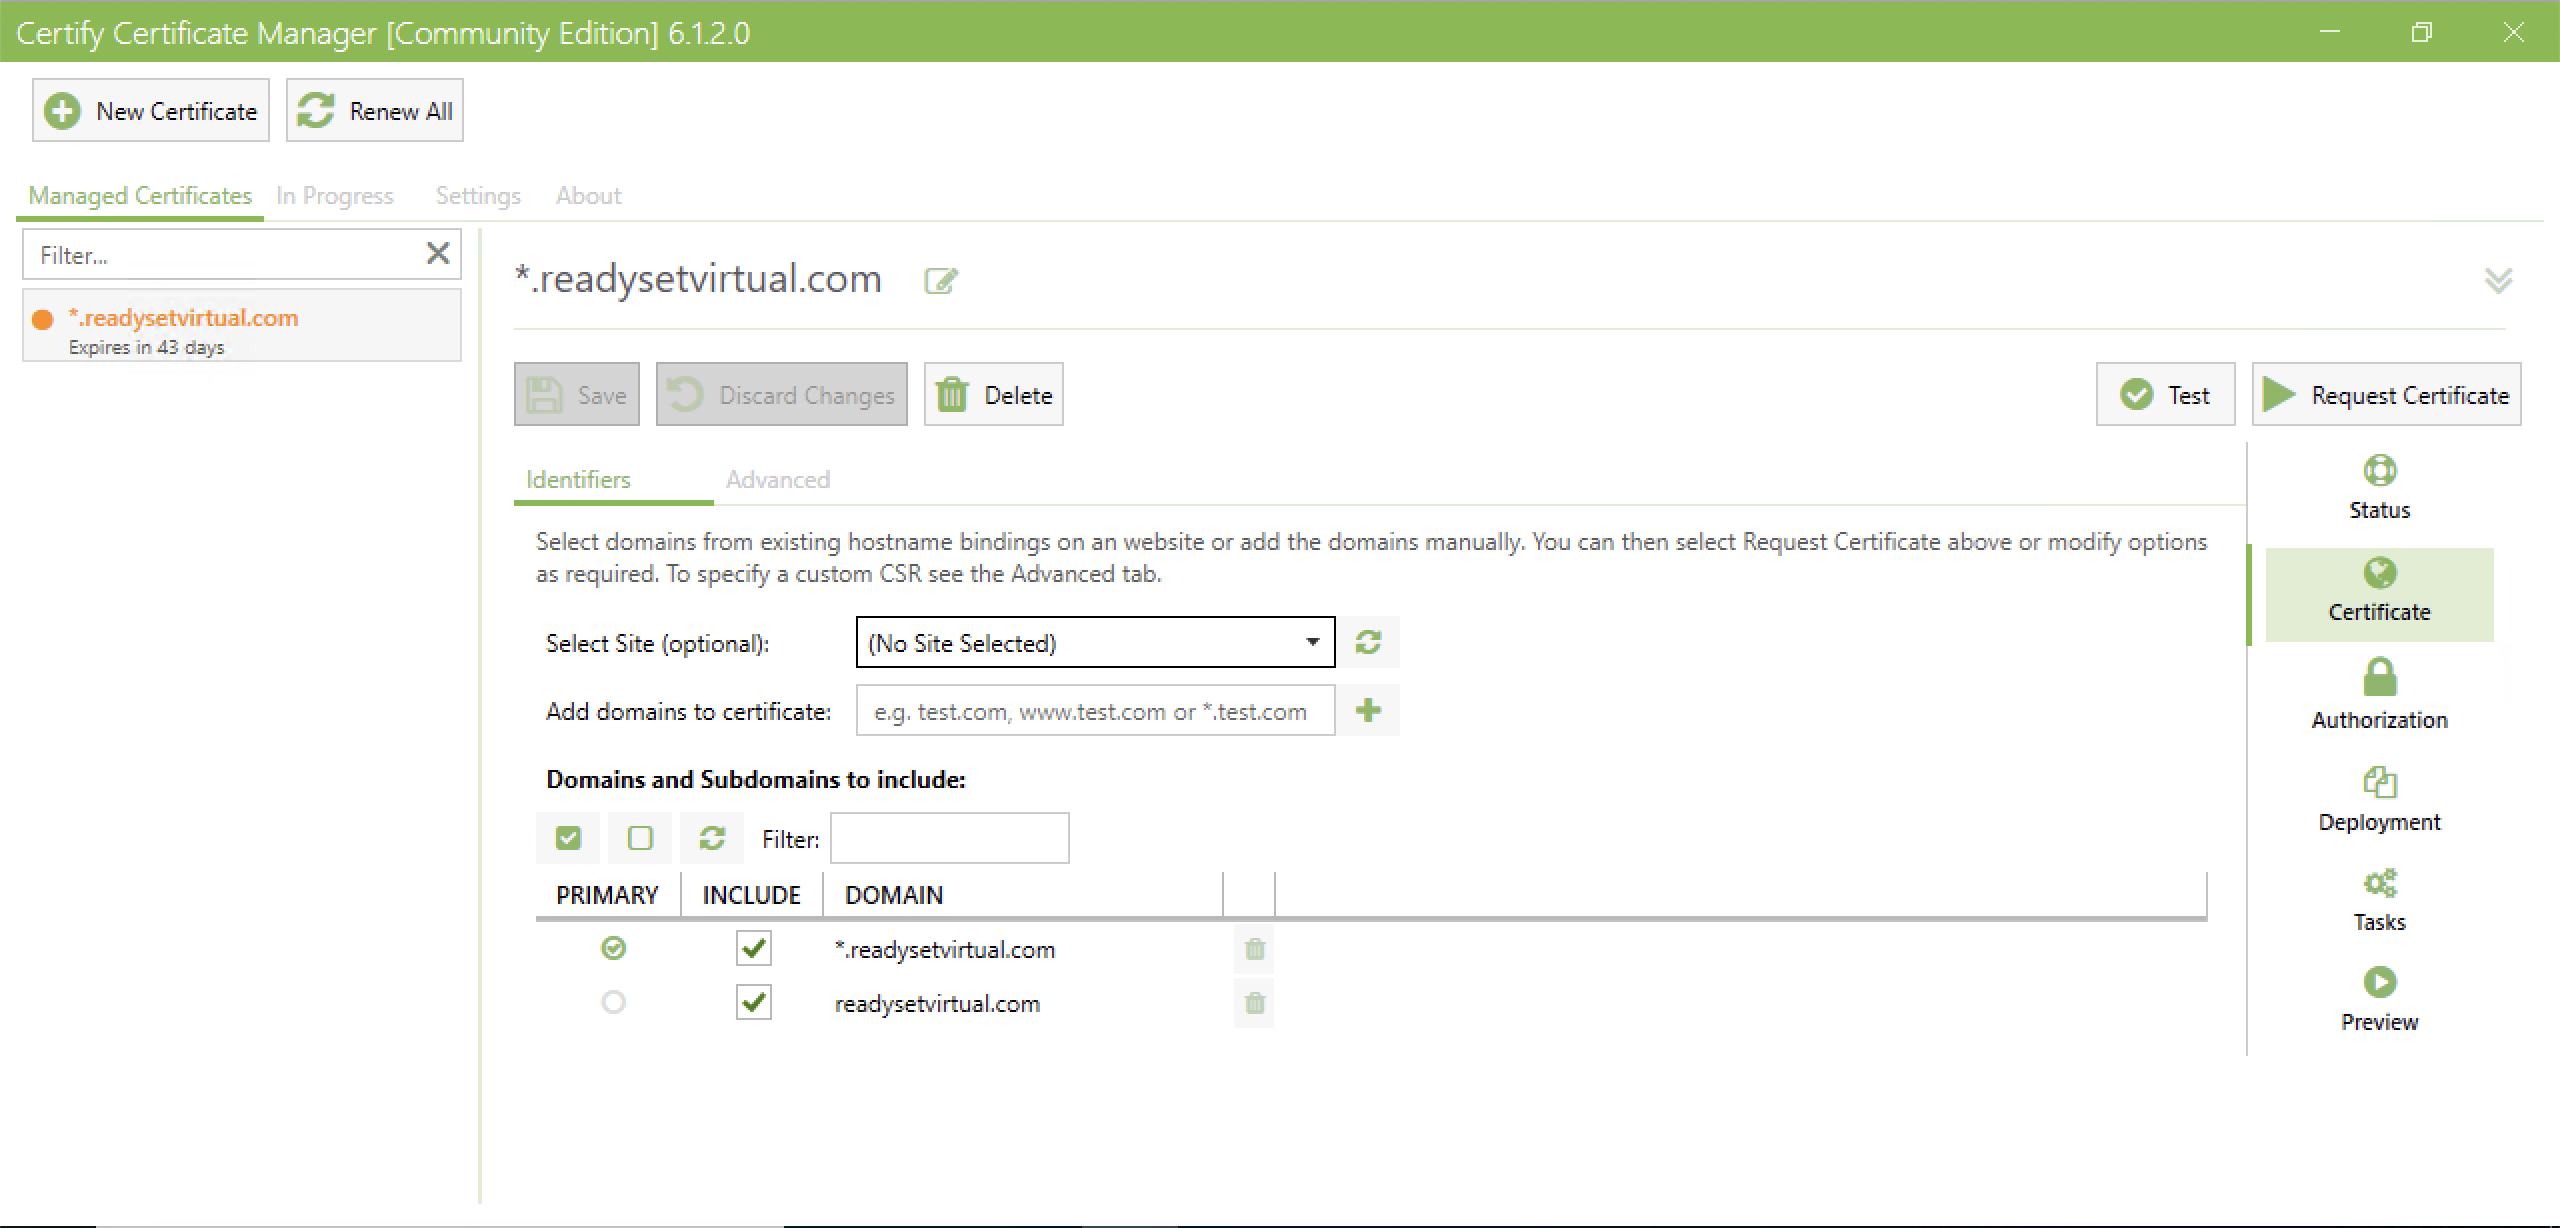
To set up CertifyTheWeb to just generate certificate:
Download and install CertifyTheWeb’s application (Best on the server you require the certificates on)
Create a new Certificate
Set the Challenge type to DNS and select your DNS Update Method /Manage
Add your credentials/API Token for the DNS manager and put in your DNS Zone ID
Run a Test and confirm that the challenge is working and that the certificate is ready to be deployed.
While certify the web will handle applying the certificate to a number of web host systems, for applications like VB365, you need to utilise the APIs/PowerShell commands to install the certificates.
This will be applied to the Tasks section of CertifyTheWeb where you can run post-scripts to your recently registered certificates.
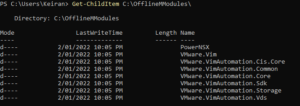
When a certificate is downloaded, it is added to the default folder of C:\ProgramData\certify\assets\<_.domainName>\ – Here you will find the .pfx files.
The below script will install the certificate to the below parts of Veeam Backup for M365. It will also enable the features.
RestAPI
Tenant and Operator Authentication
VBO Restore Portal
In a nutshell the script will perform the below actions:
Import required modules from Veeam Backup for M365
Create archive folder for certificate if it doesn’t already exist
Set Certificate path
Enable RestAPI setting and install certificate
Enable Operator Authentication setting and install certificate
Enable Tenant Authentication setting and install certificate
Enable Restore Portal Setting and install Certificate while setting Region, AppID and PortalURI
Move certificate to the archive folder
Save the below script as a .ps1 and map it through the Tasks in CertifyTheWeb – this will then call during deployment.
# Import VB365 PowerShell ModulesImport-Module"C:\Program Files\Veeam\Backup365\Veeam.Archiver.PowerShell\Veeam.Archiver.PowerShell.psd1"Import-Module"C:\Program Files\Veeam\Backup and Replication\Explorers\Exchange\Veeam.Exchange.PowerShell\Veeam.Exchange.PowerShell.psd1"Import-Module"C:\Program Files\Veeam\Backup and Replication\Explorers\SharePoint\Veeam.SharePoint.PowerShell\Veeam.SharePoint.PowerShell.psd1"Import-Module"C:\Program Files\Veeam\Backup and Replication\Explorers\Teams\Veeam.Teams.PowerShell\Veeam.Teams.PowerShell.psd1"$Region=#Default is = Worldwide$AppID=#AppID$PortalURI=#RestorePortal URI# Set the archive folder path$archive="C:\ProgramData\certify\archive\"# Check if folder not exists, and create itif(-not(Test-Path$archive-PathType Container)){New-Item-path $archive-ItemType Directory}# Grab new certificate# -Path must be set to the assets folder domain with the wilcard for the .pfx $Certificate=Get-ChildItem-Path "C:\ProgramData\certify\assets\_.readysetvirtual.com\*.pfx"# Install RestAPI certificate and enable servicewrite-host-foreground Yellow "Setting VBO365 Certificate"Set-VBORestAPISettings-EnableService -AuthTokenLifeTime 4800-CertificateFilePath $Certificate# Install Tenant and Operator Authentication CertificateSet-VBOOperatorAuthenticationSettings-EnableAuthentication -CertificateFilePath $CertificateSet-VBOTenantAuthenticationSettings-EnableAuthentication -CertificateFilePath $Certificate# Install Restore Portal CertificateSet-VBORestorePortalSettings-EnableService -ApplicationId $ApplicationId-CertificateFilePath $Certificate-Region Worldwide -PortalUri $PortalURIsleep 5# Move Certificate to Archive C:\ProgramData\certify\archive\write-host-foreground yellow "Moving certificate to C:\certs\certify_archive\"Move-Item-Path $Certificate-Destination C:\ProgramData\certify\archive\write-host-foreground green "Certificate Sucessfully Applied"
Just like that, the certificates are updated, and in the final few weeks CertifyTheWeb will run and generate a new set of certificates and apply as required when the existing are about to expire.
This is Part 2 of of my notes from the Pluralsight course “Extending PowerShell” by Matt Allford. As mentioned in part 1, these are just my notes that I took while reviewing the series again. These are in no way of replacing the course, and I highly recommend checking the course out. I hope you find something useful here that may encourage you to explore the PowerShell world.
Introduction
Exploring and working with new PowerShell Modules that are not installed by default.
Covering key components with working with the PS Package mgmt and repos.
Finding and Installing Modules
Updating Modules
Removing/Uninstalling modules
Offline Module installation
Understanding Package Management and Repositories
Linux uses YUM/Apt, etc to install and manage packages but that isn’t as easy on Windows. There is also brew for MacOS and Chocolatey for Windows that can be installed from a 3rd party. The Native windows Package Manager is built within PowerShell.
Should be keeping track of the software installed.
MS released PackageManagement (Formally called OneGet)
The PackageManagement Feature is an aggregator – Installed, update and uninstalled
Comes with a set of PowerShell Cmdlets
There are 4 pillars that make up the PackageManagement architecture.
End User: this is the interface in which we enter our actions to interact with the PackageManagement Core
PackageManagement Core: provides the functions of running the Discovery, Install/Uninstall and Maintaining an inventory of the packages.
PackageManagement Providers: The PackageManagement Framework provides and extensible plugin model tat allows for different installer platforms toplug into the framework. These are PowerShellGet, MSI, MSU, Program and NuGet by default. However, there is also 3rd party such as Python, AppX and PHP, plus more.
Package Sources: This is the source\repository location of where the Package Providers will pull the package from. E.g. PowerShell Gallery.
PowerShellGet.
Package Management Provider: One of the most common Package management providers, it is used to mange PowerShell modules, scripts and DSC resources.
Core functions – Discover, Install, Update and Publish. Packages.
It will target the PowerShell Gallery by default, and online repository, but you can also change the location.
It is available in Windows 10+, Server 2016+, PowerShell 6+ or WMF 5.1 +. It also required PowerShell 3.0+ and .NET Framework 4.5+.
PowerShell Repositories
Are a central location to share, store and Search for PowerShell content, this is a location that you would publish your PowerShell modules to in order to easily access . Also good to place your scripts.
Use PowerShell Get to find new repositories, install, update and Publish modules to the PowerShell repo.
Repos can be public and private.
PowerShell Gallery is the most widely used Repository.
DEMO: Working with Package Management and Repositories
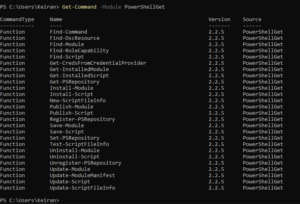
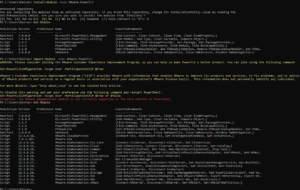
When running Get-Command -Module PackageManagement you will see a list of cmdlets that will search, install and uninstall packages through the Package Management Framework
Running Get-PackageProvider will display the currently configured Package Providers – when running in PowerShell 7, you may only see a couple of providers, but if you run it in an earlier version, you should see several more. This is because PowerShell 7 may not support the other Package Providers by time of this writing.
PowerShellGet is the most common, however NuGet is new in PowerShell 7 and is the default PackageManager for the .NET framework.
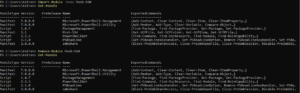
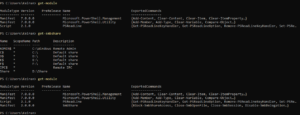
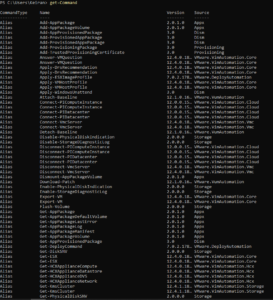
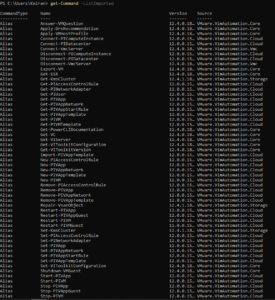
Running Get-Command -Module PowerShellGet will display all the PowerShellGet commands that are available, this will also include Alias’ and Functions.
Running Get-PSRepository will return results for the repositories set up to install and save modules and scripts to. By default, PowerShell Gallery is set and is untrusted. When you run a request against the PowerShell Repo, you will be required to accept or decline if you trust the source. You can add other Public and Private repositories.
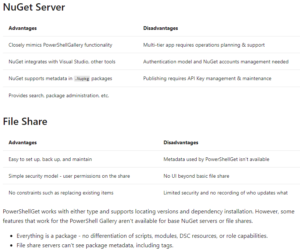
For Private repositories, you can take a look at this article from Microsoft: Working with Private PowerShellGet Repositories, Outlined are two types of repositories you can deploy for Private usage. NuGet and File Share. There are a list of Advantages and Disadvantages.
Microsoft: Working with Private PowerShellGet Repositories
Create a new Local Repo
Example from the course:
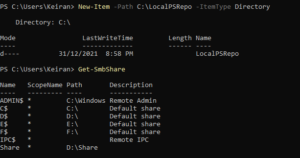
Run New-Item -Path C:\LocalPSRepo -ItemType Directory
From there you can create a new SMB Share on that folder by running
New-SmbShare -Name LocalPSRepo -Path C:\LocalPSRepo\
**Remember back in part 1 we discussed about Auto Loader. Here we have not manually imported SmbShare, however, autol oader has found the module and loaded it for us.
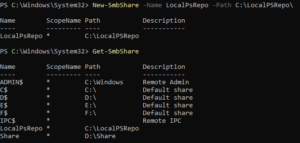
Run a Get-SmbShare again to see the new share added.
To register the repository as a default repository and trusted, you can run the below command, this will set up the source location and the script source location for the private repository.
The -Name does not need to be the same Name as what you have called the share.
The -InstallationPolicy will set whether the repository is trusted or not.
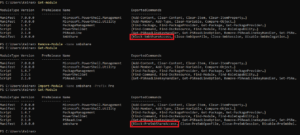
Run a Get-PSRepository again and you will see the Repository added. This will now allow the PowerShellGet provider to search through this new repo to find modules and scripts as well as still searching the PowerShell Gallery.
To set the PSRepository from Untrusted to Trusted or Trusted to Untrusted, you can do this by running the below:
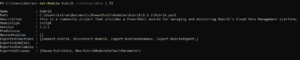
A useful tool is the Find-Module command, which will help find certain modules. There are no required parameters, but you can use such parameters as -MinimumVersion, -MaximumVersion, -RequiredVersion and -AllVersions.
The –IncludeDependencies will display a list of other modules that are required for the module to function correctly. When you go to install the module, the other dependencies should also be installed with the module at the time, you can however go ahead and install those dependencies separately.
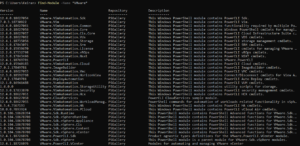
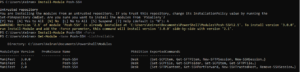
Running Find-Module on its own will return results for the latest versions of all modules available in the set PS Respositories.
Running Find-Module -Name *<name>* will search and return results that include the name in wildcard form.
Running Find-Module -Tag <name> will send back results with the tag that is referenced for a module.
**By default, the latest version will be returned. If you run the -AllVersions will display all available versions to find a specific number to install.
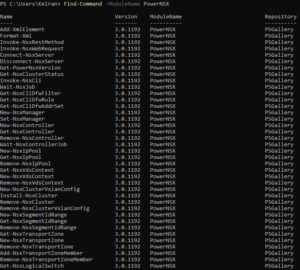
Alternatively, running Find-Command -ModuleName <module name> will display all the commands within that module, this will help when choosing if the module is the required module.
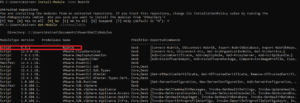
You can also drill down to find which module a specific command is located. Find-Command -Name <Command> will return a list of modules containing that command.
Running Install-Module -Name <Name> will install the module without any other parameters. However, there are a few parameters that are available, such as the minimum and maximum versions.
The -AllowClobber will give you the option to install a module even if the commands conflict with an already installed module.
-Scope defines the location in which the module is to be installed to, setting as CurrentUser will place the module in a path on the CurrentUser will be able to access (as available in the Environment Variable path) whereas setting the -Scope to AllUsers will place it in a default location that is, of course, available to All Users.
Depending on the version of PowerShellGet, the default scope for the module will be determined by the version that is installed.
PowerShellGet V1 = All Users (Preinstalled with Windows 10) PowerShellGet V2 = CurrentUser (Installed as part of PowerShell 7)
The newest version will be used by default.
To install a module, it is as simple as running Install-Module -Name <name>
Alternatively you can install to an alternate scope, however, if you do not have elevated privileges, you will receive the below error, and will not be able to install to the AllUsers default location.
Run the command on it’s own and it will go to the default scope, CurrentUser.
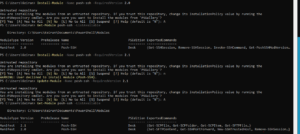
As the repository is untrusted, you will receive a prompt requesting if you would like to trust the repository. It will also advise you can set the InstallationPolicy against the repository.
As a bonus. When installing a module that is the latest version and there is already a previous version available, you will receive a warning that there is already a version installed. The Warning will request if you would like the latest version installed side-by-side.
Update modules
From time to time authors will keep their modules up to date, and it is best to update them to get patches and features related to issues running a cmdlet or new functionality.
To force the installation of an older version, you can run Install-Module -Name <name> -RequiredVersion <version>
To update this to a specific version, and not the latest, run Update-Module -Name -RequiredVersion <version>
** Updating a Module does not remove the previous version. This must be removed by using the Remove-module command.
When not specifying a version parameter, the latest version will be installed.
If the module was not installed by powershell, then Powershell will not be able to update the module as the PowerShellGet core does not have any record of it being installed.
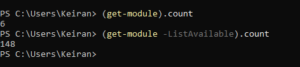
Running (Get-Module).count will show the number of modules installed via the PowerShellGet framework. This will not show any that have been installed using another method.
Running (Get-module -ListAvailable).count will show all Modules installed on the computer and any that are were not installed using PowerShellGet.
Removing and Uninstalling Modules
Removing Module will remove the module from the session but not from being installed on your computer. It is the opposite of Import.
Uninstalling will remove the module from your computer = The opposite of using the Install-Module command.
Run Remove-Module -Name <name> to remove the module
The module is still installed and can be viewed by running Get-module -Name <name> -ListAvailable
When using Uninstall-Module the only required parameter is the -Name However, there is still the option to choose the version of the installed module. This is handy for when you update a previous version and need to clear out the older ones.
When running Uninstall-module -Name <name> (that’s not including a version) the latest version will be uninstalled and the lower version numbers will remaining. To remove all, then you will need to use the -AllVersions parameter
DEMO: Offline Module Installation
This is a method usually used in dark sites or air gapped sites that have strict security configurations, or require security teams to evaluate the modules before providing and marking them as approved modules.
Save-Module
This command can be used to download/save the module (Without installation) to a computer that is connected to the internet.
Save-Module can allow you to inspect the code of the module as you are not simply installing the module. The code is already pre-scanned in the PSGallery, but you can also inspect it yourself
You can still download using parameters for specific versions, but there are two required parameter. -Name and -Path. As you are not installing this and you are saving to copy to another location, you will need to specify a path.
Save-Module -Name <name> -Path <Path>
To install a module from an offline seed. The module should be copied to a default repository in the environment variable path. Once you know the location, you can run a Copy-Item -Path <Source> -Destination <Destination> -Recursefor the module to be located by the PowerShellGet Framework to detect
Diving into my 2022 goals and starting at revisiting PowerShell, this post is part 1 of my notes that I have taken while going through Matt Allford‘s “Extending PowerShell” Pluralsight Course. Please head over and check out the course and let him know what you think. There is a lot of indepth detail and knowledge on how to work with PowerShell Modules and context around each of the topics.
Snapins
Previously Snapins were used back in version 1 of PowerShell – they were adding commands as oppose to modules that hold series of commands.
Required installation from an installer file and registered to the local machine
Lacked capabilities like dependencies.
Modules
Modules – Preferred code package method.
New
Comes as a set of files, but some contain DLL files.
Allows for reuse and abstraction of PowerShell commands
Package of related commands, grouped together and can be vendor specific so that you only need to load the modules that are required. There are some built in modules that are imported by default and other modules can be added into the Environment Variable to load later on.
An example module available.
Bits Transfer Module
This module contains Get-BitsTransfer, etc. -= none of these commands work outside of bits. But all Get, Remove, Set, etc. are in a single PowerShell module
Each module is an upgrade to the previous.
Sit in the PowerShell repo
PSModulePath is default, but any location can be used
Copying and pasting a module is fine to import, but there are better ways to install and import
Module Auto-Loading can auto load in modules when you run your PowerShell, but you don’t always want this in case there are conflicting. e.g. Get-VMis both VMware and Hyper-V commands,
-noClobber is a command to prevent conflicting commands from installing when an existing command has already been installed into the session
Install Module (Install-Module)
The Install module does not import the module for use into the PowerShell session, but it does install the module onto the local machine into a path that is in the Environment Variable location, allowing for the module to be either imported into a session later or added into the Auto-Loading.
Using theInstall-Module -Name <name> will install the module from the PowerShell Gallery if it exists.
In the above example, once the module is installed, it is not automatically imported. The Import-module needs to be run. As this is running in PowerShell 7 Core, the Vmware.ImageBuilder is not supported and is not imported.
DEMO – Working with Module Paths
To find the PsModulePath, Use the $env:PSModulePath commands. However, you can also add -split “;” to separate out the lines where a semi colon is located.
To add additional default locations for modules, you can add them via $env:PSModulePath = $env:PSModulePath + “;C:\<My module path>”
By adding the semi colon to the start of the location above, this will allow the environment path to see this location as a separate path instead of just continuing the line of the previous path. E.g. C:\Windows\system32\WindowsPowerShell\v1.0\ModulesC:\<my module path>
Setting $env:PSModulePath will only be set for the sessions. In order to make it persistent, it will need to be added to the PowerShell Profile, or added to the PowerShell Environment Variable. This can be done via windows GUI or through Powershell
The above commands are first creating a cmdlet with the environment set. This will then allow the second command to run and list out the existing paths already set in the system environment variable path.
The 3rd lone is creating a new cmdlet that is adding both the existing system environment variable paths and the new path together (hence the + sign) – keep the semi colon prefix in mind
The last command is setting the System Environment Variable path to include the $newpath cmdlet. You need to make sure you add the previous Environment Variable location and cmdlet together with the new path each time to ensure the complete PATH is set.
DEMO – Importing and Auto Loading Modules
How modules get imported explicitly and automatically.
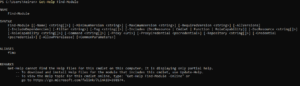
First run Get-Help Import-Module to view the mandatory parameter.
– Only required is-name Run Import-Module -name <name of module> to install the module.
Auto-loader
The auto load feature is used when a cmdlet has been run that is part of a module that has not been imported but is sitting in a module that is located in the Environment Variable Location. Powershell will search for the required cmdlet and import the module
Auto load won’t work if the module is not sitting in one of the Paths in the PS Variable Path.
Below in the example, using the command Get-SmbShare searches for the module and then auto loads the module as it is an available option.
Import a module that is not in a Environment Variable location
In the event you have a module that has been downloaded to another location that isn’t in the Environment Variable location, you can easily import it using the full location path in your import command.
Import-Module -Name C:\<Path to file>\
e.g Import-Module -Name C:\PowerShell\Module
Use Import-Module to import with a prefix
As above, we mentioned the -NoClobber parameter that will skip any commands in a module that are conflicting with an already imported module. Another method to avoid a conflict is to add a prefix, allowing the commands to be imported uniquely into the session.
In the below example, SmbShare is already loaded and does not contain a PreFix (Block-SmbShareAccess)
The Module is then removed and then Imported back into the session with use of the -PreFix parameter.
This will now add the prefix of “Pre” to the front noun in the command. (Block-PreSmbShareAccess)
So when running the command after importing with a prefix it will need to be,.
C:\> Block-PreSmbShareAccess
Demo – Indentifing Commands in a Module
Running Get-Command is not a great way to search for a particular command in a PS module. This will load every command that is available. This is far from ideal.
If you run Get-Command -ListImported This will only show you the commands for, you guessed it, the commands only available in the modules that are currently imported into the session.
In order to only find the commands of a particular module that is currently imported and not receive commands for other modules, then using the -Module parameter will cut this list down to only those commands that are required.
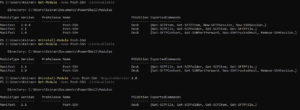
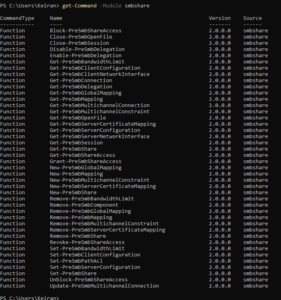
Alternate to getting the commands for a particular module is to use the Get-Module SmbShare – however, this will only listed some of the commands off to the side under the “ExportedCommands” column.
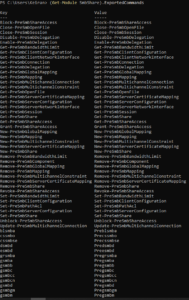
To view this better, use the (Get-Module SmbShare).ExportedCommands to display this in a nicer way with also the key and value columns.
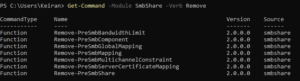
Finding a command by using the Verb
Using the PowerShell Verb-Noun layout, there may be times that you want to do a particular action and know that the verb you need to perform the action. You can search on the verb that is part of the module to get a list of the commands that are available to help narrow down to the right one. This is done using the -Verb parameter followed by the verb to search for.
Get-Command -Module SmbShare -Verb Remove
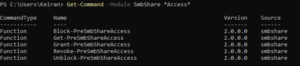
Finding a Command by Wildcard
There may be a case where you only know a part of the command that you are looking for and need to perform a wildcard search. This works by still using asterixis on both sides of the word you are looking for.