Backup Server:
The backup server contains several components that the backup operator can interact with through the console.
The console is just one of the components that can be installed on the Backup Server, this is where you can create, run and manage backup jobs, as well as configure backup infrastructure.
The backup Server allows for coordination of backup, replication and restore jobs as well as running backup and SureBackup verification tasks.
The backup server coordinates the resource scheduling for attaching disks to proxies and managing the streams to the repository, honouring the configuration for how mange tasks can be ran against certain infrastructure.
When first deployed, the backup server is also preconfigured as a VMware Proxy as well as the default repository. The first repository is configured as C drive by default
Backup and Replication Console:
The backup and replication console can operate from any windows computer that has access to the Backup server. By default, the console is installed alongside the backup services on the backup server, however, a separate installation can be made.
The console use Simplified and Protected GSS-API Negotiation Mechenism (SPNEGO) that is the Windows Built-in authentication mechanism.
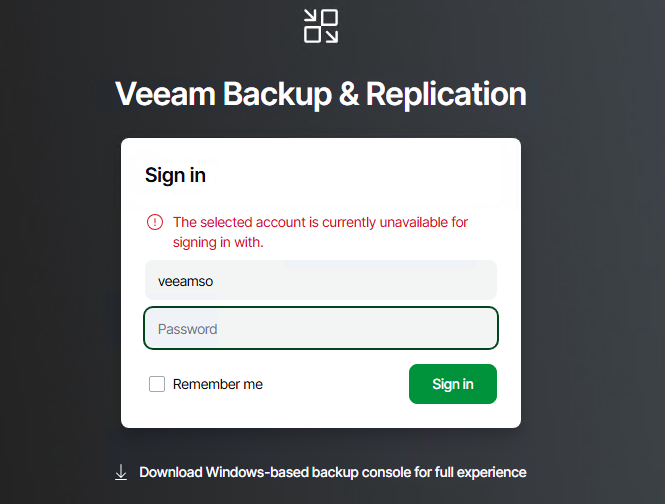
The console can only access the backup infrastructure to interact with it via credential login. When the console is first opened, a login prompt is displayed to create the connect to the server – You can also point the login to any of the servers you may have deployed – Allowing you to have a dedicated console server and backup server.
The Console can be deployed to multiple machines or opened several times on the same machine and connecting to the same server as this can help with opening different windows.
You CANNOT use the same console version to connect to different versions of Veeam BR. You need to use the matching version. If you are using 2 different installations of Veeam Server, you will need to run 2 different versions of the console to connect.
If the console connects to a server that is updated, the console will check and then update accordingly. This is only supported on the GA version, and not Preview, Beta or RTM.
** Downgrade of the console is not possible.
When installed the remote console, multiple components are installed alongside.
- Veeam Backup PowerShell Module
- Veeam Explorers for;
- Microsoft Active Directory
- Exchange
- Onedrive for Business
- Sharepoint
- SQL Server
- Teams
- Oracle
- PostgreSQL
- SAP HANA
- Data Mover Servive
- Used to run data processing tasks for VBR
- Recovery Service
- Used to perform recovery tasks
- Veeam Installer Service
- Used to install agents, transport services and other components on remote servers (Repositories, Proxies, etc.)
- Veeam mount Service.
- Used to mount backups during the restore process.
Things to keep in mind:
If you are deploying the console remotely, you can deloy it behind a NAT, but the Backup Server MUST be outside of the NAT. You also cannot remotely install the console out of the NAT while the backup server is in behind it.
Veeam Backup and Configuration Database
There are two options for running the Veeam BR configuration database that holds data for the Backup Infrastructure, Jobs, sessions and other Config data.
You can install Veeam with either Microsoft SQL or PostgreSQL database. Each can be install remotely on a dedicated SQL server, however by default it will be installed locally. Veeam includes either Microsoft SQL Express or PostgreSQL installers as per of the installation process. Be aware that using Microsoft SQL Express will bring in limitations with how much data can be installed and how that data can be accessed.
*Some other Veeam software still support Microsoft SQL only – Keep this in mind when designing you backup infrastructure.
Once a week and when the VBR Service is restarted, Veeam will run a database clean up and maintenance tasks for the database internal statistics. The maintenance task will also defragment indexes and clear unused data.
The maintenance task will log any changes and tasks performed in %ProgramData%\Veeam\Backup\Job.DatabaseMaintenance.log. file.
Veeam Backup Powershell Module
Powershell has become almost the default command line tool for interacting with Windows applications. Veeam Backup and Replication includes a PowerShell module that is extending the native Windows Powershell.
The Powershell snap-in adds a new set of cmdlets that are specifically built to interact with the Veeam Backup Service. This allows the ability to create customer scripts to pull reports or to automate management of backups jobs and restores.
There is a full Powershell reference guide available.
Virtualization Servers and Hosts
There are 4 different types of servers that can been added to the backup infrastructure of Veeam Backup and Replication. Each carry a different role in which they play within the entire infrastructure.
- VMware vSphere Server
- Can be a source host or a target host for backups and restores.
- VMware Cloud Director
- Source Host and Target (when using Cloud Director Replication and CDP).
- Microsoft Windows Server
- Can be used as a Backup Proxy or Backup Repository (Using NTFS or ReFS format)
- Linux Server
- Can be used as a Backup Proxy or Backup Repository (Using XFS Format)
It is ideal to only have 1 instance of the server in the backup infrastructure – Add it via Hostname or IP only, not both.
Physical servers can also been added into the infrastructure as well as cloud servers.
Additional server types that can be added, however some require additional plug-ins. :
VMware Backup Proxies
The VMware Proxy works just like a proxy, it sits between the backup server and the backup infrastructure components, but it is also the connection point for attaching and processing host items (e.g. Using Hot-Add to backup data from a VMware VM Disk)
The general tasks a VMware Backup Proxy:
- Retrieving VM data from the Production Storage
- Compressing
- Deduplicating
- Encrypting
- Passing to another Repository like running a replication job.
Usage Scenarios
- Backup
- Replication
- Quick Migration
VMware Backup Proxy Transport Modes
There are a couple of different ways that a proxy can be configured in order to backup if certain techniques are unavailable.
- Direct Storage Access (Use of Hot Add from VMs – Proxy must be virtual)
- Virtual Appliance
- Network (Connect through the VMware hosts to backup)
When the VM disks are running on a storage system with access to the Backup infrastructure, your proxy can also use the backup from Storage Snapshot mode.
In most cases, Letting VBR automatically select the proxy mode is perfectly fine – If one method is not available due to communication issues or other limitations, then the next viable mode will be selected. Failing over to a different method does not remove CBT. You can also manually select the preferred option for your infrastructure.
VMware Backup proxy Deployment:
In most cases, you will need to deploy a dedicated proxy server that will be able to handle the load, but by default the VBR server will be preconfigured as the proxy until another is deployed. Deploying multiple backup proxies will allow Veeam to distribute the load across the proxies to provider better backup performance and greater redundancy.
Proxies are now supported on both Windows and Linux, there are some requirements around configuring for Linux.
VMware Backup Proxy Services and Components:
There are 2 services that are required to be installed on the VMware Backup Proxy to operate the required tasks.
Veeam Installer Service: This service is used to analyse the system and install and upgrades necessary components for the server, this is installed on Windows Servers.
Veeam Data Mover: This service does most of the heavy lifting by performing such tasks from the Veeam Backup and Replication Server – Retrieving Source VM Data, Data Deduplication and Compression and moving the data to the target storage as the backup location.
VMware CDP Proxies
The VMware CDP Proxy performs tasks of moving data between source and target hosts. There are a number of tasks that the Data Mover performs differently to just a regular proxy.
- Receives VM data from the production Storage
- Aggregates Changed Data
- Prepares data for a short-term restore point
- Compresses and deuplicates data
- Encrypts and decrypts data
- Sends data to the storage in the DR site or to another VMware CDP Proxy
The VMware CDP Proxy Is required for use with the CDP component of Veeam Backup and Replication. This a different use case to the standard VMware proxies.
VMware CDP Proxy
The CDP Proxy can be installed on either Windows or Linux based servers that have been add to the the Veeam Backup and Replication infrastructure section. In order for the CDP service to operate correctly, there must be a source and target proxy configured.
To optimise the performance of the CDP jobs, the VBR server will take into account the load across all proxies that are pooled together and assigning each tasks as required.
As a design choice for better performance, having a set of proxies (source and target) for one direction is recommended. One source proxy to a target proxy from site A to B, and another set of proxies for going from site B to A.
The CDP Proxy services are fairly similar to those used on the VMware Backup Proxy, however there is an additional service in use.
Veeam CDP Proxy Service: Manages all CDP activities such as data aggregation, data compression and decompression, data transfer and other tasks.
Veeam Installer Service: <Same as VMware Backup proxy>
Veeam Data Mover: Handles traffic sent during failback
VMware CDP proxy RAM and cache.
CDP proxies use intelligence to allocate RAM to ensure data is processed as efficiently as possible. If the RAM is configured as 16GB or LESS then CDP will split the resource usage 50% each way – this means that 50% is used for the OS and 50% is used for data processing. If there is more than 16GB allocated to the proxy server, then 8GB will be assigned to the OS and the remaining will utilised by the CDP data processes to ensure the most efficient processing available. When a disk has been processed, CDP will allocate 1MB of RAM to ensure data processing will not stop even if some disks cause issues or process too much data.
As a fail safe, Data is only removed from the cache or memory on the source once the proxy receives notice that the target proxy has successfully received the data.
Requirements
- A CDP Proxy must be Windows or Linux – Can be Physical or Virtual.
- CDP Proxies are not available to deploy unless there is a vCenter or Cloud Director server configured in the backup infrastructure in Veeam Backup and Replication.
- When using a physical server – Must have a fast network link between hosts and CDP Proxies.
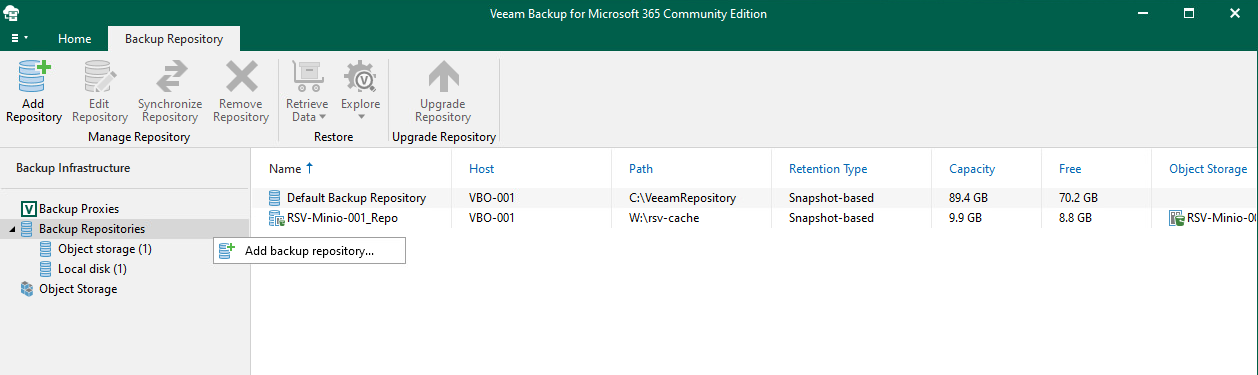
Backup Repositories.
Direct Attached Storage – Virtual and Physical.
There are 3 types of Backup repositories that can be used for Veeam Backup and Replication that are directly attached to the server.
There are where the disk is attached to the server (I.e. VMDK attached to the VM used as a repository or physical disk installed in the physical server)
Microsoft Windows Server:
Several different ways to use a MS Windows Server as a Backup Repository:
- Local/Direct (USB Drive) attached storage
- iSCSI/FC SAN if server is connected to a SAN
There are 2 Data Mover servers that are in play during a backup. There is a DM on the Proxy, and one on the Repository, these both will talk to each other to transfer data over WAN or LAN efficiently. The Data Mover is installed automatically when the server is added to Veeam BR.
A Windows based repository can also be configured to run the vPower NFS Server function Allowing Veeam BR to provide ESXi transparent access to backed-up VM images that are sitting on the backup repository.
Requirements:
- Must meet all system requirements
- Server must be added as a managed server inside Veeam Backup and Replication.
- To be able to utilise Fast Clone, must use ReFS on the target disk and meet any additional requirements for this function.
Linux Server:
Like Windows, you can connect to the disks on the backup repository in several ways.
- Local / Direct (USB Drive) attached storage
- iSCSI/FC SAN if Server is connect to a SAN
- NFS
A Linux repository provides additional security measures as well, including: Hardened Repository utilising immutability and single-use credentials.
Again, similar to the Windows repository, there are 2 Veeam Data Movers that are in play to communicate and transfer data. These are located on both the Proxy and the Repository.
Requirements:
- Must meet all system requirements
- Must add machine to Veeam Backup and Replication as managed Server
- SSH Daemon must be properly configured and SCP utility is available on Linux host to enable the installation of the Veeam Data Mover.
- To enable Fast Clone function, need to meet the FC Requirements – min. XFS with reflink=1 enabled.
- Open required ports on the firewall
To utilise both Hardened and standard repositories on the same Linux server, you need to use Single-Use Credentials when adding the host. – Standard repository will disable immutability and use persistent credentials.
Hardened Repository:
A hardended repository enables a series of additional security measures to ensure that backed up data is secure and unable to be tampered with. A hardened repository is only available when using a Linux based server.
A hardened repository provides the below additional security measures:
- Immutability = Backed up files can have a time limit assigned to them for how long they are locked, providing the ability to protect from modification and deletion during this time period.
- Single-Use Credentials = This is a set of credentials that are only used once to deploy the Veeam services (Veeam Data Mover and/or Transport Service). These credentials are only added once to the Veeam Backup and Replication in order to run the install. These are not added and saved to the credential store, providing an additional layer of security and not allowing the credentials to become compromised.
** For security reasons, not additional roles can be assigned to the hardened repository except for the use of the VMware Backup Proxy running in Network mode (NBD). Hardened Repository as VMware Backup Proxy.
Network Attached Storage
SMB:
To communicate with SMB Backup Repository, Veeam utilises two Veeam Data Movers. Not to be confused with the direct attached repositories, the two used are Veeam Data Mover on the VMware Backup Proxy & Veeam Data Mover on the Gateway Server
Veeam Data Movers are unable to be installed on an SMB share and a Gateway Server is required to be deployed to connect both the Proxy running Veeam Data Mover and the target SMB share to enable efficient data transfers over LAN or WAN.
When targeting an off-site SMB share, it is recommended to deploy an additional gateway server on the remote site that is close to the SMB repository.
Requirements:
An SMB repository can be assigned to a Microsoft Windows machine that meets the requirements.
NFS:
As is the case with SMB, both the Veeam Data Movers for Proxy and gateway servers are required as a VDM is unable to be installed on the NFS share. The processing and communication sequence is the same in that the Gateway server established the connection with the proxy server to move the data efficiently.
** Windows Gateway servers cannon be used on NFS shares with krb5i and krb5p support
Requirements and Limitations:
- The NFS repository must provided R/W access to the Gateway server
- Both Windows and Linux servers, and NAS Storage that supports the NFS Protocol
- The server must also meet all of the System Requirements
Requirements for Gateway Server:
A machine installed with the gateway Server role and used to communicate with NFS backup repositories required the following:
- Both Windows and Linux can be used as gateway servers – meeting the System Requirements
- The server must be a managed server within the Veeam Backup and Replication console.
- Backup server must have R/W access to the NFS repository to allow automatic gateway selection
- When using automatic gateway selection for NFS, the backup jobs can use the same machine as gateway for the repository and proxy. Ensure the below is configured for the backup proxies:
- All required proxies have R/W access on the NFS repository
- When configuring for automatic proxy selection, provide R/W to all procies in the VBR Infrastructure
- Ensure the NFS Client package is installed on the Linux Proxy server
While there are general requirements above, a Linux Gateway server has some additional requirements:
- The NFS Client package must be installed
- Must provide either root or elevated root credentials in order to authenticate with the Linux gateway server
- Veeam Backup and Replication will only use the highest version of the NFS protocol that is enabled on the NFS repository.
If the NFS repository has a newer version, then VBR will require the repository to be edited. Running through the edit wizard (without making changes) will run the DB update process after collecting the repositories information.
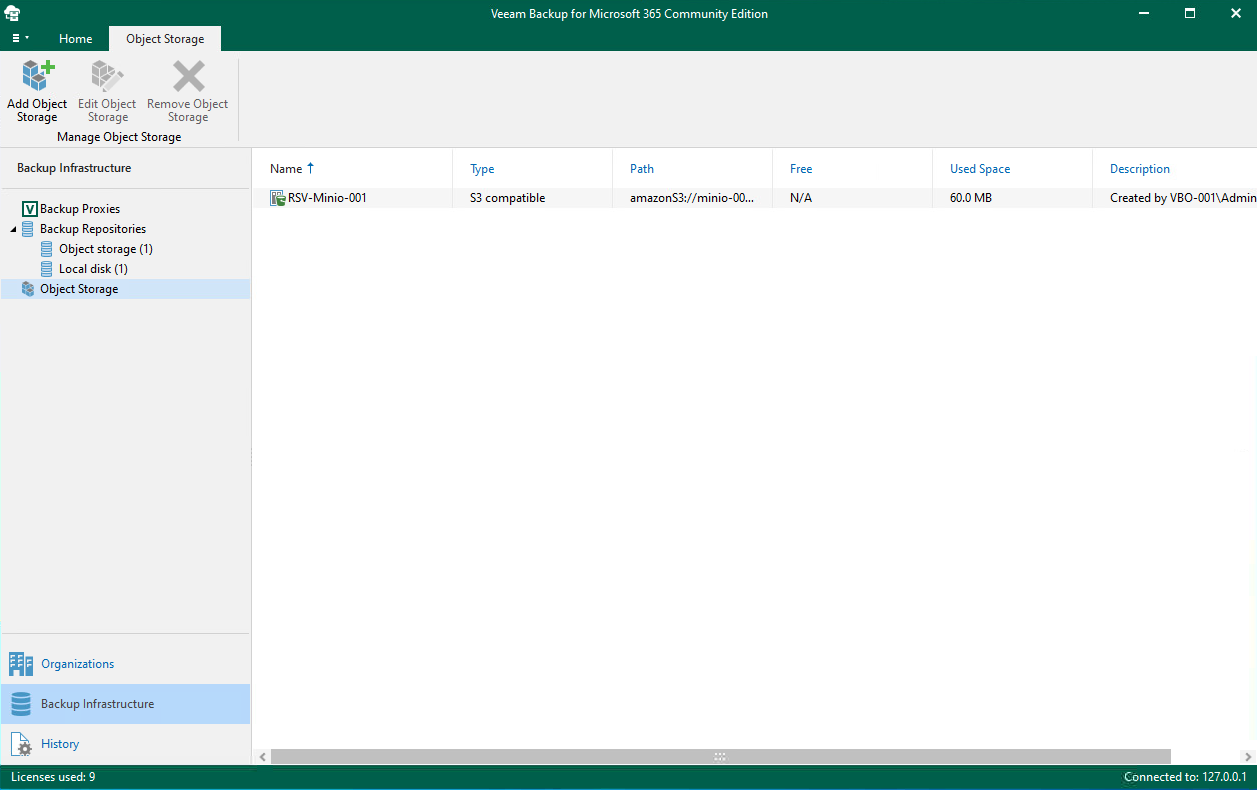
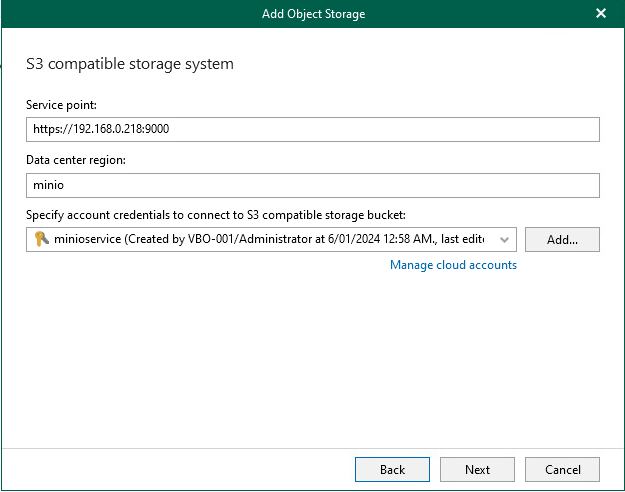
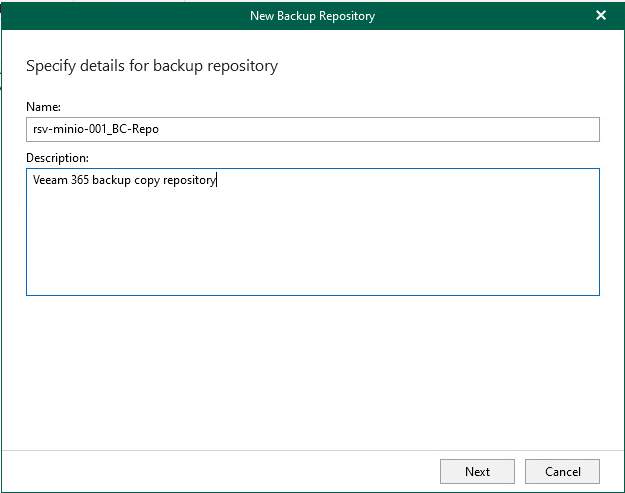
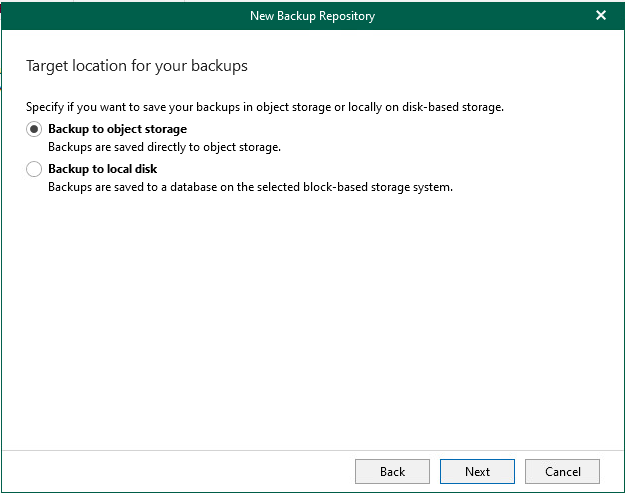
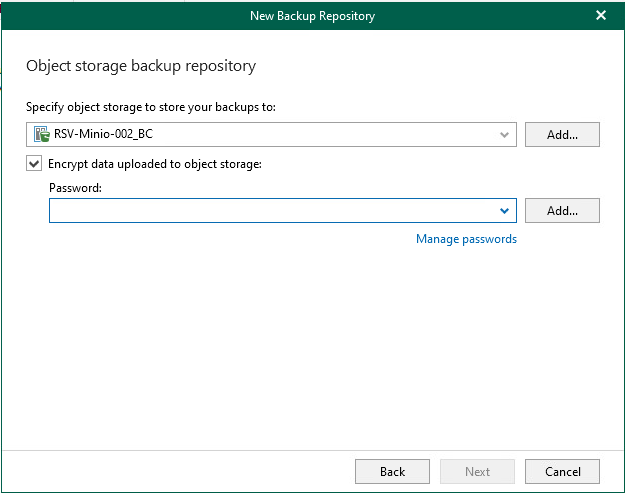
Object Storage:
Object storage is intended for long term retention of data that can be placed in either the cloud (AWS S3/Azure Blob) or an S3-compatible solution running locally/on-premises; such as MinIO.
Starting in Veeam BR 12, Backups are now able to store direct to object as the primary repository, this is where the data will first back stored before going to a second copy (in most cases, off site.)
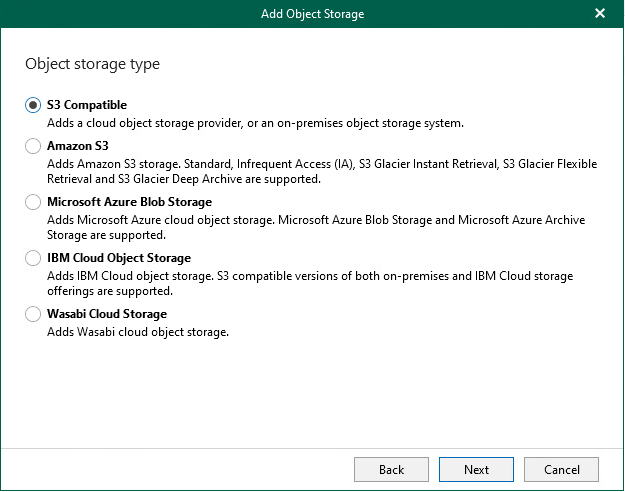
There are a number of cloud object storage providers supported available;
- Amazon S3, Amazon S3 Glacier or AWS Snowball Edge
- S3 Compatible, S3 Compatible with Data Archiving
- Google Cloud
- IBM Cloud
- Wasabi Cloud Storage
- Microsft Azure Blob, Azure Archive Storage and Azure Data Box
- (Veeam Data Cloud Vault – VBR 12.1.2.172 or higher)
Object Storage is available to be used in multiple ways:
- Target Repository as for backup and backup copy jobs
- Object stoage source from which backup copies will copy restore points from
- Target repository for file backup jobs
- Files cannot be backed up to an object repository if the repo is part of a performance extent.
- Target repository for Cloud Director Virtual Machines
- Target repository for virual and physical machines by using the Veeam Agent for Windows and Linux.
- Target repository for backups using the MacOS Client
- Target Repository for Nutanix AHV
- Target Repository for oVirt by Veeam Backup for Oracle Linux Virtualization Mnager and RedHat Virtualization
- Target repository for Applications running on Kubernetes persistent volumes created by Kastan K10 Plugin
- Target Repository for the configuration backup for Veeam Backup and Replication.
Object Storage can form part of the SOBR (Scale-out Backup Repository) where it can be used on each of the tiers.
- Performance Tier: For quickly accessing stored backups
- Capacity Tier: Available for offloading backups to cloud storage
- Archive Tier: Infrequently accessed backups, mainly considered cold storage
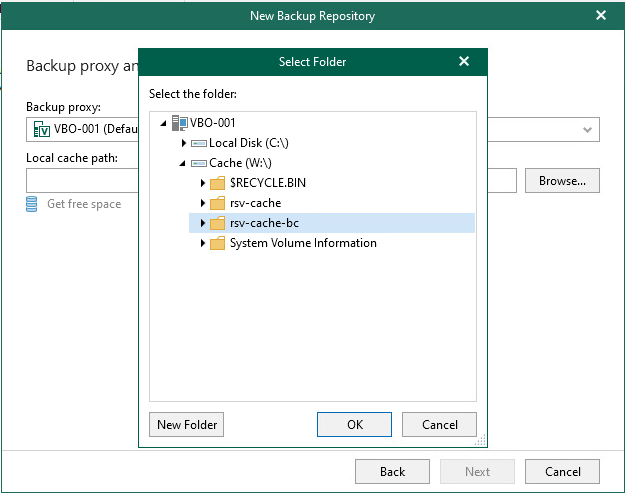
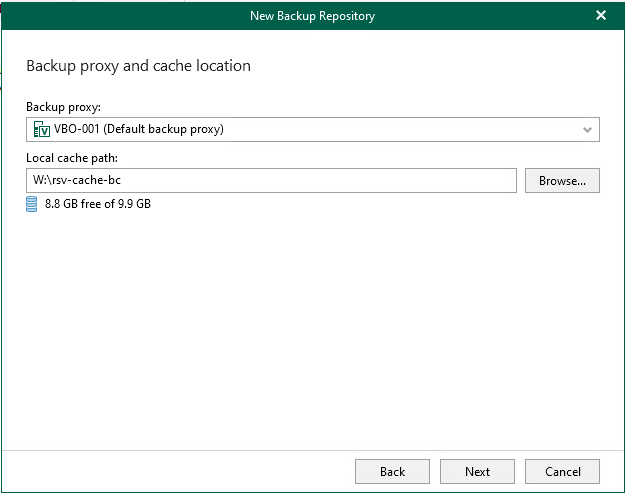
Veeam BR will use a VMware backup proxy to transfer data and a mount server to process guest OS application and perform item recovery.
VMware Backup Proxy will connect to the object storage using one of the below methods – This is all dependent on the type of job
- Directly: VMware Backup Proxy will transfer data direct to the Object Storage Repository
- VMware Backup Proxy will transfer data to the object storage repository utilising a gateway server (IF backing up multiple VMs in a job, then a gateway server pool can be used)
Considerations and Limitations
- Make sure all required ports are open to and from the object storage.
- Backup Server and Gateway server require internet connection to validate certificates
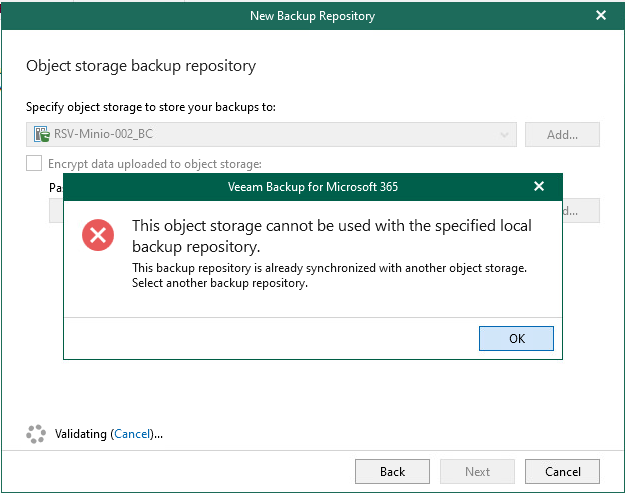
- A second backup server can be attached to the same Object Storage, however it must be read only to ensure that there is no split brain between backup servers where data is mismatched