Tag: Data Protection

  • Configure Object Backup Copy in Veeam Backup for Microsoft 365

    Configure Object Backup Copy in Veeam Backup for Microsoft 365

    In early 2023, Veeam released their next realease of Veeam Backup for Microsoft 365, with v7.  This brought a load of new features, allowing it provide faster and more resilient backups for Microsoft 365.  One of the biggest features was the ability to perform backup copies of your tenancy, allowing you to keep a second copy whether that be on another datastore, another data centre or off up into the mighty cloud.

    Backup copies aren’t new, they have been around in Veeam Backup and Replication for over 10 years, and it only made sense to extend this feature to 365 backups.

    A backup copy is a separate job from the primary job, this allows more flexibility and ease of use – so it is important to name the backup copy with something that distinguishes it from the primary job.

    Before we get into the configuration side of things, there are a couple of pre-requisites for being able to run a backup copy:

    • Only Object Repository to Object Repository is supported. You cannot perform a backup copy of the original JetDB – If you want to backup your JetDB, you could use Veeam Agent Based backup to take a copy of the JetDB files or veeam Backup and Replication to take a backup of the VM hosting those JetDB files.
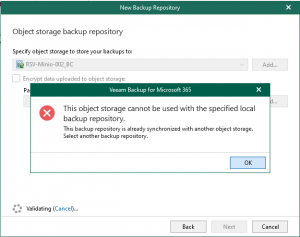
    • Your Object target must have it’s own Proxy/Repository attached, you cannot share with Object targets. You will receive an error if you try to use a proxy folder that already contains data.
    • If you want to use Immutability, Object Lock must be enabled on the bucket before configuring the job.

    That’s pretty much all there is to watch out for and consider. The rest of the steps should be fairly familiar if you have already gone through and set up Object Repositories for your existing jobs.

    Config

    1. If you are using an on-prem solution for your object storage, like MinIO or Object First, you will need make sure your storage is pre-confgiured and accessible from your 365 server.
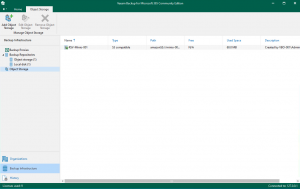
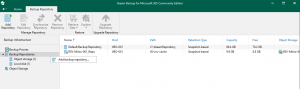
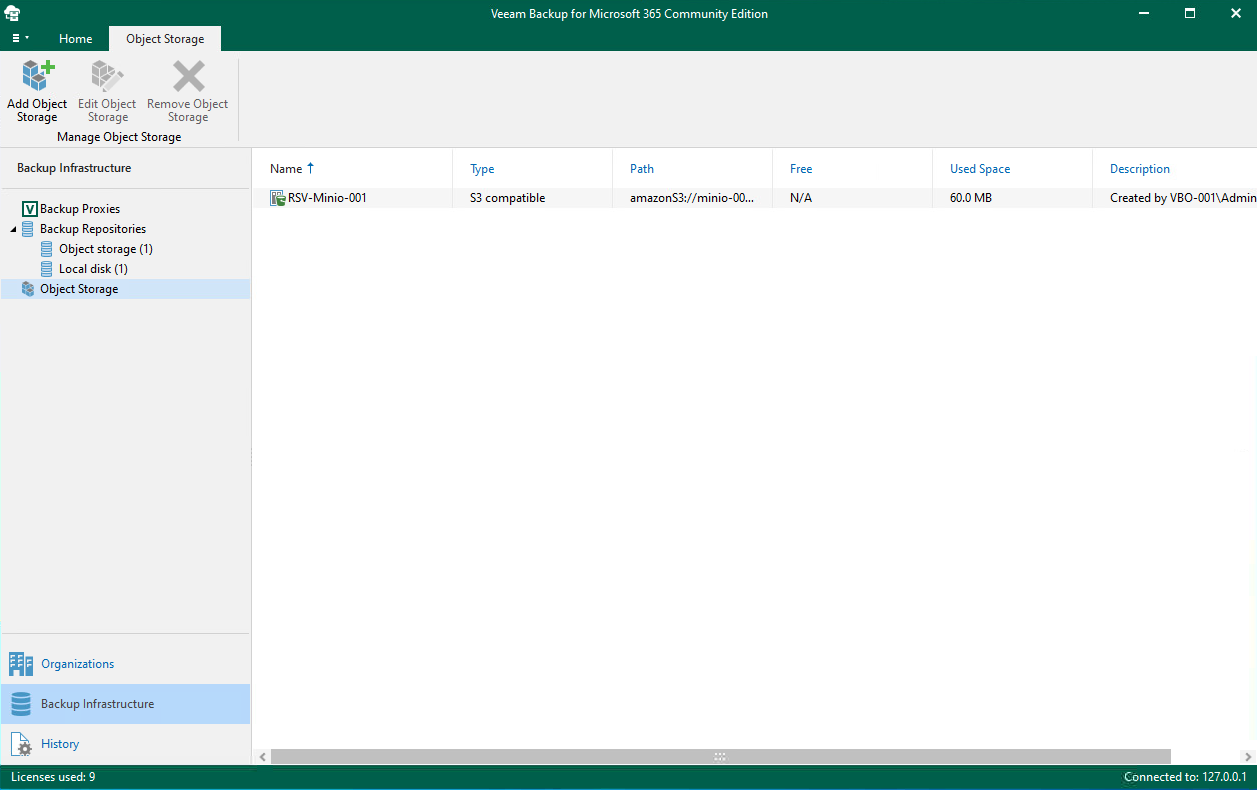
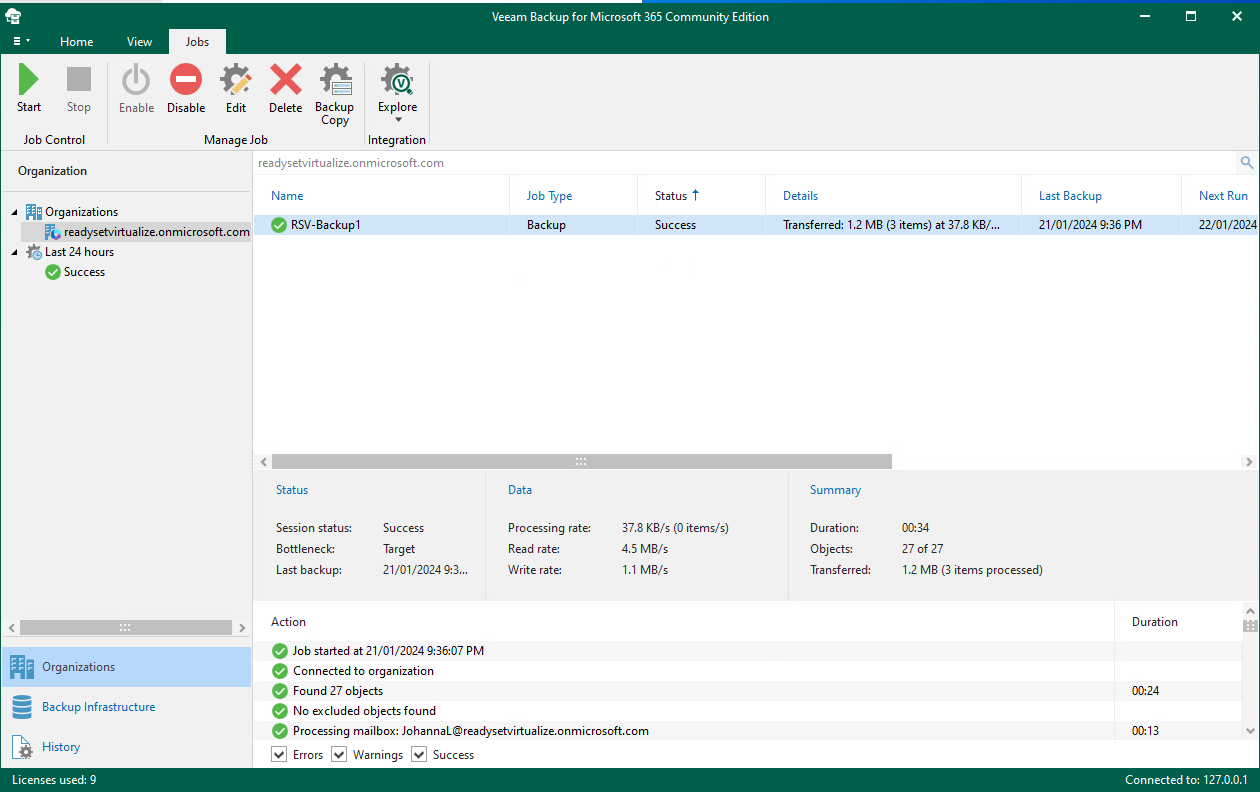
    2. Create your bucket on your Backup Copy target storage and confirm that you can access the location. Below you can see that minio-001 (left) contains my primary backup that i hav already configured and taken an initial full backup of my 365 account. My Backup Copy target, minio-002 (right) currently shows no backed up data for 365,


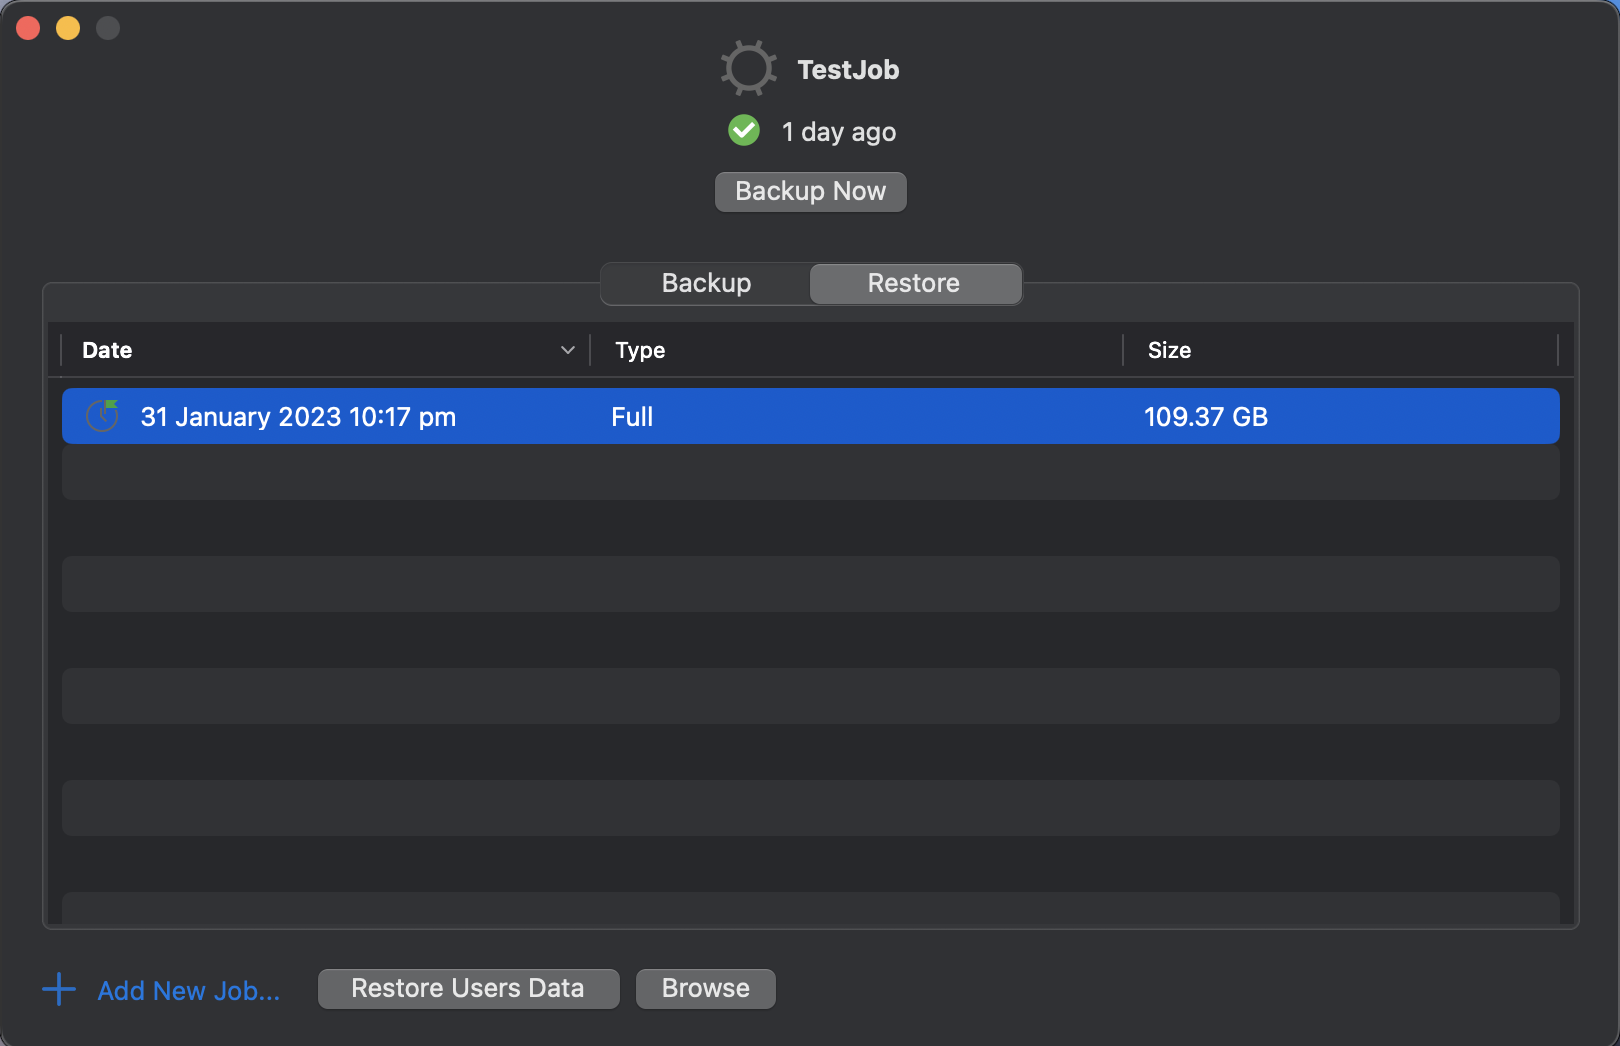
      You will also note that i currently only have 1 backup job configured.

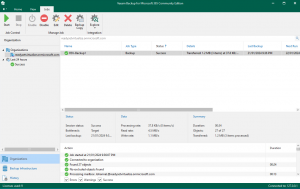
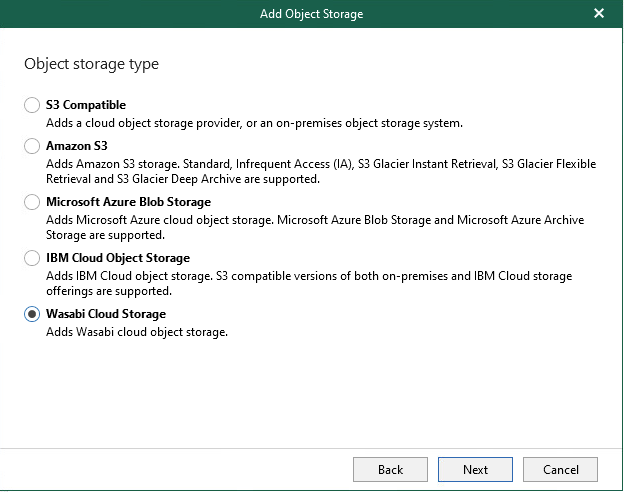
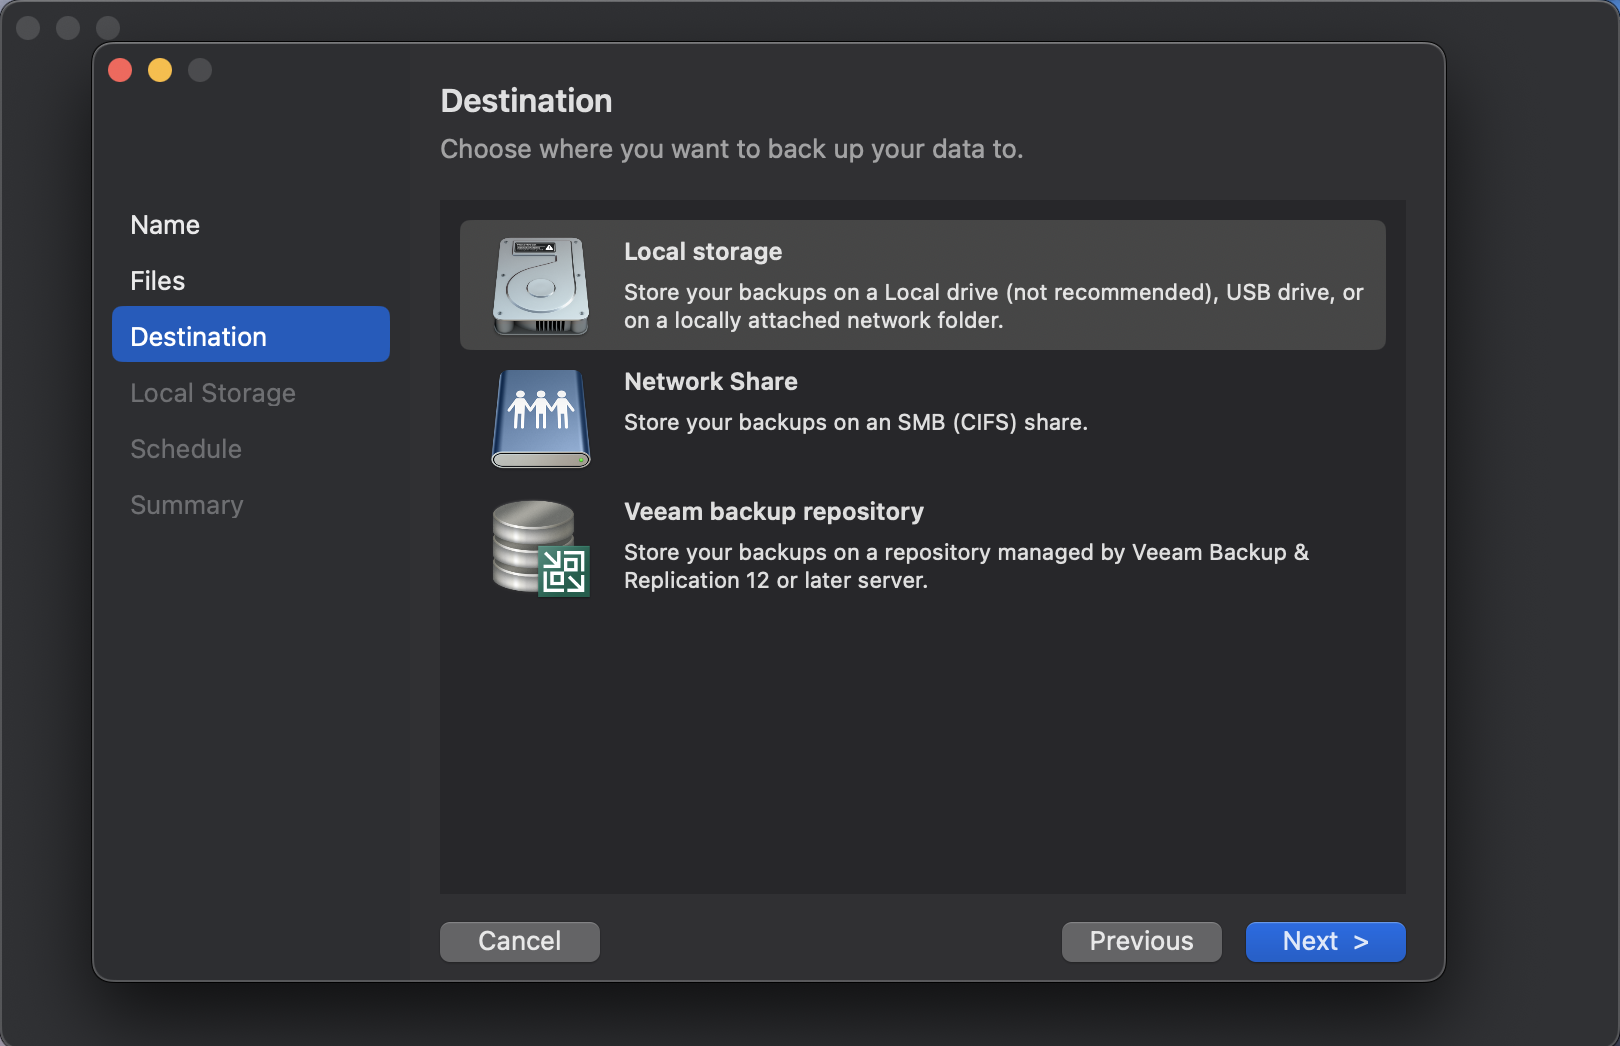
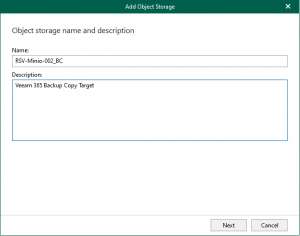
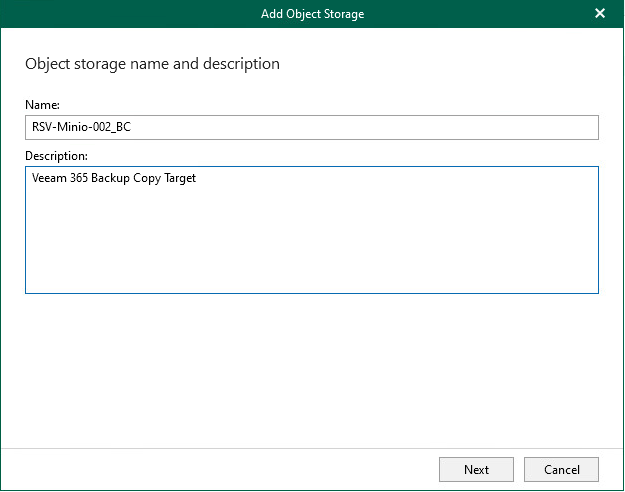
    3. Navigate to Backup Infrastructure -> Object Storage and  select Add Object Storage.  This will open up the Object Storage connection wizard. Here you can start by giving your object storage a Name and Description

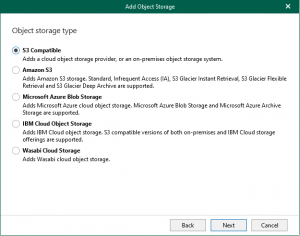
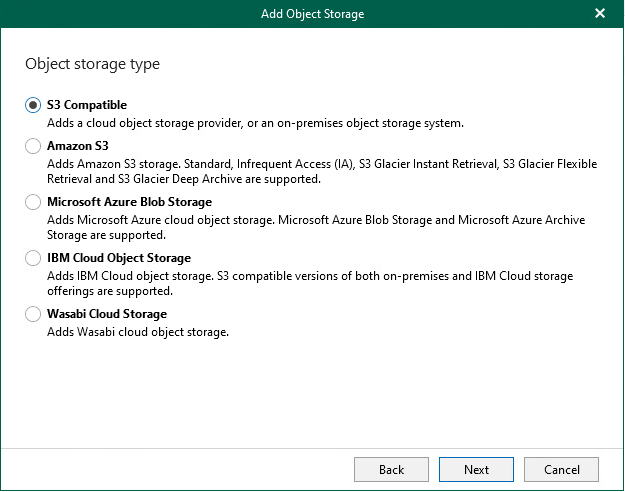
    4. Select the correct object storage solution to meet your requirements. If you are using something like MinIO, Ceph or another S3 Compatible object storage, select S3 Compatible, otherwise select the matching cloud target.

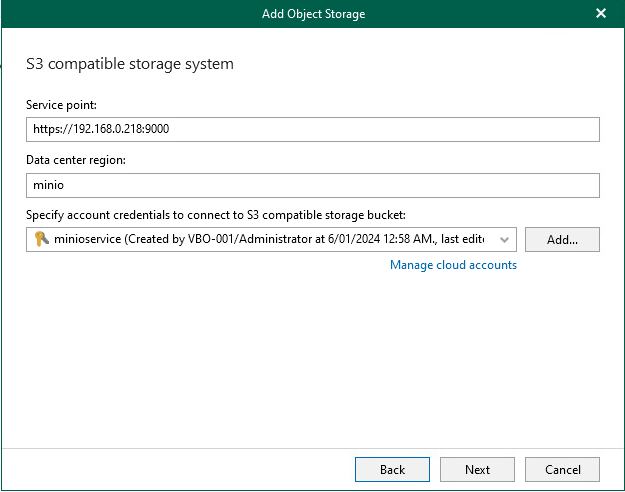
    5. In the next screen, you will need to enter your service point, Data Center Region and specify your Account Credentials for your target repository. These will be saved into the Veeam DB. The service point will be that of your backup copy target.

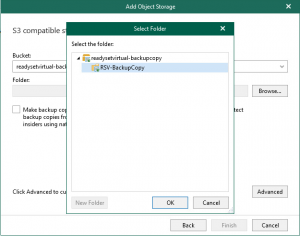
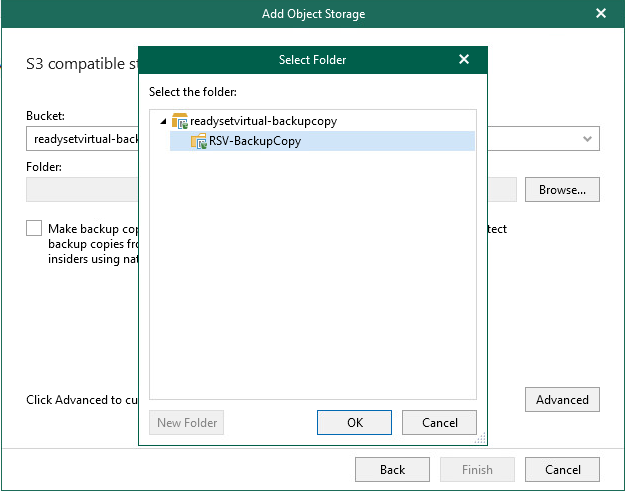
    6. Ensure that you have already prepped your repository with a bucket to connect to. Depending on the number of buckets that you have, the drop down menu will display all available buckets – Select the correct bucket for your target. Once you have selected your bucket, click Browse  and select the bucket name – Click New Folder and name your Backup Copy target folder.

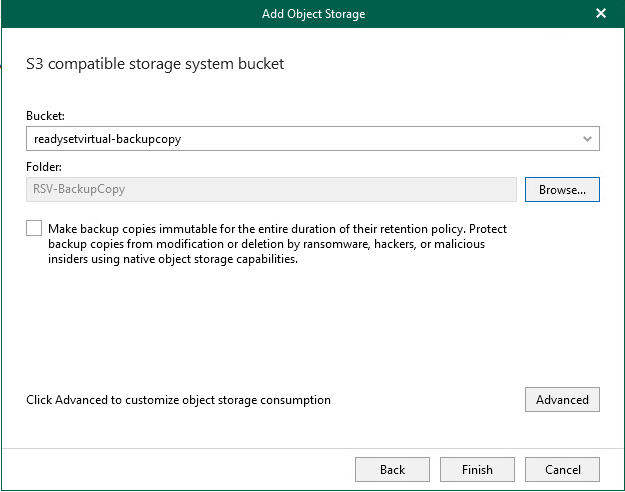
    7. Another great feature brought into v7 is the ability to create Immutable Backup Copies. However, please consider and understand the use of this feature, whilst it is always recommended to have immutable backups, in Veeam Backup for Microsoft 365, the retention period you select for the job is also the retention period of the immutable backup. In other words, If you select to retain 2 years worth of backups before they age out and have applied immutable backups, if the customer leaves and you are required to delete the customers data off your system, you will need to wait until the last backup has aged out over 2 years before it can be removed.
      https://helpcenter.veeam.com/docs/vbo365/guide/immutability.html?ver=70

      Click Finish to create your object storage

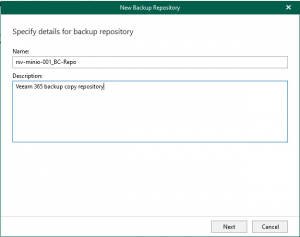
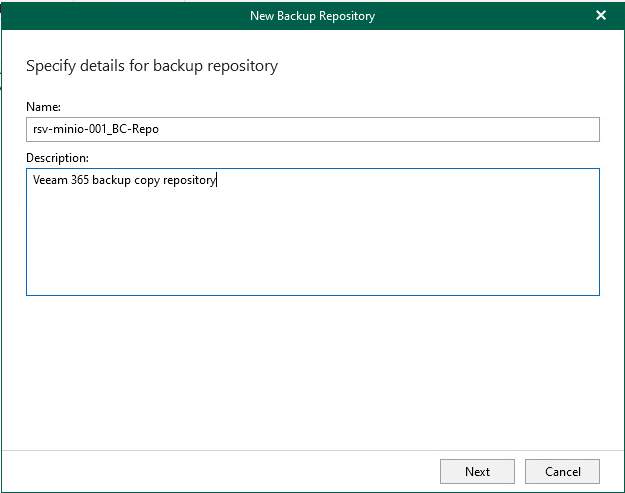
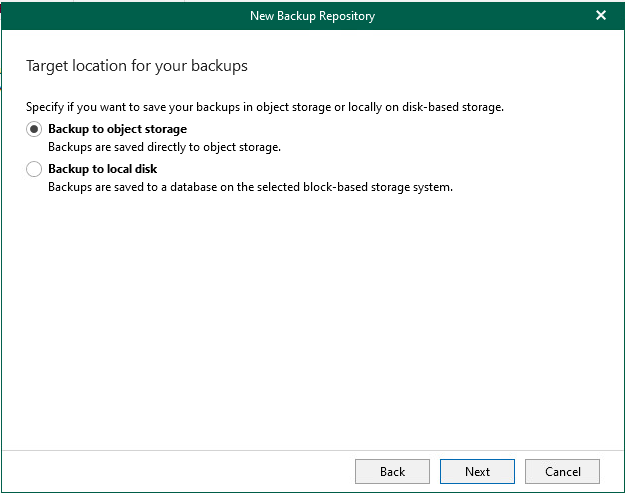
    8. You will need to create and Object Repository that attached the Object Storage to a Proxy and a caching folder for the database. Select Backup Repository > Add Repository (You can also right click to select Add backup repository). Once again a wizard will open up and you can give the repository a Name and Description


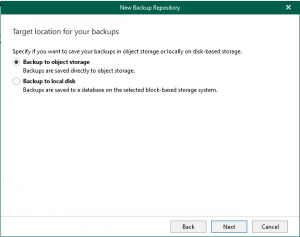
    9. Select Backup to object storage – this will select the next few windows applicable to object storage. If you select the second option, this will allow you to create a JetDB repository – which unfortunately won’t work with what we’re trying to achieve here.

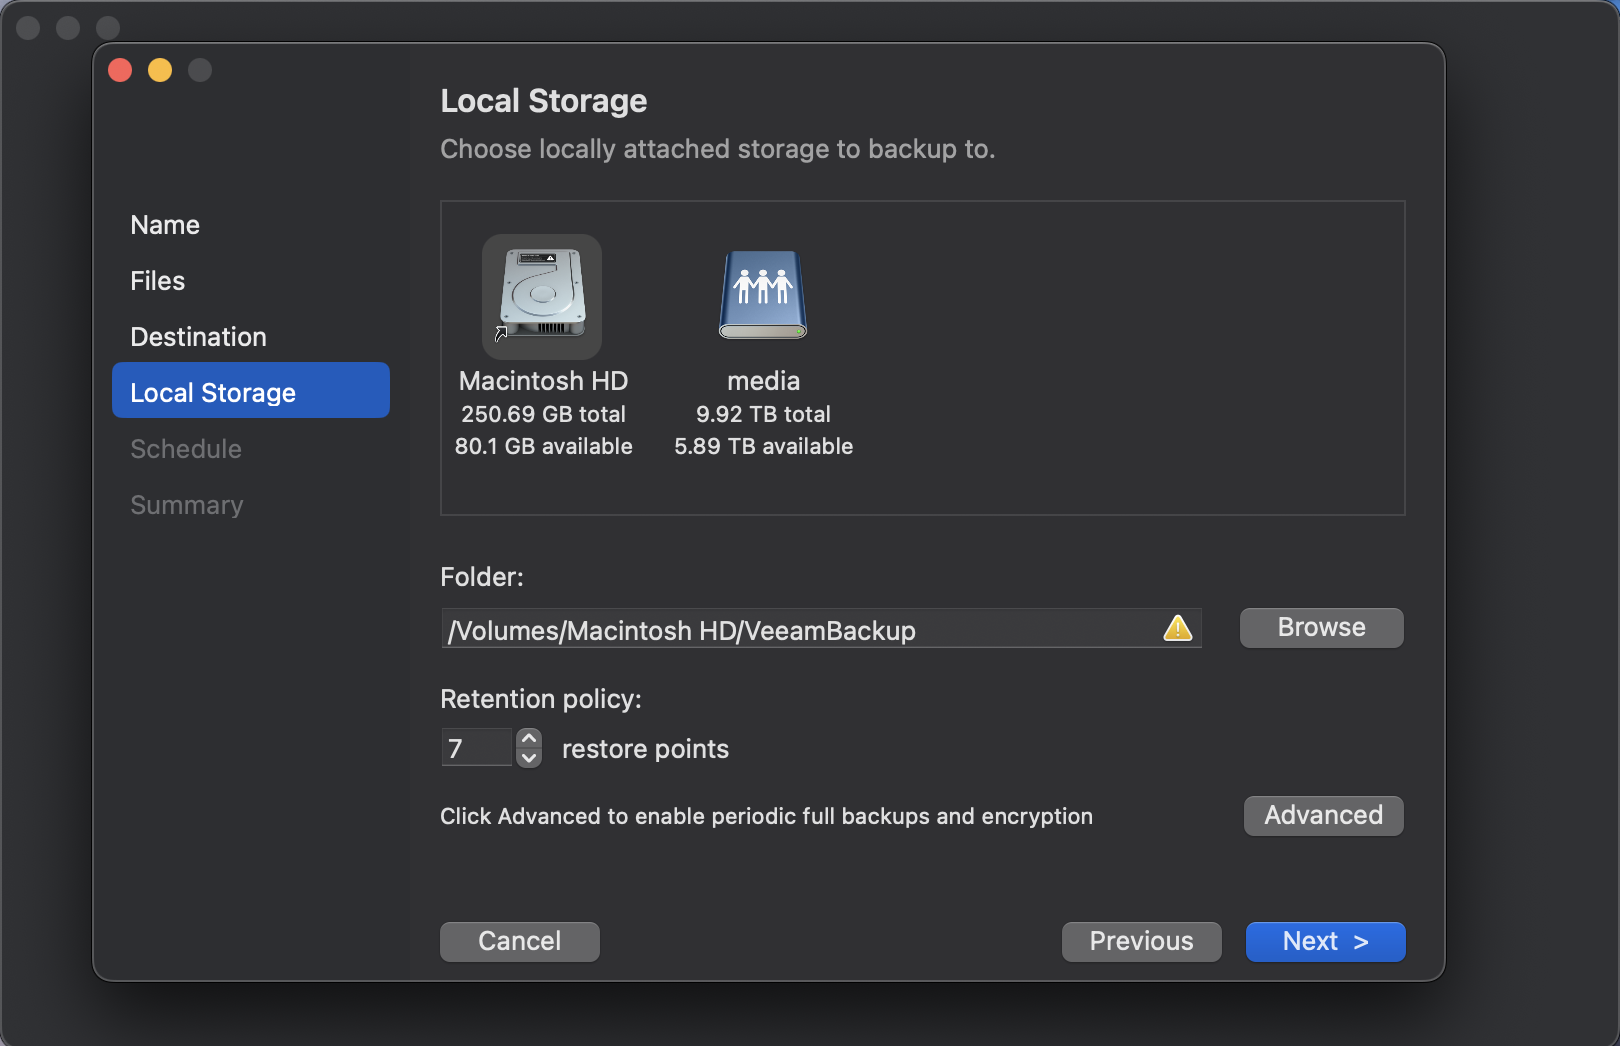
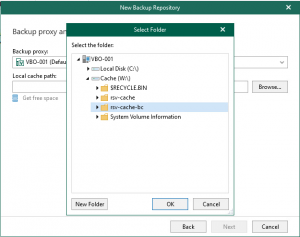
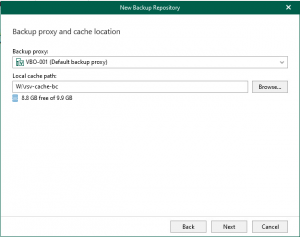
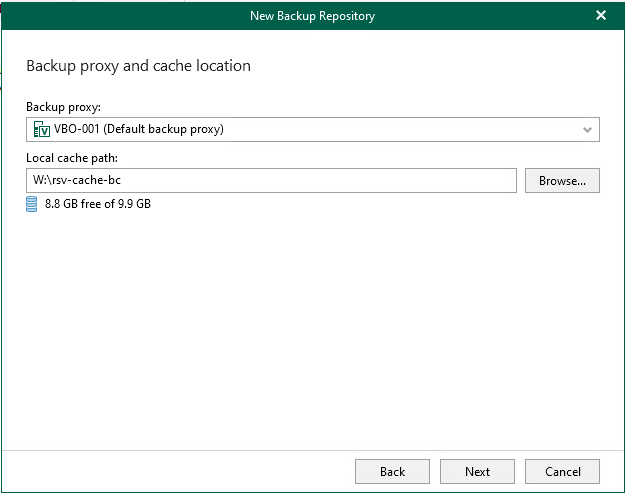
    10. Depending on your infrastructure design, you may have multiple proxy servers, and they may be in different locations. Select the right proxy server that connects to your object storage target. Here you can then create the local cache path that will reside on your proxy server. You should have a drive preconfigured to contain your cache files. Select Browse and then select the drive and path then New Folder to create the target cache folder,

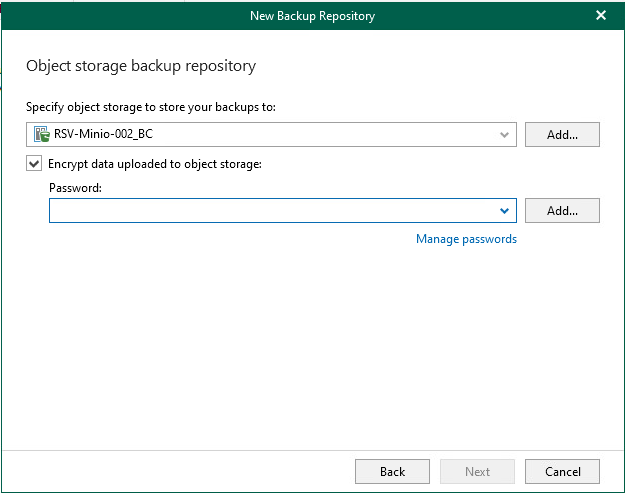
    11. Select the target object storage. If the object storage is already in use by another repository, it will not show up in the list.

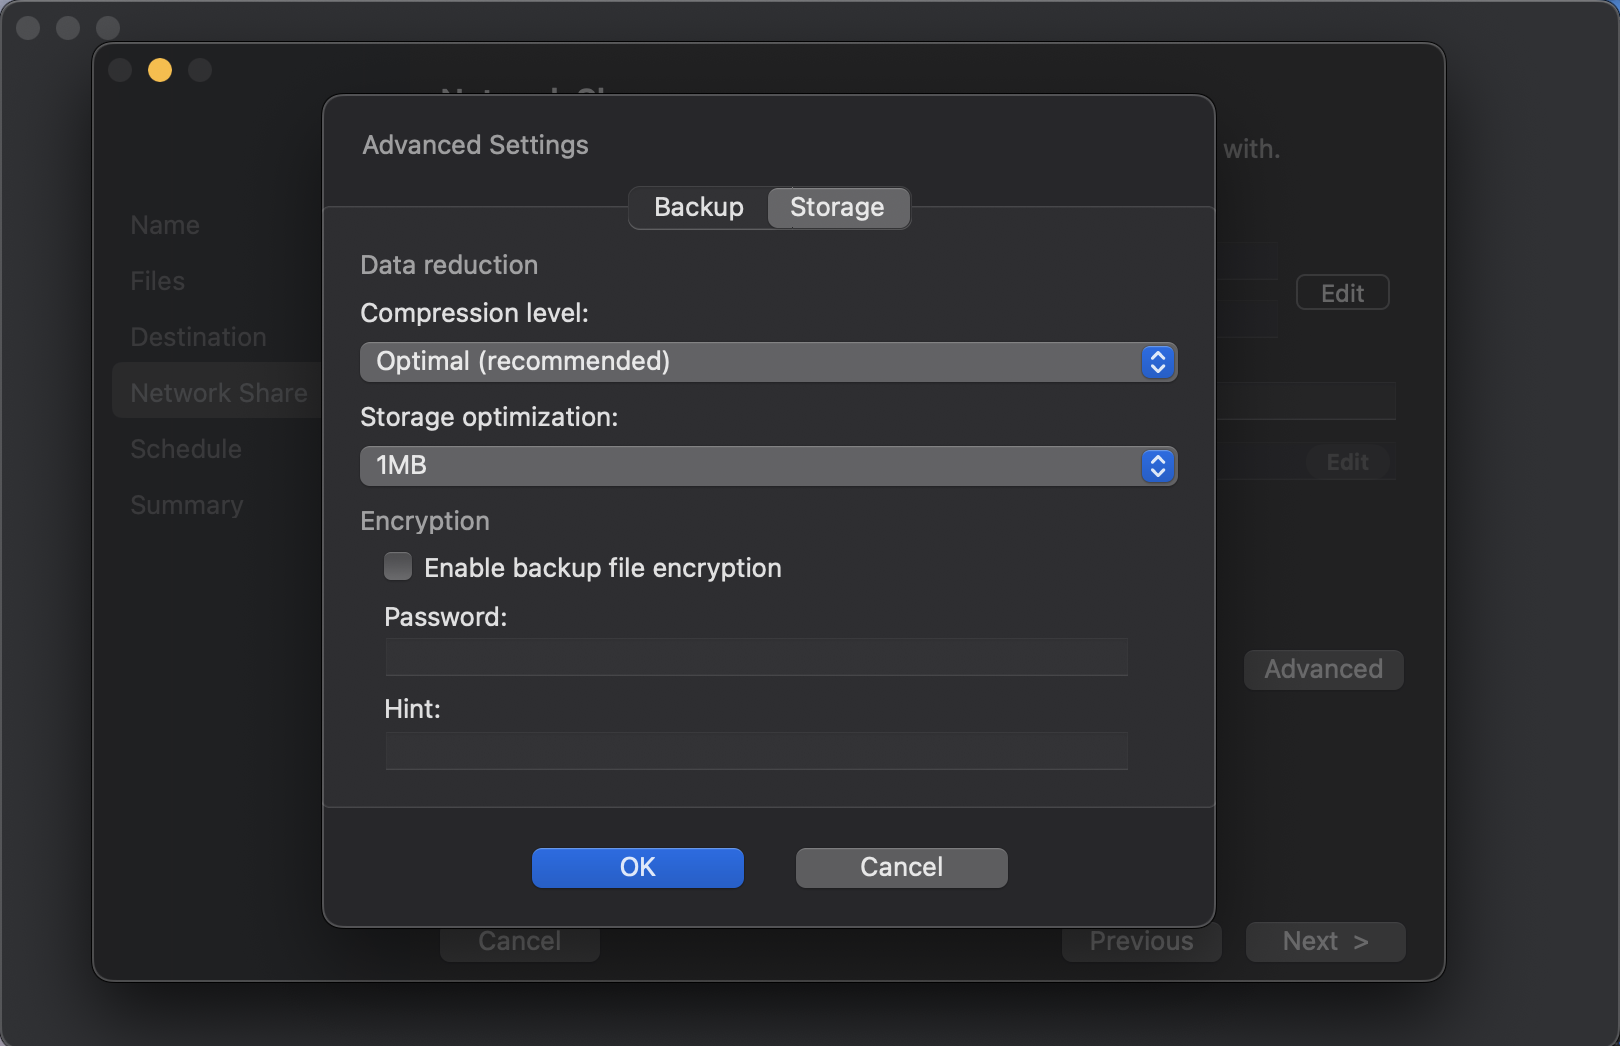
      You can configure an encryption password to ensure that the data is encrypted at the target. This is different from immutability, encryption will prevent someone from reading the data without the encryption password, but will not prevent them from deleting the data.


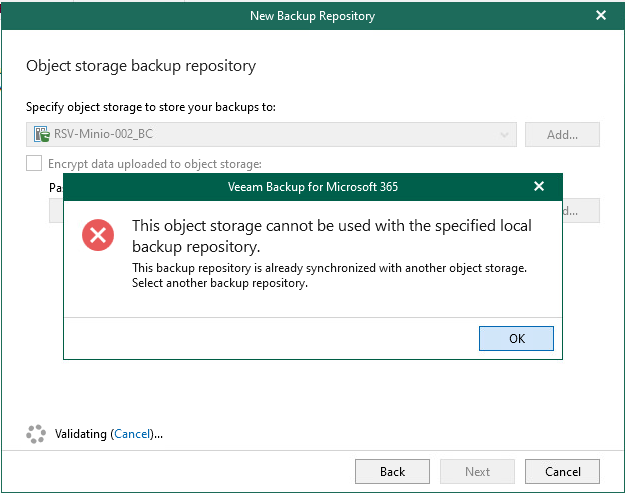
      During the validation process, if the selected cache folder already contains an existing database in it, you will receive an error message advising of this. You will either need to clear the folder or create a new folder.

    12. Select your retention policy and the type of backup you want to take, whether it be as an image or at the item level, make sure you read carefully the different options available.
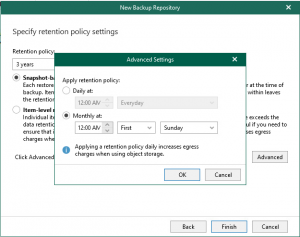
      By selecting Advanced you have the ability to choose when you want the retention policy applied – make sure you understand how this works, otherwise you may end up paying additional egress charges.
      https://helpcenter.veeam.com/docs/vbo365/guide/new_repository_4.html?ver=70 

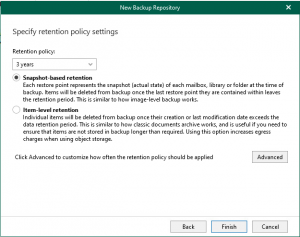
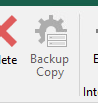
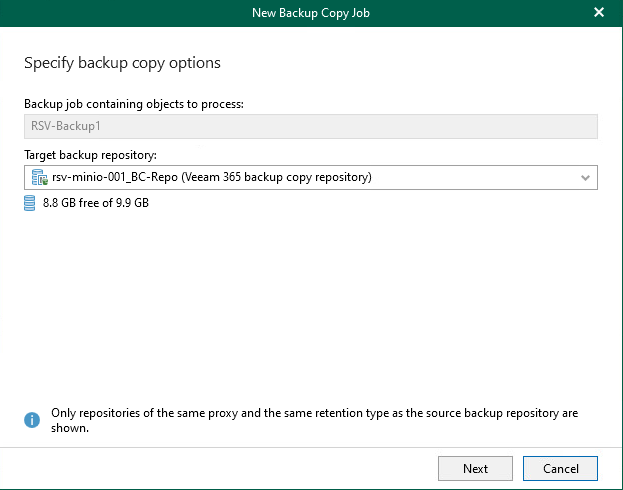
    13. Lastly, once the targets have been configure, it is now just a case of creating the backup copy job. Head back over to Organizations > Select your existing primary backup job and click Backup Copy  – this will open a new wizard that looks similar to the primary backup job creation wizard.

    14. Here you will be able to select your Target Backup Repository – take note that this is the Backup repository and not the Object Storage directly.

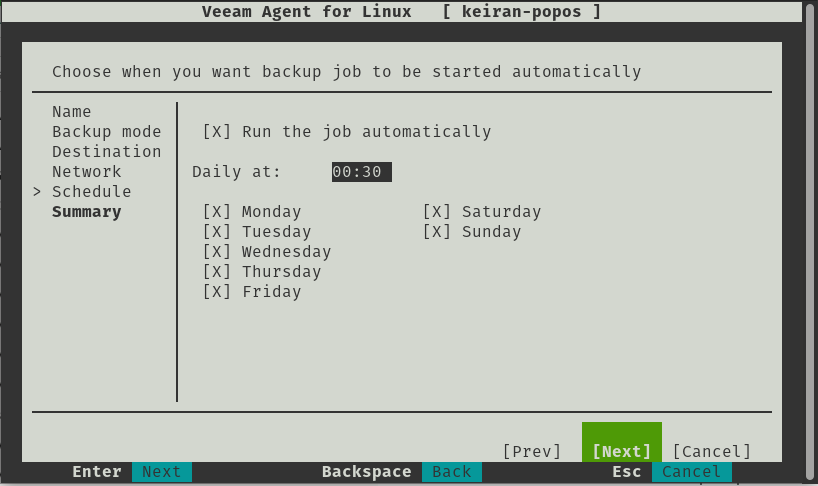
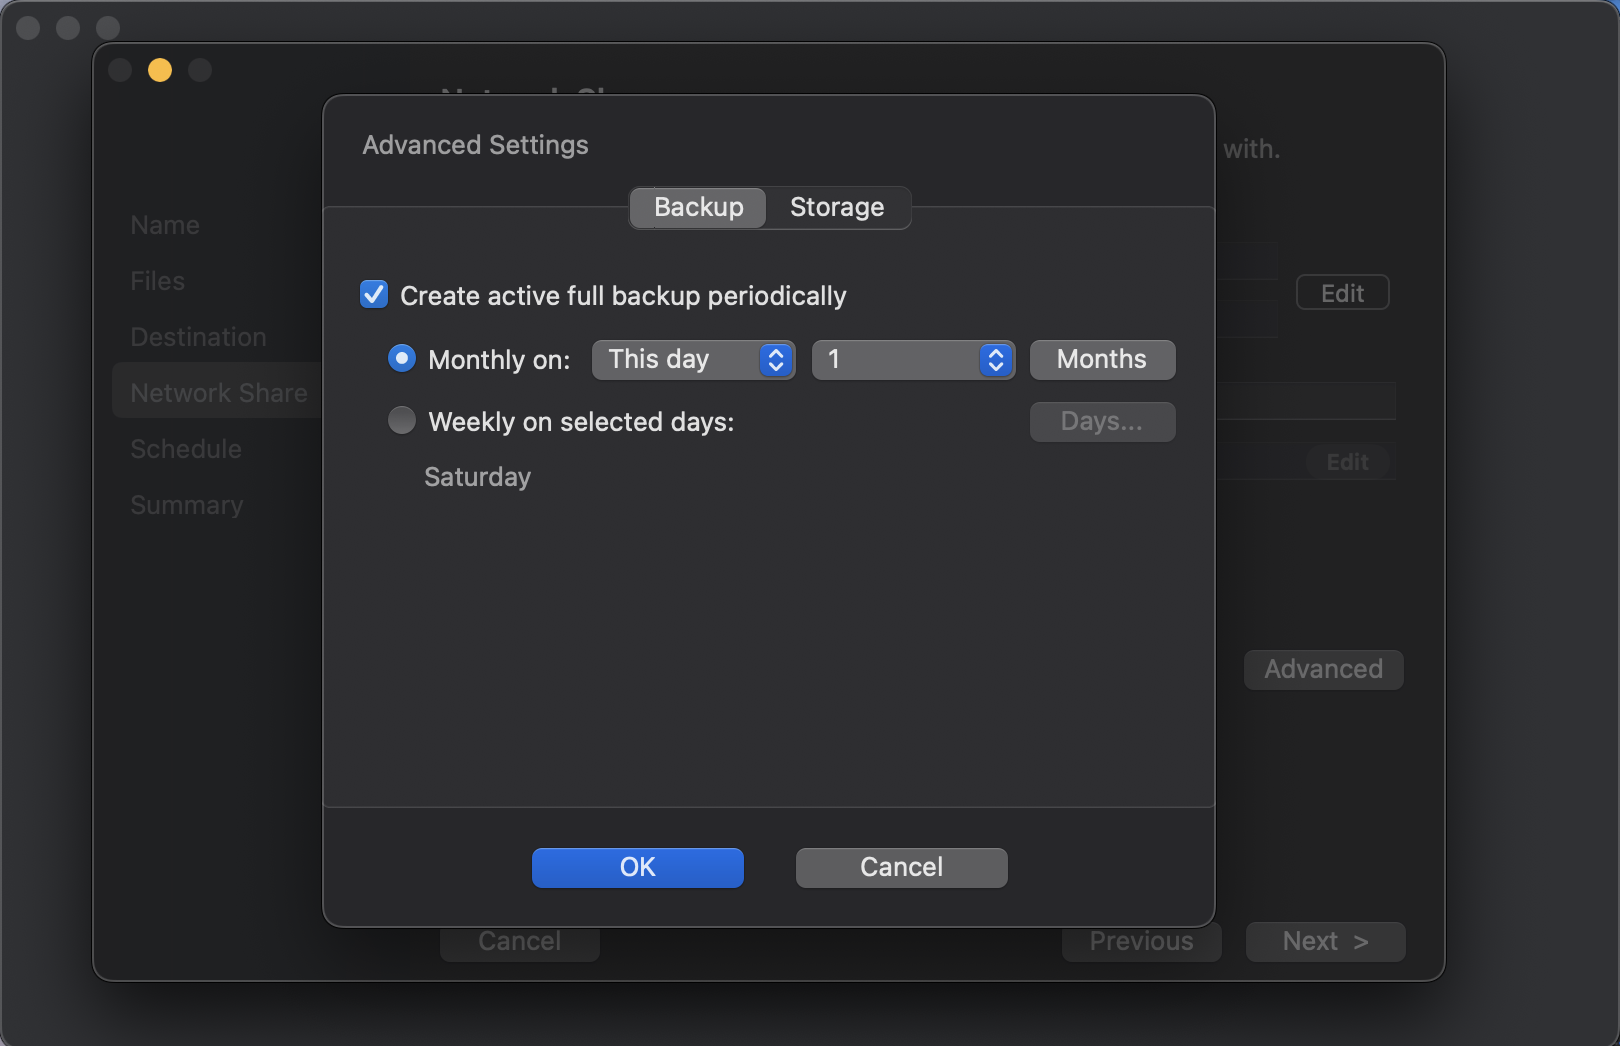
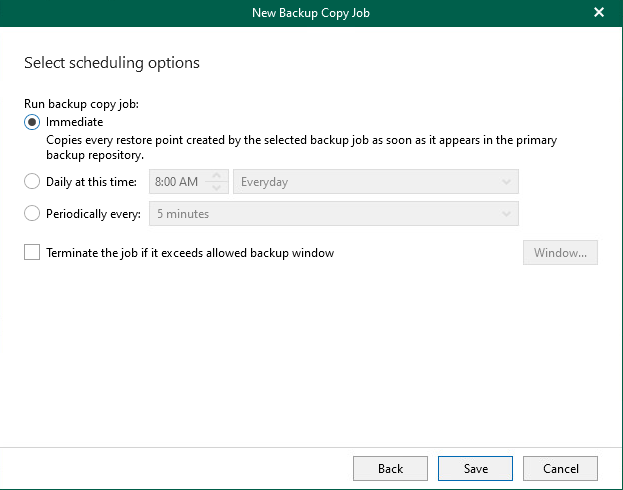
    15. You can choose when you want to run the backup copy job. You can select for it to occur immediately as the primary backup job runs, you can set a specific time of day or on a repeated schedule.
      There is also the option to run the backup job within a pre-defined window.

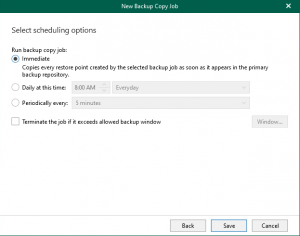
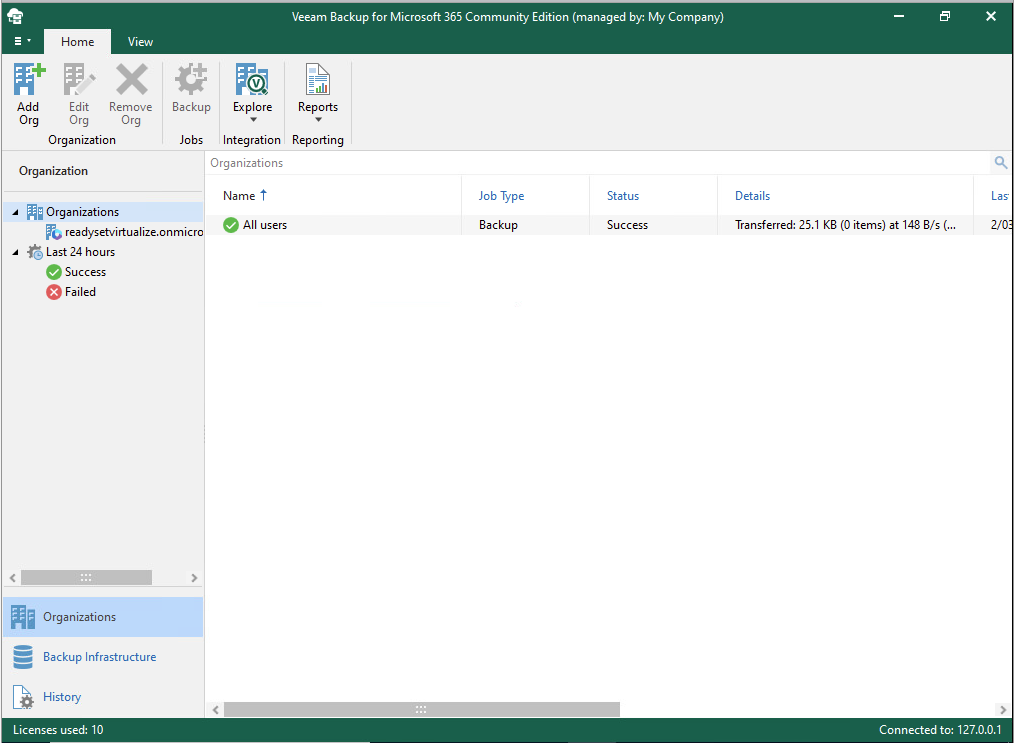
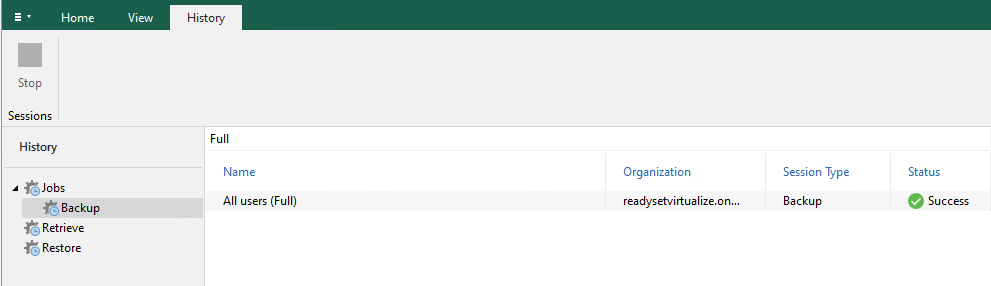
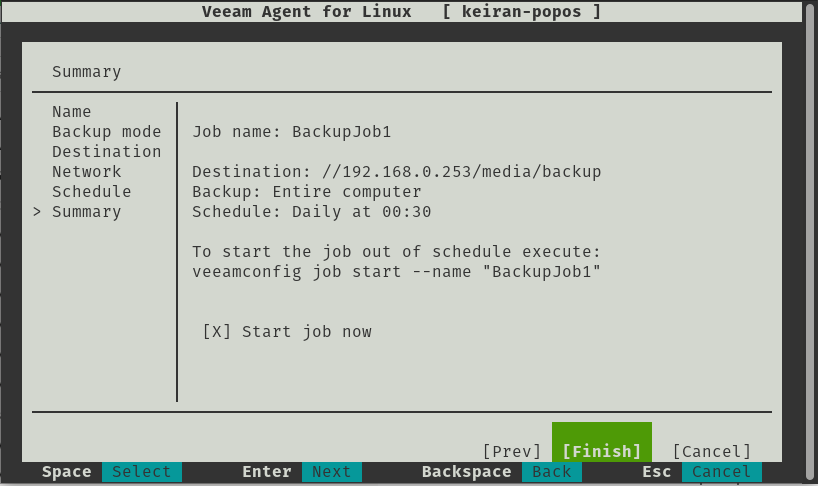
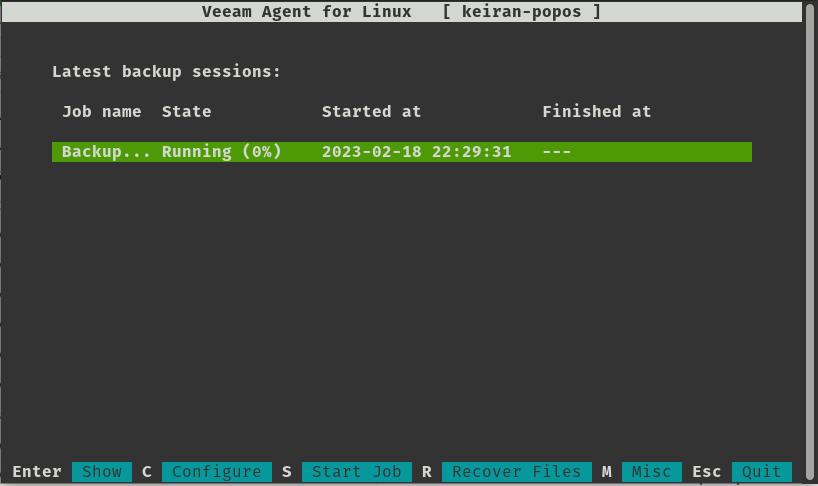
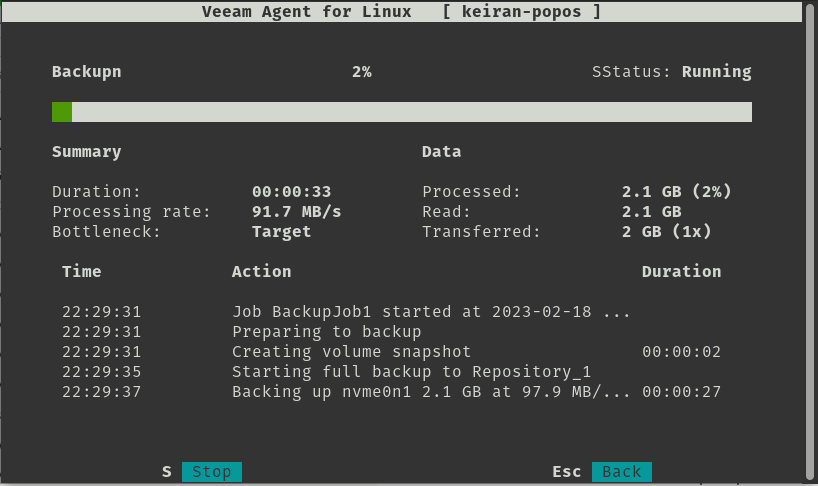
    16. Once the job has been configured, if you did not select the “Immediate” option to run the job, you can go ahead and run it for the first time. You will note that the job type is shown as Copy and the the start and last backup information is avialable.

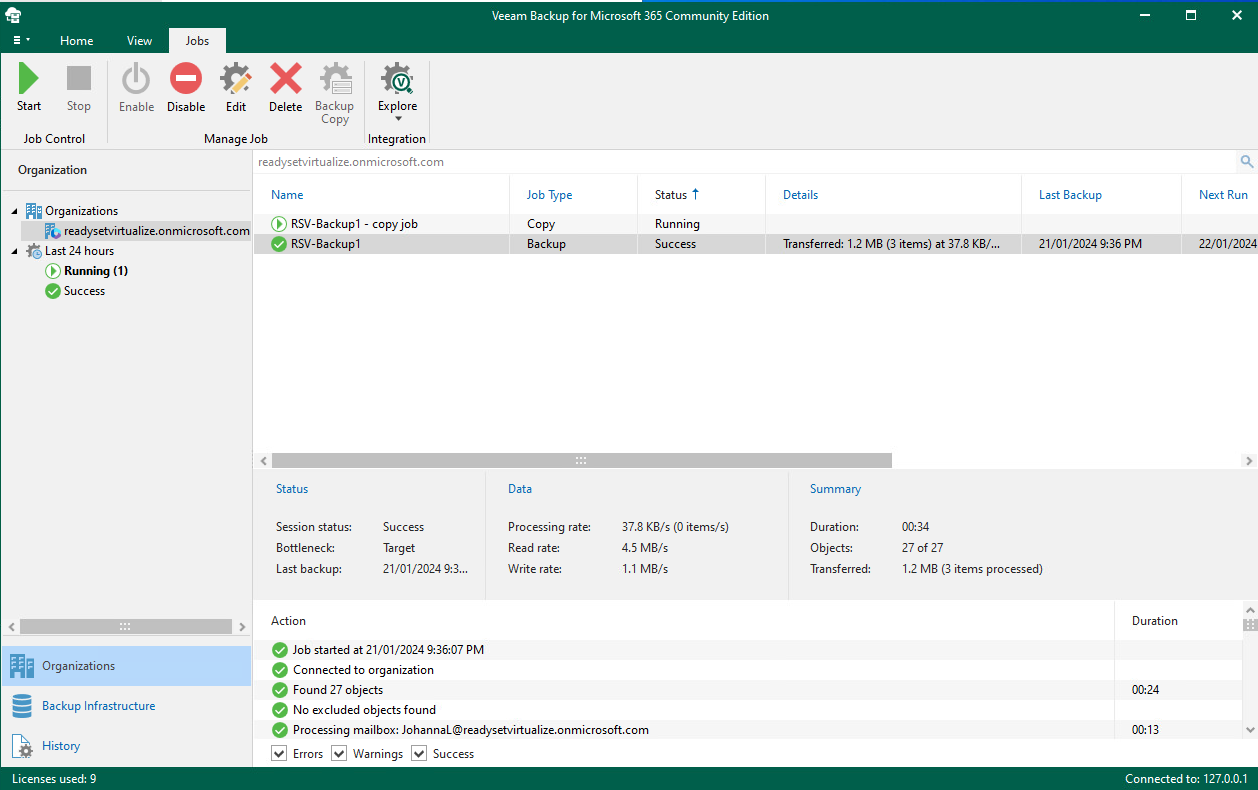
    You have now configured a backup copy of your primary Microsoft 365 backup.

    For more information, please check out Veeam’s KB articles related to backup copies. 

  • What’s New in Veeam Backup for M365

    What’s New in Veeam Backup for M365

    It’s another week and Veeam has yet again realeased a new version. This time it is Veeam Backup for Office 365 and it is backing up the truck and dumping a sizeable amount of new features. Release notes here

    Interface Changes

    In v6, Veeam introduced the Self-Service Restore portal allowing customers to be able to log in with their M365 account and restore from their backup. In v7, this has since had an update and a facelift allowing user a greater experience.

    While there have been some portal changes, the console has also had some minor changes made to it with colours and styling. Whilst only appear to be minor, if you spend enough time in the earlier versions, you will notice the difference.


    Immutability

    One of the newest features that has been around in the VBR world for the last few versions is Immutability. Having a backup is one thing, but is it truely a backup if it is able to be removed or minipulated? Veeam takes care of this by providing the addition of immutability, locking down your backups to ensure that they go untouched and continue provide a safe and secure copy.

    Backup Copies

    In keeping a safe and secure copy, Veeam have now impleted Backup Copies to help get closer to the 3-2-1 rule. (3 Copies – 2 Media types – 1 Offsite). Backup copies have been around for a very long time in the Backup and Replication product set allowing for multiple copies of the backup to be placed in another repository, whether that ben connected locally or via Cloud Connect.  Veeam Backup for M365 allows the backup to be created on the attached local/on-prem repository and then the backup copy to push to a secondary location such as Azure Archive tier.

    In order to create your backup copies, you need to create a location that will be able to accept the copy. If you are an Azure shop, for example, a new option in creating an Azure Blob Storage type has been added. Here you can select to use Azure Archive Storage for cost-efficient storage, which is a great place to send your backup copies to. If you do not have a repository configured similar to this, then backup copies will not be an available option.

    New Object Storage Locations

    It’s been no secret that Veeam have really been knuckling down to implement Object Storage across their product set, and slowly they have been adding it to each of their products. This year we saw Veeam Backup and Replication v12 introduce direct to Object Storage backups, whereas this has been in the M365 product set for some time as an offload target for the repository. Along with the interface changes, there is a new selection page when starting to create your repository. You will need to have created an Object Storage location under the Object Storage menu, but once that is available, you can select which repository type you would like to create as your primary target storage.

    With the full support of direct to Object Storage, Veeam has also added native support direct to Wasabi Cloud Storage allowing for cheap, reliable Object Storage. In the past, you would need to configure a connection to Wasabi via an S3 Compatible storage type.

    History Search

    It might seem a little strange, but for me, this has been one of my biggest gripes with the Veeam Backup for M365 console. The lack of being able to search easily in the console when looking for historical backup reports has now been resovled with the introduction of the search bar. Here you are able to drill down to key words to find a log file for a particular job instead of needing to scroll through the long list of logs.  This has been a very welcomed enhancement.

    Conclusion

    Overall, even though my list above doesn’t appear to be very extensive in the number of items, each one of these has a huge impact on productivity, efficiency and the ability to ensure your backups are both safe and secure and available for when you need them.

    If i had to choose, my two favourite additions are Backup Copies and Immutability. These are critical to ensure that your data is safe. Data protection is one of the highest priorities a business should have on their list for running a business, it ensures that when the inevitable happens, you can get your business backup and runnings as quickly and efficiently as possible, no matter what the disaster is.

  • Backing Up with the Veeam Agent for Linux

    Backing Up with the Veeam Agent for Linux

    When new products are released, we generally see other products in the line up being updated with new features and improvements. We saw quite a number of new features added to the Veeam Agent for Mac. During the Veeam v12 launch where the focus was on Veeam’s new Data Platform, Veeam Warranty and Veeam Backup and Replication v12, there was also some other products that received updates and new release numbers and in among those was the Veeam Agent for Linux v6.

    Over the years, Linux has grown in popularity in the desktop world and new distros continue to pop up, but in the enterprise space, Linux continues to dominate, whether it be as a virtual machine or a bare metal appliance. Regardless of what the distro is used for and it’s underlying hardware\hypervisor, it still needs to be backed up. Your data is important. So, with that said, let’s dive in.

    Installation

    So this is something very easy, especially if you have any Linux skills. You will first want to make sure you check the release notes to ensure that you have the a supported distro (or flavour) of Linux. All the main distros are there; Ubuntu, Debian, RHEL, SLES, and many more. You will also want to make sure that all you have all the required dependencies. If you are are planning to backup to a Veeam Backup and Replication or Cloud Connect Repository, you must target VBR 12 or higher. Head on over to the downloads page over at Veeam, here you can grab the latest and appropriate version for your distro. Again, make sure you have all the required dependencies and have read the release notes so you can familiarise yourself pre-install.

    In the below, I will be installing on Pop-OS, a distro based on Ubuntu/Debian with a desktop environment, so I will be installing the .deb package and using the Apt package manager.

    Once the package has been downloaded to your preferred location, open up terminal (If you didn’t use wget or another terminal based download method) and set your new core directory to that folder. Once in the path, you can run the dpkg install line and then update your apt repository. Once the repository has updated you can go ahead and install Veeam.

    # cd path/to/folder

    # dpkg -i ./veeam-release*

    # apt-get update

    # apt-get install veeam


    As soon as the install has completed successfully, you can go ahead and launch Veeam. This will bring you to a ELUA splashscreen that you will need to read and accept to continue. You will then be able to move on and configure your first backup job.

    $ veeam


    Backup

    Using the keystrokes, you can navigte around the menu. c will take you to configuring your first backup job.

    Configuring a job is very straight forward and easy to navigate, you have a plethora of options for destination, retention and how you want your files backed up.

    As mentioned, you ahve a number of options in how you would like to back up your files. You can select from either backing up the entire machine, volume level backup, file level backup and the additional option to disable snapshots giving you a crash-consistent file-level backup without the use of snapshots.

    • Backup Entire Machine
      • With this option, you will be able to take a complete in-place backup of your system, allowing you to either restore specific files, or restore the entire system back to the last backup. This includes all partitions. If you run something like df – h  Here you can see the list of all the partitions that are mounted.
    • Volume Level Backup
      • In this option, you can select the volumes that you would like you backup to take a copy of, for example, if you only want a copy of your data drive or partition without the system root or swap partition, you can select just the data drive.
    • File Level Backup
      • Here you can select specfic folders and file in which you want backed up. This is a great option if all you want is to back up your desktop and document folders.

    Only one option is able to be selected.

    The destination is a very important selection, if you select a local storage device that is built into your computer, than you may have trouble if there is physical damage to the machine. If you were to select a local drive attached, you will need to ensure that the drive needs to be removed safely, and stored in a safe place.  Shared folders allow you you to be able to backup to an SMB or NFS share, this allows you to select a destination that might be in another room in the house, or allows your backup to take place over wireless so you can be sitting in any room of the house working away while the backup takes place. Backing up to a Veeam Backup and Replication repository is similar to a shared folder, however you have more control over the backup and it is easier to mount from within the console in the event you need to restore – The Linux agent version 6 is only able to connect to VBR v12 or higher.

    It worth noting that the above options are avilable in the free version, however there are also 2 other options available with a valid license. Object-Storage is becoming increasingly popular and there are many vendors that offer both an on-premises installation and a cloud hosted option. With a license you will be able to backup to an object storage repository, or utilise Veeam Cloud Connect and backup to a service provider – both for off-site copies.

    If you attempt to run the SMB share, you may run into an issue where an error message advises that the “Current System does not support SMB” – This is an easy fix and you just need to install the cifs-utils package and once installed, you will be able to continue on with the setup.

    # apt-get install cifs-utils

    When designing your Backup and DR plan, it is crucial to plan for how long you need to retain your restore points for. The type of restore points is also as important, whether you want all incrementals or a full created once a week, but planning from the beginning can save pain later on. With the Linux Agent, you have the option to enable Active Full and set a schedule for how often you would like the process to run. Veeam also offers some other advanced features when configuring your backup job. Encryption is certainly important, especially for sensitive data, and Veeam’s gives the option in the free version to add an encryption password, but make sure you save that password somewhere secure otherwise your backup will be scrambled and unreadable.  You can also run scripts after the restoration.

    Simply, the last two options allow you to set your schedule, what time and what day would you like your backup to run. Once you’re happy with that you can review your backup configuration and continue – if you desire, you can start the job immediately.


    Restore

    This is where I felt the product really shined, as much as having an easy backup with a lot of options to make it as efficient as possible, if you can’t access and restore your data then why are you even bothering with a backup?

    Once the first backup has been successful, select R for Recover Files takes you to another screen that displays your backup jobs and their restore points. Once you select a restore point, your system will mount that point to /mnt/backup and from here you can fully browse your backed up files. If you are using a desktop environment, you can open this up in your file manager, and if you are using all cli then you can navigate to the mount point and copy the files as required.

    It really is that simple.

    Conclusion

    Another great product, not only because it does exactly what it is meant to, plus more, but it is also free with a limited set of options. Veeam have really put a huge effort into making a great backup tool so easy to use on Linux. Yes, there are a number of dependencies that are required, but that is just Linux, and majority of them are already installed. Hats off to Veeam for sticking to making another easy to use tool, and also for making it freely available.

  • Introducing Veeam Mac Agent v2.0

    Introducing Veeam Mac Agent v2.0

    Over the years we have seen Veeam release some great products, and with each release they continue to build in more and more features and there is no exception when it comes to the the updated release of the Veeam Agent for Mac v2.

    Like the Windows agent, the latest Mac agent is available as a standalone install. The previous version was completely managed from Veeam Backup and Replication where you had to cut a config and package the install. With v2, you can install straight from the pkg file allowing you to have more control and freedom.

    Like the Windows and Linux agents, Veeam is providing the Mac agent with a limited free license which allows up to 1 job created and limited backup locations. However, it still has a ton of functionality and gives you access to backing up either individual files, directories or the entire computer.

    So let’s dive in and take a look at what is available under the free license.

    Straight off the bat, there is a really nice UI to work with, the layout is easy to work with and everything is very much self explainatory. There are heaps of features that are wrap into this tight little bundle and are easily accessible. The locations in the UI make sense are all in logical locations.  I did, however struggle to find how to delete the job as my instict from using other Veeam products was to Right click > Delete . This was simple enough in the end as it was just in the top menu, which I guess just makes it safer.

    Backup

    As mentioned above, there is a number of new repositories that are available for backing up your workstation to. Previously you were limited to only backing up to a Veeam Backup and Replication repository, but the Mac agent has now been extended to locally connected repositories and SMB shares.

    Some people like to only backup certain files and others prefer to backup their entire directories and Veeam knows this well which is why they give you the ability to choose your precious files or your entire root/sub directories.  You can even enable backing up locally attached USB drives in case you have an external drive that holds other working files.


    The Mac agent is still quite packed full of features and functions to ensure you get the most out of your backups. You have access to advanced features, such as; Active Full backup schedules, Compression, Storage Optimizations and Encryption.


    Restore

    What’s the point of a backup if you’re never able to restore from it when you need to? While dealing with enterprises, we always say to have a test plan in place, but I feel fairly certain that a lot of folks wouldn’t have one in place for their home network. we should also remember to treat our backups as a copy of our data and not as the only copy.

    The Veeam Mac Agent makes restoring a very easy task. Click on the restore tab, select your restore point and then browse your backup. Simples.

    Just like restoring in Backup and Replication, you can choose to either OVERWRITE or KEEP your existing copy of the document (Keep is usually ideal so you can check your restored copy first).  KEEP will place a second copy in the same directory and rename to <filename_RESTORED_date&time> so that you will know exactly which copy it is. There is also COPY TO which will allow you to restore to another location – This is great if you want to place the restored file on an external hard drive or in another folder.


    If you choose the “Restore Users Data” option, then you will receive a big pop-up to advise you that you will overwrite your User Profile. So, you have been warned!


    Veeam have also done a fantastic job with their job logs and have a very detailed, but human consumable log output directly in the interface.

    Consclusion

    Yet again, Veeam have hit it out of the park with their products and to be able to provide a a free product that is packed full of features is very generous of them.  I think the Mac Agent has come a long way from v1 and is worth trying out. It certainly is a replacement for TimeMachine and much easier to understand and configure. I would like to see a few more menu items in the right click menu, but these are available in the Apple top bar, so no real issues there.

    Make sure you check out the new Veeam Mac Agent once it is GA and be sure to check

  • Rubrik Backup Service Windows Host Install Walkthrough

    Rubrik Backup Service Windows Host Install Walkthrough

    To be able to get the most flexibility out of your data management and backups, sometimes you need more to be able to interrogate your OS to be able to backup the applications that are running inside. Some backup providers use VMware Tools\Hyper-V Integration Tools to be able to perform application consistent backups, such as; MS SQL and MS Exchange. Whilst this may seem like a great idea to minimise the number of services running, this also means that the backup vendor loses some control over what their product can leverage and limiting them to the virtualisation eco-system.

    Rubrik delivers control and flexibility with their Rubrik Backup Service (RBS) which is available for Windows, Linux, AIX and Solaris, but also allowing for the ability to backup virtual and also physical servers. The RBS allows for granular control over applications such as MS SQL where it can backup each database with different SLA domains, as well as backing up file systems.

    This post will walk through deploying the RBS to a MS Server 2019 Server manually, although, there are several methods available to automate the installation, this walkthrough will show you . To automate check out the Rubrik Inc. Github and Rubrik Build for sample scripts and API documentation. For Example: Install-RubrikBackupService with PowerShell

    Required Opened Ports: 
    tcp 12800
    tcp 12801

    First off, downloading the Rubrik Backup Service installer is easily achievable by 2 methods. You can obtain the installer from under the Windows Host section on your Rubrik CDM web UI or via the hyperlink https://<rubrik cluster Ip-hostname>/connector/RubrikBackupService.zip


    Once downloaded you will need to extract the contents. Ensure that you keep all files together in the same folder as they are all required for the install. Each installation package is specific to the cluster it was downloaded from and will only work with that cluster.

    The wizard is a simple “Next, Next..” process. Open the MSI file. When you select custom, you do have the ability ti change the installation location. Once completed, click Finish.

    Open up the computer Services manager and check that the “Rubrik Backup Service” is running.

    At this point, you will not see the host show under Windows hosts under the web UI, you will need to click on the “Add windows hosts” button – either in the main screen or in the top bar.


    When adding the hosts you can either do this by IP or hostname. Ensure that your DNS is configured correctly prior to trying to add via hostname – click Add. Adding the host will create a secure connection between the host and the cluster.


    If you run into an issue where the cluster is unable to connect to the host or display an error regarding retrieving the certificate, make sure you configure your firewall. As this lab is on a single subnet the cause for the error was the Windows Defender Firewall. Add the required allow access and retry added the Windows host to the cluster.


    The host will show a status of “Connected.” You will need to install the Volume Filter Driver (VFD) to enable the cluster to track changes to the blocks as well as assist with the performance of the incremental backups. Select the host you want to install the VFD on and click the 3 dots in the top right corner -> Select Install VFD -> Wait until the Volume Filter Driver Status changes to “Host Restart Required” and reboot the host. (Refresh the UI if you don’t see it update after some time.)


    After reboot, you should now see the status change to “VFD Installed”

    The Windows host is now looking ready to go and the last two items are to set up the protection by adding the SLA domain and content to be protected

    .
    Select the host and click the “Manage Protection” button. Here you can choose to backup set you want to protect, whether it is the volumes or filesets.

    When adding a fileset, you can set rules around whether to include or exclude certain folders and file types.


    Once you have set your backup set, you can then assign the SLA domain that meets your requirements for your backup SLA. For more about SLA Domains see SLA Domains Global Scale


    It is a very simple process which, as mentioned above, this can be automated through the use of scripts and APIs, however this was just a walkthrough of the process. Ensure to check out the Rubrik Build site. There are also other scripts available on the Rubrik Build GitHub repo along with various SDKs for use with Rubrik CDM.