Year: 2025

  • Getting network on Linux servers operational after migrating hypervisors

    Getting network on Linux servers operational after migrating hypervisors

    Recently I made the move to migrate all my VMs from running on VMware ESXi to running on Hyper-V. This was the first time that I have shifted to another platform away from ESXi as my main hypervisor platform.

    As it was a single server, I made a backup of all my VMs with Veeam, taking also a copy of my config file and built a new Veeam Backup and Replication server on Hyper-V with importing the config file, allowing to restore all VMs across to Hyper-V.

    Whilst all VMs booted up, the one issue I did run into was the ethernet adapter had changed from a VMXnet3 to a Hyper-V Virtual Network Adapter.

    For Windows VMs, this was no issue and they all connected as if nothing had changed.

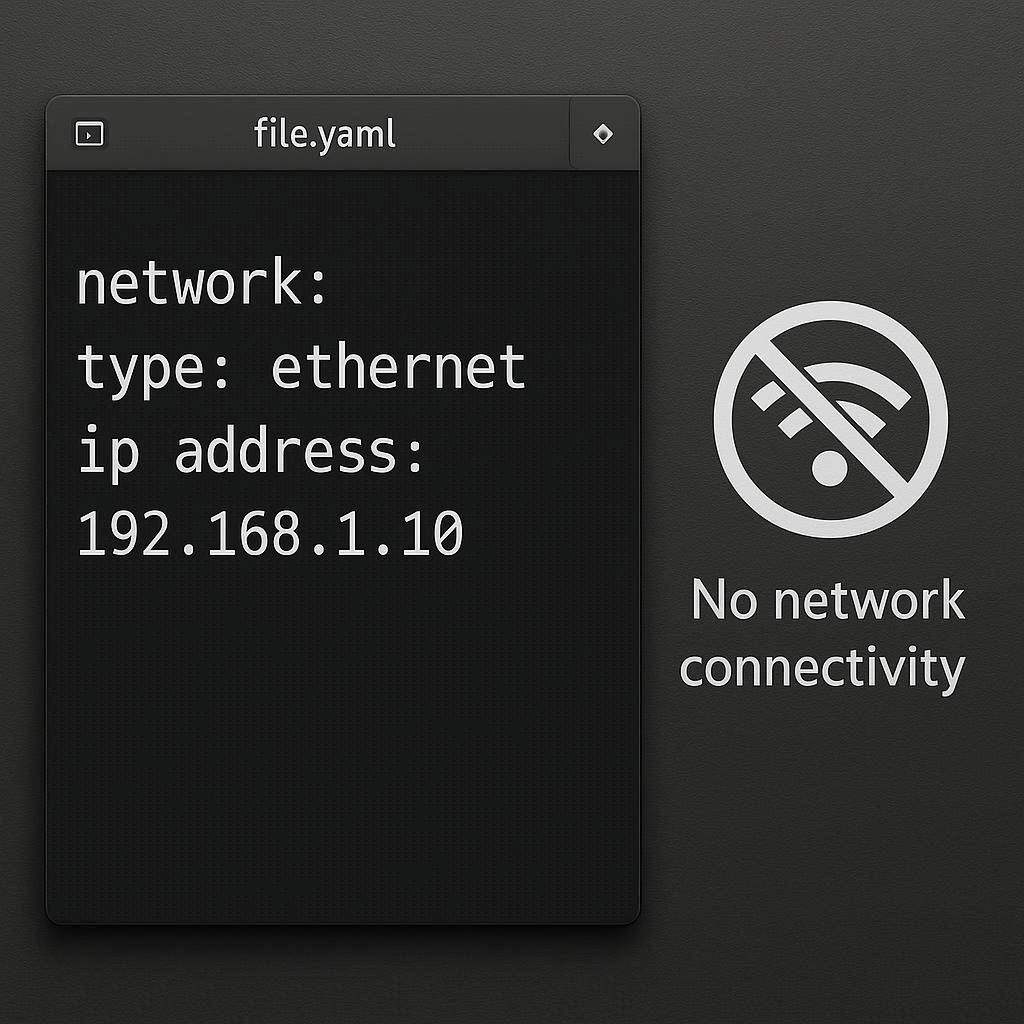
    For Linux servers (Ubuntu in my case), the adapter name did change and the the Netplan .yaml file did not update. Thus, there was no connectivity to the outside world.

    While the adapter in Hyper-V manager looked to have a connection, it was unable to display the IP Address as it was not associated with it. (This would be relevant to any hypervisor migration where the adapters aren’t exactly the same).

    There is a very simple fix, as I mentioned above,  the. netplan yaml file does not automatically update to reflect a new adapter name as there is no detection that runs like it does when installing the OS.

    To find your new adapter, you can run: ip link show – You will be able to match the mac address on the adapter to the results in the ip link output.

    Once you have your new adapters name, you can then update the .yaml file. Using the below commands, you will first search and confirm the name of the .yaml file and then edit with your preferred editor (in my case I will use vi). You can use tab completion to fill in the file name when you have the netplan folder specified

    ls /etc/netplan/
    sudo vi /etc/netplan/00-installer-config.yaml

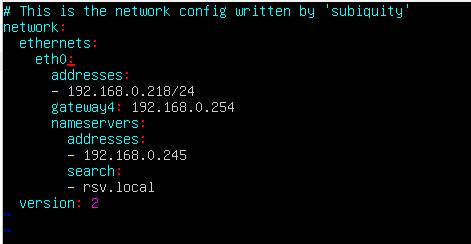
    Inside the .yaml file, you will need to find the line underneath “ethernets” – this will be your old adapter name and using the correct key combination, enter the insert (i key) function.
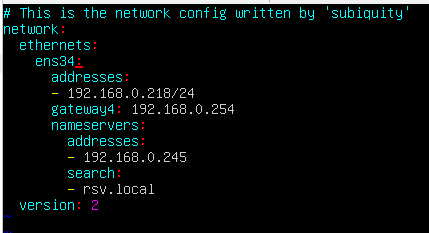
    Using my screenshots, update the “ens34” to “eth0”

    Press esc to escape the insert mode, then use :wq to write and quit vi.
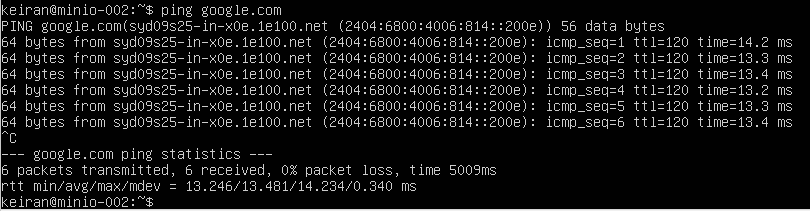
    Lastly, make sure to apply the netplan configuration. This is easily achieved by sudo netplan apply – Once applied, run through a ping test and make sure your network is functioning correctly.
    My understanding, and experience so far, is that with Hyper-V the adapter name is going to be the same followed by ascending numbers (eth0, eth1, eth2, etc.) – However, it is always best to confirm first.

    Hopefully that will save you some time when migrating between various hypervisors where the adapter changes.

  • Veeam 365 – Missing Application Permissions

    Veeam 365 – Missing Application Permissions

    With technology ever-changing, and businesses continuously facing security challenges, services such as Azure and AWS need to keep on adapting and improving their security posture to ensure that they continue to protect their customers and services. While this is certainly the correct thing to do, it does sometime create issues for the end users or other applications that are making use of those services.

    If you are a Veeam Backup for M365 customer or user, you may come across the below warning messages when running a backup job. This is because Microsoft have made some additional security changes with different graph API access permissions. This isn’t really all that bad, minus the bits that have been skipped during that backup window, but it is extremely easy to resolve.

    12/02/2025 9:07:25 PM :: Missing application permissions: Exchange.ManageAsApp. Missing application roles: Global Reader. Public folder and discovery search mailboxes will be skipped from processing, and a shared mailbox type will not be identified.

    12/02/2025 9:07:25 PM :: Missing application permissions: ChannelMember.Read.All. Private and shared team channels will be skipped from processing


    To resolve this, all you need to do is run through editing your organization once again, and allowing to. update the application registration.

    You do need to make sure you still have the certificate in the cert store for which you used to create the application or recently updated with

    1. Right click on the organization and select Edit Organization


    2. Click Next until you get to the “Microsoft 365 Connection Settings” – Here you can select Use an existing Azure AD Application


    3. Your Username and Application ID will appear in the boxes. Here you will need to then select Install and select your certificate that you used to connect to the application when you either created or last updated.

      Ensure to check the  Grant this application required permissions and register its certificate in Azure AD box. Click Next

    4.  You will then be request to copy the code and go to https://microsoft.com/devicelogin and log in with a GA account to authorize the change

    5. Once Authorized you will then see the progress of the update.

    6. Once all updated click Finish. You can then go ahead and start the job and wait for it to complete.

    7. Once the job has completed, confirm that all was successful and no further warnings.

    This should be resolve any issues Veeam Backup for Microsoft had for backing up using the Graph API.